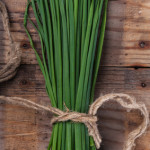
As gardens begin to grow, one of the first perennial herbs to appear are chives. Chives are quite resilient and are particularly easy to grow both in garden beds or in pots. They can stand a bit of shade, tolerate drought, and grow well in any type of garden soil. For first time gardeners, this is an excellent plant that will yield a reliable source of flavorful nutrition.
Chives belong to the lily family and are part of a large genus of over 500 species of perennials that contain bulbs or underground stems. Known for their strong scent and distinct flavor, chives, along with garlic, onions, scallions and leeks are known as allium herbs. Allium species have been cultivated around the world for centuries and are valued both medicinally ad for their fabulous flavor.
If you grow your own chives, you can continually cut them back so the crop will continue into early fall. If you let happen to let them go you will get lovely purple-pink globe shaped chive flowers that make a beautiful garnish as well as a bright addition to spring or summer salads.
Chives are best when used fresh. Rinse and dry them well, then snip with scissors or cut with a very sharp knife. Snipped chives can be placed in freezer bags and frozen for later use, but will not maintain the texture of fresh shoots.
This is an herb that will elevate so many dishes, including soups, stews, salads, sauces, marinades, dressings, and dips. Adding a few tablespoons of chopped chives to cottage cheese will add a pleasing punch to a super simple snack. Make an easy supper of baked potatoes or sweet potatoes topped with Greek yogurt and chives. Mixing chives into cream cheese, along with lemon zest, and a grinding of black pepper will make an excellent spread for sandwiches or crackers. Omelets prepared with chives, parsley, and dill are a nice choice for any meal.
Chives contain valuable vitamin and mineral content. Vitamins K, A, and C are found in chives, as well as calcium, an important mineral. Chives also contain small amounts of magnesium, phosphorus, potassium, and sodium. Purported to be anti-inflammatory, antibacterial and antiviral, eating more chives may boost your immune system and assist in maintaining superior levels of health.
If you buy your own chives at the grocery store, look for a bright green color with no sign of yellowing or wilting. Chives will keep in the crisper drawer of the refrigerator for several days. Before using, rinse and dry well and trim the ends before using.
Enjoy this light and bright spring herb.
“Work With What You Got!”
©Tiny New York Kitchen © 2020 All Rights Reserved


Yom Kippur Menu Ideas
Yom Kippur is the holiest day of the Jewish calendar. Jews refrain from all food and drink, including water. It is no coincidence that the solemn day of Yom Kippur occurs in the midst of the autumn bounty, just before the most exuberant of the harvest festivals, Sukkot, the Jewish Thanksgiving. In Temple times, Yom Kippur was the day that the priests purified the Temple and expiated the sins of all of the Israelites in anticipation of the Sukkot festivals. The fast cleanses not only the body, but the soul as well. It is not just an act of contrition, but an affirmation of sincerity. It focuses concentration on the spiritual. I have put together a Yom Kippur menu to break the fast.
Menu Ideas
Starters
Pomegranate-Orange Sunsets
Almond Challah Bread
Smoked Whitefish and Fennel Salad
Cream Cheese and Assorted Cheeses
Fresh Red Pepper Rings and Black Olives
Main Dishes
Smoked Fish: Sliced Smoked Salmon, Whole Whitefish, Baked Salmon, and Sable
Smoked Salmon With Hummus, Baba Ghanoush, Tabouli, Tzatziki, Feta, Grape Leaves, Olives, Pita Chips and Fresh Pita Bread
Poached Salmon Served With Dill-Mustard Sauce
Gefilte Fish Trio Served With Horseradish and Carrots
Herring In a Wine Sauce
Tuna and Egg Salad
Domestic Sliced Cheese: Cheddar, Havarti, Muenster and Swiss
Sides
Classic Salads
Orzo, Spinach and Feta Salad
Cous Cous and Vegetable Pilaf
Penne With Tomatoes and Corn
Salad of Sliced Baked Beets, Boston Lettuce, and Fresh Chopped Dill With Walnut Vinaigrette
Homemade Applesauce
Potato Blintzes
Cheese Blintzes
Hummus, Tabouli and Baba Ghanoush
Desserts
Plain Cheesecake
Cheesecake Topped With Strawberries, Blueberries, Mango and Kiwi
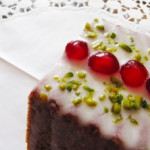
Traditional Honey Cake
Cranberry Honey Cake
Applesauce Honey Cake
Chocolate Babka
Cinnamon Babka
Mini Pastries and Tartlets
Tiramisu
Rainbow Cookies
Rugelach
Black and White Cookies
Whoopie Pies
Pecan Shortbread
Blueberry Blintzes
Cherry Blitnztes
Custard Challah Bread Pudding
Fresh Fruit Platter

 All-American Hot Dogs
Summer is here and why pay top dollar going out when you can make delicious hot dogs at home? Here is a guide to the different ways Americans make their frankfurters around the country. I had the Sonoran style hot dogs while I was in Tucson in February and absolutely loved them.
New York Style
Served with brown or German mustard and sauerkraut or onions cooked in tomato paste.
Chicago Style
Served on a poppy seed bun with mustard, pickle relish, sport peppers, onions, tomatoes, dill pickles and celery salt. Pepperoncini can be substituted for sport peppers.
Kansas City Style
Served on a sesame seed bun with brown or German mustard, sauerkraut and Swiss cheese.
Atlanta “Dragged Through The Garden” Style
Serve topped with coleslaw.
Detroit “Coney” Style
Served with chili, onions, mustard and cheddar cheese.
Seattle Style
Served with cream cheese and grilled onions.
Phoenix/Tucson “Sonoran” Style
Served as a bacon-wrapped hot dog with pinto beans, onions, tomatoes, mustard, mayo, jalapeno peppers and cheese.
Austin “Tex-Mex” Style
Served with queso, guacamole and crushed tortilla chips.
San Francisco “Wine Country” Style
Served with red wine caramelized onions and goat cheese.
Miami “Cuban” Style
Served with mustard, pickles and Swiss cheese.


 Mac & Cheese Please!
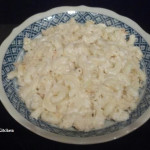
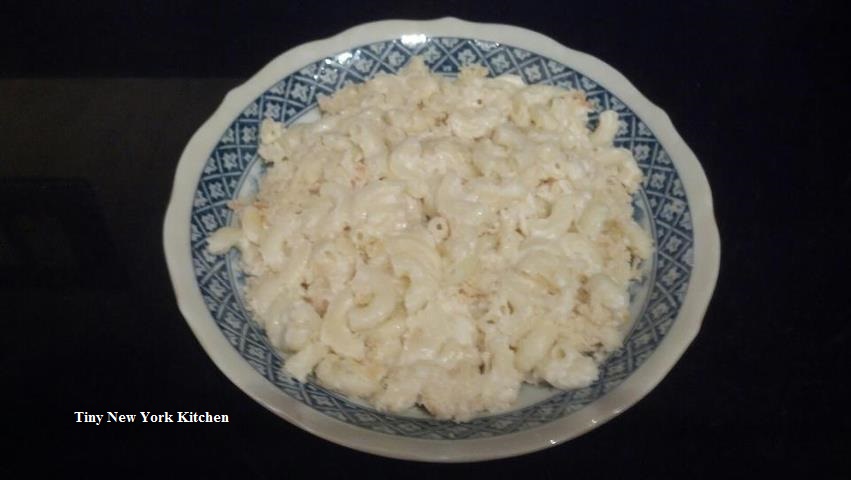
Forget that horrible box stuff and make your own delicious Mac & Cheese. Here is a different spin on the usual cheddar cheese macaroni & cheese dish. Using the brie, cream cheese and mascarpone makes it nice and creamy. I used macaroni pasta here, but you can use pasta shells or farfalle pasta.
INGREDNTS
2 Tablespoons Unsalted Butter
1/2 Teaspoon Kosher Salt
12 Ounces of Farfelle or Macaroni Pasta or Shells
7 Ounces Brie (Rind Removed) Cut Into Chunks
5 Ounces Cream Cheese Softened & Cubed
3 Large Eggs Lightly Beaten
1 Cup Mascarpone Cheese
1 Cup Grated Parmigiano Reggiano Cheese
3/4 Teaspoon Black Pepper
1/4 Teaspoon Finely Grated Nutmeg
Heat your oven to 375º F. Butter a 2 quart gratin dish. Bring a large pot of heavily salted water to a boil. Cook pasta to al dente and then drain well. DO NOT rinse the pasta. Transfer the hot pasta to a large bowl and toss immediately with Brie and cream cheese until melted and smooth. In a separate bowl, whisk together the eggs, mascarpone and Parmigiano. Stir the egg mixture into pasta. Season with the kosher salt, pepper and nutmeg. Place the pasta into the prepared baking dish. Bake for 30 minutes. Remove from the oven and serve immediately. Serves 6

 Packing A Picnic & Serving Food Outdoors
Packing A Picnic
*Pack lots of extra drinks in a cooler. When it’s hot outside picnickers get thirsty.
*Pack sweet treats. Bring fresh fruit such as berries and melon or cookies instead of ice cream.
*Keep prepared foods in the refrigerator until it is time to pack them up.
*Bring a soccer ball, football, baseball & mitts or a Frisbee. If you live close to the park either walk, rollerblade or ride your bikes.
*Pack sunscreen! Even when it is overcast or if you’re lying in the shade make sure to wear sunscreen.
Serving Food Outdoors
*When taking foods on a picnic make sure to keep perishables in the cooler with either ice or freezer packs until serving time. Make sure that the food is cold BEFORE it goes into the cooler.
*Pack just the right amount that you and your picnickers are going to eat. You don’t want to bring leftovers back home.
*If you are driving to your picnic don’t put your cooler and picnic basket in the hot trunk. Instead transport your picnic in the air-conditioned car.
*At you picnic site, keep the cooler and picnic basket in the shade. Open the cooler as little as possible.
*Never leave foods at room temperature for more than 2 hours. If the temperature outside is over 90°F, perishable foods should be left out no longer than 1 hour.
*If you buy a lot of take-out foods, such as fried chicken or barbecued beef, make sure to eat the food within 2 hours of pickup. Otherwise, buy the food in advance, refrigerate and reheat just before serving.
*Keep desserts made with whipped cream, cream cheese or dairy products refrigerated until you are ready to serve. Store any leftovers in a refrigerator or cooler.
*When preparing food outdoors, away from home, make sure to bring a jug of water, soap and paper towels for hand washing.
 Serving & Storing Cake
To enjoy cakes at their best, follow these tips:
*Allow cakes with butter type frosting to stand for about an hour before slicing.
This allows the frosting to set.
*For cakes that are filled or frosted with whipped cream make sure to assemble
Them no more than 2 hours before serving. This will prevent them from
Getting soggy.
*To cut your cakes use a thin bladed knife cut pieces. Run the knife under hot
Water and make sure to wipe the knife dry before cutting the first piece
And in between subsequent cuts.
*For storing cakes most cakes can be covered and stored at room temperature
For 2 to 3 days. It is good to have a cake cover, but if you don’t have
A cake cover then just invert a large bowl over your cake. If you directly
Cover the cake with plastic wrap then it will for sure make a mess of the
Frosting.
*For those cakes that have a filling or a frosting that contains eggs, whipped
Cream or cream cheese it is best to store your cake covered in the fridge.
*If you want to freeze your cake then you should put your cooled and unfrosted
Cake layers on a baking sheet. Freeze them until they are nice and firm.
After the layers are frozen then transfer them to large freezer bags or wrap
Them and seal them in freezer wrap. They will keep in the freezer for up to
4 months. Thaw them before frosting.
*If you are serving your cake directly from the pan then cover them and freeze
Them in the pan. Make sure to thaw them before frosting them.


