
More and more people are swapping starches for flour in their recipes. If this is something that you have thought about doing then read on to find out more about cornstarch and its uses.
Cornstarch is one of the most versatile starches that there is. Extracted from the starchy endosperm of corn, its white powdery substance is virtually flavorless. It’s a nice ingredient for thickening puddings, soups, pie fillings, and many baked goods recipes. When added to cake, cookie, and shortbread recipes, cornstarch helps create a crumbly and tender texture.
Commercially, cornstarch is often used as an anti-caking agent. When added to packaged goods like shredded cheese, cornstarch coats the cheese and helps to absorb moisture that would otherwise cause spoiling. The absorption process also helps prevent food from clumping over time. Additionally, it is used when making sugars, such as corn syrup.
When cooking with cornstarch, it is best to mix this ingredient into a recipe that is at room temperature. When cornstarch is added to too hot of a mixture, the heat can cause unwanted clumping. Before adding any starch to a recipe, it’s recommended first to make a slurry. To make a slurry, simply mix cornstarch with a cold liquid such as water. This mixture will create a paste-like substance, that you can then add to the desired recipe. Using this slurry method will ensure that the cornstarch is evenly distributed throughout the recipe and not broken down by the heat. It is not recommended to freeze sauce and soups that include cornstarch. Freeing cornstarch can cause the molecules in the starch to break down, and once thawed, the liquid will not hold the same texture as before.
For Thickening:
Cornstarch is often used as a thickening agent when added to soups, stews, and gravies. Denser than flour, less cornstarch is needed to thicken a liquid to the desired consistency.
When cornstarch is added to a recipe, the starch molecules work to absorb water and thicken the mixture. When heated, those molecules swell and consume even more of the liquid in the recipe. Upon thoroughly cooking, the starch in the mix will have expanded size to ten times its size. Once the mixture cools, these same molecules will set. The setting of these molecules can help further solidify the dough, which makes cornstarch a great thickening agent for gooey fillings like pies and pudding. However, this molecule expansion is limited. While a cornstarch enriched recipe can be brought close to boil, it should never be fully boiled. When cornstarch is exposed to too high of temperatures, the starch molecules will begin to deflate, and the mixture will return to its runny state.
For Baked Goods:
Cornstarch not only acts as a thickening agent, but it can also be used in baked goods like cookies, brownies, and cakes. If you’re looking for more structure in your favorite dessert recipe, then you may want to try using cornstarch. Combining cornstarch with other flours can help soften the rigid proteins of the flour, resulting in a light and chewy dessert. Similar to when adding cornstarch to a soup or pudding, if adding cornstarch to a dessert batter, it should first be turned into a slurry. This will ensure that all of the molecules remain intact and that the starch is evenly distributed. Upon adding cornstarch to your baked goods, evaluate it as you would a soup. Has your batter reached the desired consistency? If not, then a bit more cornstarch may be needed. Once your dough looks perfect, bake your dessert like usual. The result should be light, fluffy, and delicious desserts.
Anti-Caking Agent:
Have you ever wondered why your powder sugar ingredients include cornstarch? Cornstarch acts as an anti-caking agent. By keeping moisture and condensation from reaching whatever it is mixed with. It helps to prevent lumps in finely ground foods like sugar. Cornstarch isn’t just used to ward off moisture from sugar. The next time you’re in the grocery store take a look at how many products list cornstarch as an ingredient. From gravy granules to shredded cheese, you might be surprised by the wide variety of foods that cornstarch is added to.
Frying With Cornstarch:
Cornstarch can also be used as a coating for fried foods. While cornstarch shouldn’t be used as a substitute for flour in baked goods, you can very easily substitute it in for flours when coating fried chicken, fish, or other items you’re frying. Not only will cornstarch work in the same way that flours do, but it will hold up better against sauces and absorb less of the frying oil. Less oil means less fat in your meal.
When frying food with cornstarch, I recommend that you coat the items lightly. Applying a light even coat to your food will ensure that it results in a crispy texture. When too much cornstarch is added, the coating often turns out gummy rather than crunchy. For the perfect, gluten-free fried food, consider blending cornstarch with a gluten-free flour like almond flour. This will help create a more breaded result, similar to wheat flour.
©Tiny New York Kitchen © 2021 All Rights Reserved
Holiday baking time is a fun time of the year with the kitchen filled with delicious aromas and an array of treats to share with friends and family. No matter what style or flavor is your favorite, follow these steps for the best cookies you’ve ever baked, every time.
Use Room Temperature Ingredients
Get eggs and butter out of the refrigerator early, so they blend better in your cookie dough. Your cookies will have better texture and volume when all the ingredients are evenly incorporated.
Measure With The Spoon & Sweep Method
Use a spoon to add dry ingredients like flour to a dry (flat edged) measuring cup, then level off with the back of a knife. This method gives you the right amount of flour for the recipe, so your cookies aren’t too dry or dense.
Chill Dough Before Shaping Or Slicing
Refrigerate at least 1 hour or even overnight, so the dough is easier to work with and cookies hold their shape. Giving the ingredients time to meld makes your cookies taste better too.
Flour Your Cookie Cutters As You Go
Keep a small bowl of flour next to your work surface when rolling and shaping cutouts. Dip cookie cutters in flour in between stamping so they release easily and don’t stick to the dough.
Use Parchment Paper To Line Baking Sheets
Ensure that your cookies won’t stick to the baking sheet by using parchment paper liners. Parchment can be used more than once depending on the style of cookie, then can be replaced for more baking and easier cleanup.
Rotate Sheets Halfway Through Baking
All ovens have hot and cold spots. Help cookies bake evenly by switching the sheets between the top and bottom oven racks or rotating the sheets 180 degrees on the rack halfway through the baking time.
Rest On Baking Sheets For 1 To 2 Minutes Before Moving To Cooling Rack
When cookies are removed from the oven, they can still be soft and molten on the inside. Let the cookies settle and cool for a minute or two before transferring to a wire cooling rack with a thin spatula.
Cool Baking Sheets To Room Temperature Between Batches
Unbaked dough can start to melt immediately on a hot baking sheet, causing cookies to spread and overcook in the oven. Let sheets cool to the touch before using again.
Cool Cookies Completely Before Frosting Or Storing
Frosting can soften and melt on warm cookies, while sealing cookies in a container before they are cooled can cause sogginess. Let cookies rest on a rack for at least 1 hour before decorating or packaging.
Add A Small Piece Of Bread Or Orange Peel To the Cookie Tin
The cookies will slowly absorb the moisture from the bread or peel, so they won’t go stale as quickly. Replace the bread or peel every few days as it dries out.
©Tiny New York Kitchen © 2020 All Rights Reserved
Many people are making bread these days and there’s nothing quite like the smell of bread baking in the house. Here are some answers to frequently asked bread making questions.
Never allow salt to come into direct contact with yeast because it removes the water that yeast needs to live. Instead, add salt to the flour used to make the dough, so the flour can act as a buffer.
A heavy-duty stand mixer is a great appliance for making bread dough. You can use the dough hook for mixing and kneading. If the dough isn’t coming together with the dough hook, switch over to the paddle attachment and mix just until the ingredients are combined, then switch back to the dough hook.
After the dough is mixed, let it rest. Professional bakers call this period, autolyze. It lets the flour fully hydrate and strengthens the gluten in the flour before kneading. Cover the work bowl with plastic and let the dough stand for 20 minutes and then knead on medium speed until the dough is smooth and elastic.
Dough made with a high proportion of whole-grain flour should feel tacky when you are kneading it. In general, moist or even sticky dough makes the best bread. Don’t add too much flour to the dough or the bread will bake up dry and tough.
How can you tell when the dough has been kneaded long enough? Use the windowpane test. Pull off a golf ball knob of dough and pat it into a rectangle. Pulling slowly and consistently from all four corners, stretch the dough into a thin, translucent membrane. If the dough tears easily, knead it longer. This technique won’t work with dough that includes seeds, nuts, or raisins, as they will tear the dough even if it has been kneaded sufficiently. If such ingredients have been used, check for stretchy and resilient dough.
Many bakers use a bowl to hold bread dough, but a straight-sided clear plastic tub is ideal for keeping track of dough as it rises. Mark the beginning level of the dough on the outside with a pen or a piece of tape, and then you can easily see when the dough has doubled. You can also use a glass bowl, but the doubling is a bit harder to define in a slope-sided container. Gently poke a finger into the dough. If the hole doesn’t refill, the dough has probably finished rising.
Many crusty artisanal are baked with steam to help keep the crust soft and pliable, allowing the bread to expand fully. Professional ovens have built-in steam injectors, but home bakers have to be more creative. One recommended method: When you turn on the oven to preheat it, place an empty heavy-duty rimmed baking sheet or pan on a rack near the top of the oven, When the bread dough is added to the oven, toss a handful of ice cubes into the pan and close the door. The ice will melt quickly and create a burst of steam. While the oven door is open, cover the glass on the door with a towel to catch any drips (the cold water could crack the glass) and remove the towel before closing the door.
A common way to test bread for doneness is to rap on the bottom of the loaf and listen for a dull thump. Using a thermometer is more reliable. Insert an instant-read thermometer in the bottom of the loaf, being sure to the tip reaches the center of the loaf. Butter and egg laden breads are finished when their internal temperature reaches 185 to 190 degrees F. Leaner and crispier breads are ready at 200 to 205 degrees F. For breads baked in loaf pans, insert the thermometer just above the rim of the pan, angling the tip down to the center of the loaf.
“Work With What You Got!”
©Tiny New York Kitchen © 2020 All Rights Reserve
Some people are natural bakers and some people learn as they go. I’m guessing that most people are the “learn as you go” types. Here are some little things that, are not giant revelations, but are useful tips to help you through your holiday baking.
Unwrap Butter Before Bringing To Room Temperature
Many recipes call for softened butter and if you’re using it, here’s a trick. Instructions for softening butter usually directs one to leave the butter on the counter until it reaches room temperature. It’s much better to unwrap the butter straight from the refrigerator and let it soften in the mixing bowl. When butter is cold, it lifts cleanly off the wrapper as opposed to much of it sticking to the paper and the mess it makes.
Use Butter Paper To Grease Pans
If you don’t unwrap your butter when cold and you have butter-globbed butter wrappers, use them to grease pans.
Use A Large Slotted Spoon To Separate Eggs
For separating eggs, break the whole egg into a small-size bowl. Grab the yolk with a metal slotted spoon. Use the wall of the bowl to help and let the white slink off the edge of the spoon, jiggling if the white is stubborn. The white doesn’t actually go through the wholes of the spoon, but the holes somehow seem to facilitate their departure. Do one at a time and transfer each one after so as not to taint the batch should a yolk break. If you are using just the whites and don’t need the yolks right away, stick them in the freezer for later use.
Use The Right Kind Of Measuring Cup
Use spouted cups for the measuring of wet ingredients. Use the scoop/cup type for dry ingredients. It’s hard to get an accurate amount of flour or sugar in a big glass measuring cup, and it’s hard not to spill oil or water when it’s filled to the brim in a scoop measuring cup. For wet ingredients, get to the eye level with the quantity marks and make sure they are even. For dry ingredients, spoon ingredients into the cup and then level it off with a knife.
Better Yet, Use A Scale
Unlike the rest of the world, American recipes use cups for measuring. Baking can be an exact science and as long as the recipe includes weights the scale is the most accurate way to measure.
Don’t Measure Over The Bowl
If you measure your ingredients over the bowl you just may get more in the bowl than you intended. Measure to the side of the bowl, even if it means having to wipe up a few grains of salt from the counter.
Know Your Oven’s Moods
Each oven heats differently. Ovens have hot and cool spots, which might explain uneven baking. Get into the habit of moving shelves around (middle rack is a good bet) and setting a timer to rotate pans halfway through baking. Test your oven by turning your oven to 350 F degrees, line the racks with slices of white bread and cook until they start to toast; remove them and analyze the results for a pattern. Are they even? Are the ones from the back darker than the rest?
Use An Oven Thermometer
Your oven dial may not be giving you an accurate read. The best way to avoid this is by purchasing an oven thermometer that sits inside the oven. Many bakers do this and having the ability to monitor the temperature in real-time allows you to adjust as needed.
Candy Thermometers
All candy thermometers are not created equally. Here’s how to calibrate your candy thermometer: Put the candy thermometer in a pot of water and bring it to a rolling boil, with constant and vigorous bubbles. The boiling point for water is 212 F (100 C), which is what your thermometer should read (if you are at sea level). You can leave it in there for a few minutes to make sure the reading is accurate.
Dark And Light Pans Are Not Perfectly Interchangeable
Are your cookies always overdone on the bottom? Are your roasted vegetables not getting browned enough? This one makes perfect sense. Dark pans absorb heat, light pans reflect it. Use light pans for cookies and cakes that don’t want a brown crust. Use dark pans for roasting vegetables, making pizza, or baking anything in which you want more of a crust.
Swapping Pan Sizes And Shapes
You might now want to use the pan that the recipe calls for. Pick up a copy of, Joy of Baking, and use the Baking Pan Sizes page. It has a list of every pan and its capacity, so that you can switch things around and swap pans with compatible capacities or adjust if needed.
Wear An Apron
Your apron will take a beating, but it will save your clothes!
“Work With What You Got!”
©Tiny New York Kitchen © 2019 All Rights Reserved

Turn out amazing treats with these easy tips and tricks to help you bake your best every time.
Measure Flour Accurately
Using a measuring cup to scoop directly from the bag can pack in too much flour, leading to dry, dense baked goods. Use the “spoon and sweep” method by gently stirring the flour in the bag with a spoon. Spoon the flour into your measuring cup. With the back of a knife, level off the cup and sweep the excess back into the bag.
Warm Eggs To Room Temperature
Room temperature eggs blend more easily in batter and dough, and whites whip up with bigger volume. Take eggs out of the refrigerator a couple hours before baking or add cold eggs to a large-size bowl. Cover with warm, not hot, tap water. Rest for 5 to 7 minutes while you measure other ingredients.
Test Your Baking Soda And Baking Powder
These leaveners help baked goods rise. If they aren’t active, quick breads and pancakes will be flat instead of fluffy. Spoon baking powder and baking soda into separate small bowls. Pour boiling water into baking powder. Pour distilled white vinegar into baking soda. If the ingredients fizz, they’re still active.
Measure Liquid And Dry Ingredients Separately
Too much or too little liquid can change the texture and taste of the finished recipe. Liquid measuring cups give you room to pour right up to the fill line without spilling. Use clear measuring cups with pour spouts for liquids. Use flat-bottomed measuring cups for dry ingredients and use the “spoon and sweep method.”
Prevent Overbaking
Know your oven’s quirks. All ovens run slightly differently, and some spots are hotter than others. Keep an eye on how your baked goods are browning, the temperature, and the time to make the best estimate. Use an oven thermometer to see if your oven runs hot or cold (a few degrees above or below what the dial says), and adjust accordingly. Set a kitchen timer, and check for doneness a few minutes early. Rotate your pan halfway through for even baking.
“Work With What You Got!”
©Tiny New York Kitchen © 2019 All Rights Reserved
Have you ever wondered what the difference between cake flour, bread flour, and pastry flour is? Is it ok to substitute all-purpose flour that call for a specific flour type? These are questions that I get asked often.
Choosing the correct flour is about controlling the amount of gluten in your dough. Gluten is a protein structure that makes dough both firm and elastic. Bread flour comes from “hard” flour, which has a higher protein content (produces more gluten) making it perfect for bread, pizza dough, and any recipe that needs a little more elasticity and cohesion.
Pastry flour is made with “soft” flour, which has a much less protein content and produces less gluten. Dough made with pastry flour is tender, flaky and doesn’t hold together firmly. That’s a good thing because no one wants a rubbery piecrust! Cake flour has even less protein content than pastry flour, but not by much. It has just enough protein to give the cake a little structure, but not enough to make it tough.
All-purpose flour is a blend of “hard” and “soft” flours, which falls in the middle of the gluten spectrum, and works well in most baked goods. Your cakes might not be quite as tender, but in most cases they’ll still come out beautifully. It’s all a matter of degree. Cookies, piecrusts, muffins, quick breads, and scones all do well with all-purpose flour.
Gluten development is also the reason why recipes instruct you not to over mix your dough. Once you add water or any other low-fat liquid to flour, gluten bands start forming and the more you knead or stir the dough, the more these elastic bands start connecting. If you are using all-purpose flour in a cake or piecrust, make sure to stop mixing just when everything comes together.
“Work With What You Got!”
©Tiny New York Kitchen © 2018 All Rights Reserved
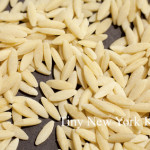
Orzo is the Italian word for barley; however, orzo is not made from barley at all, but rather from semolina, which is a course ground flour made from durum wheat. With its shape reminiscent of slivered almonds, orzo cooks up in about half the time of rice, making it a speedy standby to have on hand to add heartiness to meals.
Just bring 3 quarts of lightly salted water to a boil. Add 8 ounces ( 1 1/2 cups) dried orzo and boil about 10 minutes until it has a firm, chewy texture. Stir occasionally to prevent it from sticking together. Drain orzo in colander and serve immediately.
Rinse orzo only if it will be baked or served cold in a salad. Otherwise, do not rinse as rinsing removes a light coating of starch that helps sauces and seasonings cling to the pasta.
For the best texture and flavor serve orzo immediately after cooking. If your orzo gets done before the rest of the meal, you can keep it warm by returning the cooked drained pasta to the warm cooking pan. Stir in a little butter or olive oil to prevent it from sticking together. Cover the pasta with a lid and let it stand no more than 14 minutes.
“Work With What You Got!”
© Victoria Hart Glavin Tiny New York Kitchen © 2017 All Rights Reserved

Most recipes have been perfected for use at seal level. At higher altitudes, adjustments in the cooking time, temperature, and ingredients could be necessary.
At sea level, water boils at 212 degrees. With each additional 500 feet of altitude, the boiling point drops 1 degree. Even though the boiling point is lower, it takes longer to generate the heat required to cook food. Therefore, at high altitudes, foods boiled in water (such as pasta and beans) will take longer to come to a boil and will require longer cooking times than recipes suggest. The processing times for canning foods and the blanching times for freezing vegetables will vary, too.
At high altitudes, cake recipes may need slight adjustments in the proportions of flour, leavening, liquid, eggs, etc. These adjustments will vary from recipe to recipe, and not set guidelines can be given. Many cake mixes now carry special directions on the label for high-altitude preparation.
High altitudes can also affect the rising of doughs and batters, deep-frying, candy making, and other aspects of food preparation. For complete information and special recipes for your area, call or write to the home agent at your county cooperative extension office or to the home economics department of your local utility company or state university.
“Work With What You Got!”
© Victoria Hart Glavin Tiny New York Kitchen © 2017 All Rights Reserved
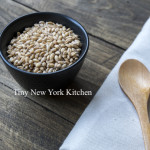
To help you when shopping for whole grains, here are the words you should look for in the ingredients list:
It’s A Whole Grain If It’s Called:
Brown (Also Black, Red, Purple) Rice
Buckwheat
Bulgur (Cracked Wheat)
Millet
Quinoa
Sorghum
Triticale
Whole-Grain Corn
Whole Oats And Oatmeal
Whole Rye
Whole Spelt
Whole Wheat
Wild Rice
It’s Not A Whole Grain It It’s Called:
Corn Flour Or Cornmeal
Enriched Flour
Multigrain (This Means Various Grains, Not Necessarily Whole)
Pumpernickel
Rice Or Rice Flour
Rye Flour Or Rye
Stone-Ground Wheat (It Needs To Say “Stone-Ground Whole Wheat”)
Unbleached Wheat Flour
What Or Wheat Flour
Wheat Germ (Not A Whole Grain, but Very Good For You)
Whole Barley (Pearl Barley; Not A Whole Grain, But Very Good For You)
“Work With What You Got!”
© Victoria Hart Glavin Tiny New York Kitchen © 2017 All Rights Reserved

I love to bake all year long, but during the holidays I’m on “baking overdrive.” To make better cakes here are some simple tips to help you with the best outcome possible.
Don’t use cold eggs. The eggs really should be at room temperature, otherwise the mixture won’t emulsify properly. If you’re short on time place eggs in a bowl of warm water for 15 minutes.
Make sure to measure all ingredients precisely. Baking is an art form, but also a science.
Position pans as close to the center of the oven as possible. If you’re placing more than one pan in the oven, they should not touch each other or the oven walls. If your oven isn’t wide enough to put pans side by side, place them on different racks.
If a recipe calls for 1 cup of sifted flour, then first sift the flour and then measure it. If it calls for 1 cup flour sifted, measure the flour, then sift it. It may seem subtle, but it can make the difference between a light, fluffy cake and a heavy one.
Allow at least 20 minutes for your oven to preheat. It’s best to turn the oven on before you start working on your recipe.
Avoid opening the oven door. Opening the oven door too often can make a cake fall, so use the window in your oven door to check the cake’s process when possible.
Remember that each oven heats differently. Check for doneness 10 minutes before the recipe suggests. For most recipes, a cake is ready when it starts pulling away from the sides of the pan and a toothpick inserted in the center comes out clean.
Invest in wire cooling racks. Cakes cool faster and don’t get soggy when set out on a rack. Leave them in the pans for 10 to 15 minutes before unmolding, and then place on a rack to cool completely before frosting. Angel, chiffon and sponge cakes should be left in the pan to cool to prevent collapsing.
Unfrosted cakes can be stored, well wrapped in plastic, at room temperature for 24 hours. If storing unfrosted cakes for more than 24 hours, it is best to freeze them rather than refrigerate them. Wrap the layers in plastic wrap and then heavy-duty foil to freeze, let cake thaw in the refrigerator before frosting.
To store frosted cakes, keep at room temperature under a cake dome or large bowl unless the recipe specifies refrigeration.
For smooth and easy cake removal, prep your pans properly. When a recipe calls for greasing and flouring, place a piece of parchment or waxed paper on the bottom of a pan (trace and cut it to fit). Coat the sides and bottom with softened butter, and then dust with flour, turning the pan on its side to get full coverage and tapping out the excess. For chocolate cakes, swap in cocoa powder for flour.
Angel, chiffon, and sponge cakes should go into clean, untreated pans since they need to adhere to the sides in order to rise properly.
Happy Baking!
“Work With What You Got!”
© Victoria Hart Glavin Tiny New York Kitchen © 2016 All Rights Reserve


