
"Write it on your heart that every day is the best day in the year."
-Ralph Waldo Emerson

Happy Boxing Day!

Tiny New York Kitchen Wishes You A Very Merry Christmas!

Merry Christmas Eve!

"The best and most beautiful things in the world cannot be seen or even touched. They must be felt with the heart."
– Helen Keller
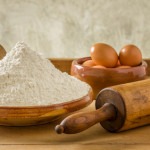
If you have many occasions to use a rolling pin then you really should have different sizes and different shapes of rolling pins on hand. Sometimes a very long, thick, and heavy one will be best. For other dough you will want a smaller, lighter one. The French style, which is extra long, narrow, and tapered at both ends, is especially good for rolling dough into a round shape, as for a pie crust, while the straight-sided rolling pin is better for an oblong shape.
If you’re unfortunate enough to be without any rolling pin at all, other things will do a decent job. Try a straight-sided bottle, tall jar, or a drinking glass.
"Work With What You Got!"
© Victoria Hart Glavin Tiny New York Kitchen
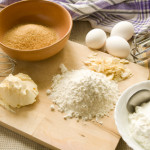
Gluten-Free Baking
Baking can be tricky when you throw gluten-free into the mix, even the most skilled cooks can be challenged. Here are some tips that can make Gluten-Free Baking less challenging.
Gluten-Free flour mixes can generally replace wheat flour cup for cup. Nut and bean flours may need extra experimentation to find the exact amounts to use.
Consider using smaller pans when baking gluten-free. It’s easier to get the center cooked without the edges burning as can happen with larger pans.
Keep a close watch on baking times. Some gluten-free recipes may take longer to bake than their wheat-containing counterparts.
To help gluten-free recipes taste their best, consider boosting flavor with extra nuts, herbs, spices, and flavor extracts such as vanilla and almond.
If converting a recipe to gluten-free, increase the egg amount by one extra egg to help ingredients bind together.
Gluten-free flours can be dry. You may need to increase a recipe’s liquids.
Xanthan gum keeps gluten-free baked goods moister and less prone to crumbling. Add 1/4 to 1/2 teaspoon xanthan gum for each cup of gluten-free flour.
"Work With What You Got!"
© Victoria Hart Glavin Tiny New York Kitchen

Happy Hanukkah!

We make a living by what we get. We make a life by what we give. – Winston Churchill

Storing Candy
One of the nice things about homemade candy is that it can be eaten when it is at its freshest. In addition, it contains no chemicals, artificial flavoring, or preservatives, although the lack of preservatives does limit its storage capabilities. Most homemade candy, however, will keep well for several weeks if it is stored properly. The exception is divinity, which gets stale quickly and should be eaten within two days of preparation.
Here are some rules for storing candy successfully.
Sticky and chewy candies, like taffy, nougat, and caramels, and hard candies, like butterscotch, should be individually wrapped in waxed paper, plastic wrap, or foil.
All candy keeps best in an airtight container in a cool, dry place. Some chocolate candies, like truffles, are best stored in the refrigerator.
Do not store brittle candies in the same container with soft, creamy candies. The moisture from the soft candies may make the hard candies sticky.
Candy freezes well. Place the candy, individually wrapped if appropriate, in a cardboard box or plastic container. Overwrap the container with freezer paper or foil. To thaw the candy, let it stand for several hours, or overnight, and come to room temperature before opening the container. This will prevent moisture from collecting on the candies because of the temperature change.
"Work With What You Got!"
© Victoria Hart Glavin Tiny New York Kitchen


