
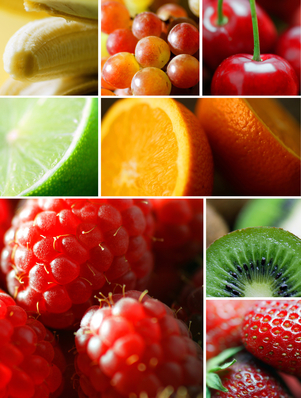
 Fruit Essentials
Have you ever come home from the market after purchasing fruit to find that you spent money for nothing? I have plenty of times and it ticks me off every time. Here are some Fruit Essentials that may help you have more fruit shopping success.
Did you know that many plants that are botanically fruits are not sweet? We think of them as vegetables or non-fruits. Avocados, beans, coconuts, corn, cucumbers, eggplants, green peppers, okra, peas, pumpkins, sugar peas, string beans and tomatoes all fall in the fruit category. Some cookbooks make a distinction between fruit, vegetables and fruit vegetables. Fruit vegetables are foods that are botanically fruits, but are most often prepared and served like vegetables. These fruits are considered fruit vegetables: Aubergine, autumn squash, avocado, bitter melon, cantaloupe, chayote, chile, courgette, cucumber, eggplant, gherkin, green bean, green sweet pepper, hot pepper, marrow, muskmelon, okra, olive, pumpkin, red sweet pepper, seedless cucumber, squash, sweet pepper, tomatillo, tomato, watermelon, wax gourd, yellow sweet pepper and zucchini.
Pectin is a substance contained in some fruit which is used for making jams and jellies thicker. High pectin fruits are apples, cranberries, currants, lemons, oranges, plums and quinces. Low pectin fruits are bananas, cherries, grapes, mangos, peaches, pineapples and strawberries.
Low pectin fruits seem to discolor quicker than high pectin fruits ( bananas and eggplants). Lemon juice or vinegar slows the discoloring process. Other fruits and vegetables that discolor quickly are avocados, cauliflower, celery, cherries, figs, Jerusalem artichokes, mushrooms, nectarines, parsnips, peaches, pears, potatoes, rutabaga and yams.
Bruising: When a fruit is bruised the cell walls break down and discoloration begins. The process can be slowed down by refrigeration.
Cleaning: It is important to clean our fruit and vegetables. Rinse fruit in cold running water and scrub as needed before cooking or eating. Soaking fruit in water for more than a few minutes can leach out water soluble vitamins.
Peeling: The fruit skin usually contains a lot of important nutrients, but if you need to peel a thick-skinned fruit cut a small amount of the peel from the top and bottom. Then on a cutting board cut off the peel in strips from top to bottom. A good way to peel thin skinned fruit is to place the fruit in a bowl with boiling water and let stand for about 1 minute. Remove and cool in an ice water bath. You could also spear the fruit with a fork and hold over a gas flame until the skin cracks OR quarter the fruit and peel with a sharp paring knife or potato peeler.
Wax: Oh those beautiful waxed apples that wink at us at the market. They are beautiful because they are waxed. I don’t know about you, but I would rather not eat wax. Wax can be removed from the surface of fruits by washing them with a mild dishwashing soap and then thoroughly rinsing them. This will remove most of the wax, but probably not all of it.
Purchasing Ripe: Purchase these fruits fully ripe: Berries, cherries, citrus, grapes and watermelon. All of the fruits in this list, except berries, can be refrigerated without losing flavor.
Purchasing Not-So-Ripe: Apricots, figs, melons, nectarines, peaches and plums develop more complex flavors after picking. Store these fruits at room temperature until they are as ripe as you would like them.
Refrigeration: You can refrigerate apples,ripe mangos and ripe pears as soon as you get them. Do not refrigerat bananas.
Seasonal Fruit: Winter is the season for citrus. Fall is the season for apples and pears. Late spring is the season for strawberries and pineapples. Summer is perfect for blueberries, melons, peaches and plums.
Washing: Dry fruit with paper towels or kitchen towels and then use a blow dryer on the cool setting to completely dry fruit.
Squeezing: A microwave can be used to get more juice from citrus fruits. Microwave citrus fruits for about 20 seconds before squeezing the fruit for juice.

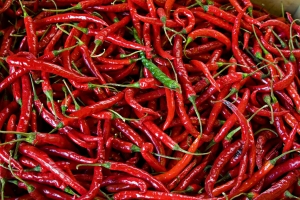 Know Your Chiles
To keep your Mexican dishes authentically delicious, here are some pointers about chiles. If you were asked to identify one characteristic that would singularly describe Mexican dishes, the “chile” would be the answer, namely chile peppers. Whether ground, whole, sliced, diced, pickled, fresh, canned or dried, chile peppers are an inherent part of Mexican dishes.
There are many varieties of chiles, ranging from mild to very hot! Chefs use whatever chiles are available to them. Some varieties are available canned when they aren’t available fresh. Here is a list of some common peppers.
Green Peppers: Also called bell peppers. They are very mild peppers and are used in salads as a garnish and they are used to flavor & color dishes.
Anaheim: Also called California peppers. They are mild, long green chiles. They can be eaten raw and are used in salads.
Jalapenos: They are smaller sized and dark green chiles. They are typically very hot.
Serranos: They are smaller and slimmer than jalapenos, but be warned they are hotter too!
Ancho: These chiles are plump and dark green chiles that range from mild to medium. Ancho means “wide,” that’s why these are usually the best choice for chile rellanos.
Yellow Hots: They are longer than jalapenos and moderately hot. These chiles are used in hot mixes, along with other chiles and are used in salsas. They are also used as a garnish to color dishes.
Wax Chiles: These chiles are small, slender, yellow chiles and are used in pickled mixes, in salsas and as a garnish.
Chilitepins: These chiles are tiny and seedy red peppers. They are used for seasoning in salsas in combination with other chiles. They are also used in pickling. Warning…they are VERY hot!
You can roast chiles over the top burner of your stove. Make sure to turn frequently to keep the chiles from burning. You can cook three to four chiles at a time. When the skins turn dark brown and look blistered then remove them from the heat. Wrap the chiles in a damp kitchen towel or paper towel to make the skins easier to remove.
Chiles can be roasted in an oven as well. Place the chiles onto a parchment paper lined baking sheet. Bake at 350º F. until the skins are brown and blistered. After roasting, wrap the chiles in a damp kitchen towel for a few minutes. Then remove the skins.
You can also dry chiles. To dry chiles, make a chile “garland.” Sting chiles up by their stems to make a cluster. Let them hang to dry by placing them in a very dry place until they become dry. Fresh green chiles turn from green to red when left to dry out. Dried chiles are ready to use when they are crackly-dry.
Chile garlands can also be used for decorations in your kitchen, living room or patio. These sartas or ristras are a characteristic sight in the Southwest.
To use dried chiles, just soak them in a hot water bath until they are softened. Open the chiles up and remove the stem and seeds. Puree them in a food processor or blender. Add small amounts of water to process. If the chiles are hot then add a water and vinegar mixture to help tame the chiles. When a chili paste is made then make sure to pass through a sieve to make a smooth paste. Season the paste as you desire to make salsas or for cooking.


