Nothing says romance like a rolling pin or so thought sailors around the turn of the 18th century who often brought home decorative glass rolling pins for their loved ones. The pins were typically hollow and could hold additional gifts like salt, tea, cocoa, and other rare commodities from far off places. Today we view rolling pins as either mundane, practical kitchen utensils or family heirlooms passed down through generations. Though simple in design, rolling pins are revolutionary in utility, shaping dough to a uniform thickness that could never be achieved by bare hands alone. No one knows when the rolling pin was first invented, and while there may be variations for specialized uses, the basic design of a weighted cylinder remains the same. Two main styles dominate today’s market: the baker’s pin and the French rolling pin.
The Baker’s Pin
The baker’s pin, sometimes known as the American rolling pin, features two handles that attach to a rod that spins inside a heavy cylinder. The handles make for easy rolling forward and backward, and the pin itself is typically weighty enough that you don’t have to put much effort into flattening dough. Baker’s pins are available in a variety of materials – hardwood cylinders being the most common. Pins made with a marble, silicon, or stainless steel barrel are also available for those interested in an easier to clean rolling pin. When chilled, marble and metal rolling pins are better at holding a cold temperature, making them ideal for working pastry and other doughs that must be kept cold.
The French Pin
French pins, by comparison, have no handles; you use the heel of your hand to press down and roll the pin to flatten the dough. Among French pins, you’ll find straight (dowel) and tapered designs. Bakers who use straight pins often laud their ability to produce consistently smooth and even dough, while those who prefer tapered pins tout maneuverability. The tapered design is ideal for creating circular shapes, such as pie crusts and pizzas, and shaping edges. French pins, like baker’s pins, are also available in different materials.
Clean With Care
Wooden rolling pins require special care when cleaning. Immediately after use, wipe them down with a dry cloth or paper towel or use a damp cloth to remove any dough residue and dry to remove excess moisture. Avoid using soap, which can strip away the wood’s natural oil. Be sure to periodically oil the wood (mineral or butcher block oil works well) to prevent cracks. These simple steps should keep your wooden rolling pin in like-new condition. Someday it might become a prized family heirloom – a memento of cherished moments in the kitchen baking for people you love.
“Work With What You Got!”
©Tiny New York Kitchen © 2018 All Rights Reserved
If you need a break from Thanksgiving leftovers make rich and buttery Gnocchi With Butternut Squash, Spinach & Tomatoes.
When you have a house full of guests consider making a gluten-free cheesecake.
Tiny New York Kitchen Wishes You & Your Family A Very Happy Thanksgiving!
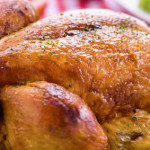
Choosing A Bird
How big should you buy? If you don’t want leftovers then estimate 1 pound of turkey per person. If you do want leftovers then estimate 1 1/2 pounds per person.
Fresh Or Frozen
Should you buy fresh or frozen? Fresh will keep for 4 days in the refrigerator. There is no need to thaw it and some believe that fresh is more flavorful. Frozen is often more affordable, can be purchased weeks in advance, but requires thawing time.
Defrosting
There are two ways to defrost your frozen turkey. 1. In the refrigerator; if you have more time, allow the bird to thaw in the refrigerator in its original packaging. Allow 24 hours of thawing for every 5 pounds of turkey. 2. Cold water bath; if you’re short on time submerge the turkey in a cold water bath. Change the water every 30 minutes. Allow 30 minutes of thawing for every pound of turkey.
Roasting
Remove the giblets. The giblets typically include the heart, liver, and gizzard (often gathered in a bag), plus the neck. You can throw them away or simmer them in stock or water to make your own broth to use in gravy or stuffing.
Tie The Legs
For even roasting, use butcher’s twine to loosely tie the turkey legs together, and then tuck the wings under the shoulders. Don’t wash the bird. Washing can easily spread bacteria. To kill any bacteria, roast the turkey until it reaches an internal temp of 165 degrees.
Brush With Melted Butter
Bump up the flavor by adding herbs, spices, and citrus zest to the butter.
Take The Temperature
Ignore the pop-up timer, they’re unreliable. Instead use an instant read thermometer and take the temperature in the thickest part of the thigh (it takes the longest to cook) and make sure the thermometer isn’t touching any bone. 165 degrees is the magic number.
Let It Rest
Once the turkey comes out of the oven, cover loosely with foil and let it rest at room temperature for 15 minutes. This allows the juices to reabsorb for moist and delicious meat.
Storing
Leftovers should be put away right when you’re done serving. If anything is left out for more than 2 hours, throw it away. Store leftovers in airtight containers in the refrigerator for up to 4 days or in the freezer for up to 3 months. Reheat to 165 degrees and cover to preserve moisture and texture.
“Work With What You Got!”
©Tiny New York Kitchen © 2018 All Rights Reserved
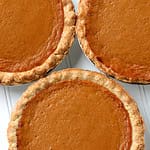
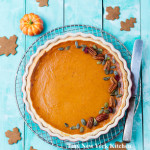
Pumpkins earned their name because of their round shape. The English called them “pompons,” which came from the French word “pompom.”
Like many early American dishes, pumpkin pie is a product of indigenous ingredients and English culinary tradition. First cultivated in Central America around 5500 B.C., pumpkins were one of the first foods settlers brought back from the New World. The English quickly added pumpkin to their pie-making tradition, so by 1620, when the Mayflower sailed to the New World, it’s likely some of the Pilgrims were already familiar with these orange gourds.
There’s a very good chance that when the first Thanksgiving was held a year later, pumpkin was on the table in some form. By the early 18th century, Thanksgiving was a well-established holiday throughout New England, and pumpkin pie was part of the feast.
In 1705, Colchester, Connecticut, postponed Thanksgiving for a week, because there wasn’t enough molasses, their sweetener of choice, to make the pies.
“Work With What You Got!”
©Tiny New York Kitchen © 2018 All Rights Reserved
Use this simple guide to help you plan your Thanksgiving gathering. Remember to save some for leftovers.
Appetizers
5 People: 1 10 People: 2 15 People: 2 20 People: 3
Turkey
5 People: 6 to 8 lbs 10 People: 15 to 16 lbs 15 People: 22 to 23 lbs 20 People: 24 to 28 lbs
Starchy Sides/Vegetables
5 People: 1 10 People: 2 15 People: 2 to 3 20 People: 3
Non-Starchy Sides/Vegetables
5 People: 1 10 People: 2 15 People: 3 20 People: 4
Salad
5 People: 1 10 People: 1 15 People: 2 20 People: 3
Gravy
5 People: 2 to 3 cups 10 People: 5 to 6 cups 15 People: 1 to 2 quarts 20 People: 2 quarts
Desserts
5 People: 1 10 People: 1 to 2 15 People: 2 to 3 20 People: 3 to 4
Wine
5 People: 3 Bottles 10 People: 5 Bottles 15 People: 8 Bottles 20 People: 10 Bottles
Coffee
5 People: 5 Cups 10 People: 10 Cups 15 People: 15 Cups 20 People: 20 Cups
“Work With What You Got!”
©Tiny New York Kitchen © 2018 All Rights Reserved
Whether you’re hosting your first Thanksgiving or you’ve been making the family feast for decades, refer to our Thanksgiving timeline checklist to keep your prepping, shopping, and cooking on track for the big day.
1 TO 2 WEEKS BEFORE THANKSGIVING
Confirm the number of guests and plan your menu
Order your turkey
Plan your table setting, serving dishes, and decorations
Read through all your recipes to determine the food and cooking equipment you will need
Make your shopping and to-do lists
Shop for nonperishable food items, plus any cooks’ tools, cooking equipment and tableware you need
A FEW DAYS BEFORE
Prepare the turkey brine, but do not add the turkey, cover and refrigerate
Prepare food that can be made several days ahead of time, such as pie pastry and cranberry sauce
THE DAY BEFORE
Complete your food shopping
If you ordered a fresh turkey, pick it up or have it delivered
If you are brining the turkey, place it in the brine and refrigerate
Prepare dishes that can be made in advance such as soups and pies
Chop vegetables for side dishes; refrigerate in covered bowls or sealable plastic bags
Peel and cut the potatoes, place in cold water and refrigerate
Set the table
THANKSGIVING DAY
Refrigerate wines that need chilling
Prepare the stuffing and other side dishes
Prepare the turkey for roasting and put in the oven at the determined time
If you plan to stuff the turkey, do not stuff it until just before you put it in the oven
While the turkey is roasting, make the mashed potatoes
While the turkey is resting, make the gravy and cook or reheat the side dishes
Carve the turkey and serve your guests
Have a wonderful Thanksgiving!
“Work With What You Got!”
©Tiny New York Kitchen © 2018 All Rights Reserved


