The orange carrot we know and love today came originally from Holland, but up until the Middle Ages, all carrots were purple. Gardeners often delight in such oddities, but you will be very lucky to find any purple specimens available in stores or supermarkets.
Carrots contain large amounts of carotene and vitamin A, along with useful amounts of vitamins B3, C and E. When eaten raw, they also provide potassium, calcium, iron and zinc, but these are partly destroyed with cooking.
Almost all vegetables have a better flavor if they are grown organically, but this is particularly true of carrots. If possible, buy organic ones, or look for the young, pencil-thin carrots that still have their feathery tops attached. These young carrots can be eaten raw, or steamed for a few minutes. Older carrots should be unblemished and feel firm. Carrots should not be stored for too long, but they will keep for several days in a cool airy place or in the salad drawer of the refrigerator.
The age of carrots is a guide to how they should be prepared. The valuable nutrients lies either in or just beneath the skin, so if the carrots are young, simply scrub them. Medium-size carrots may need to be scraped with a knife before cooking them and large carrots will need to be scraped or peeled. Carrots can be cooked or eaten raw. To eat raw, they can be cut into julienne strips and tossed with a dressing, or grated into salads and coleslaw. They can bee cooked in almost any way you choose. As an accompaniment, cut them into julienne strips and braise in butter and cider. Roasted carrots are delicious, with a melt-in-the-mouth sweetness. Par-boil large ones first, but younger carrots can be quickly blanched or added direct to the pan with a joint of meat.
“Work With What You Got!”
© Victoria Hart Glavin Tiny New York Kitchen © 2017 All Rights Reserved
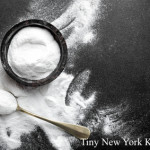
Baking soda and baking powder are used in baked goods to expand the air bubbles that are created when you cream butter and sugar or whip eggs. They do not make the bubbles themselves. Both of these leaveners depend on chemical reactions between alkali and acidic ingredients to create the carbon dioxide that leavens the batter or dough. And although their names are similar, they are not interchangeable.
Baking soda (bicarbonate of soda), an alkali, reacts with the acidic ingredients in a recipe, such as buttermilk, yogurt, sour cream, molasses, and brown sugar, to form carbon dioxide that expands the air bubbles in a batter. Batters and doughs with baking soda should be baked immediately after mixing, before the carbon dioxide can dissipate.
Baking powder does not rely on a specific combination of ingredients for its rising power. It is made from alkaline baking soda mixed with acids (often aluminum sodium sulfate and monocalcium phosphate) and a bit of cornstarch. Most baking powders are called double-acting because they are first activated when the batter is moistened, and then again from the heat of the oven. Some bakers get a metallic aftertaste from commercial baking powders made with the commonly used aluminum sodium sulfate, but there are brands without it, so be sure to check the label.
You can make your own baking powder. For 1 tablespoon baking powder, mix 2 teaspoons cream of tartar and 1 teaspoon baking soda. This mixture will be activated as soon as it is moistened, so get the batter into the oven without delay, before the carbon dioxide is exhausted.
Baking soda has a shelf life. Slip the box into a resealable plastic bag to keep out the air, taking note of the expiration date on the box, and store in a cool, dry cupboard. To check its freshness, stir 1/2 teaspoon baking soda into 2 tablespoons vinegar. If the mixture bubbles and fizzes, the baking soda is still good.
Refer to the use-by date on baking powder to estimate its shelf life and store in a cool, dry place. For a freshness test, stir 1/2 teaspoon baking powder into 1/4 cup hot tap water. If it fizzes, it’s still good.
“Work With What You Got!”
© Victoria Hart Glavin Tiny New York Kitchen © 2017 All Rights Reserved
Have you ever reached into the cavity of a fresh chicken and found it frozen inside? Poultry can be chilled to 26 degrees and still be considered fresh. Water may freeze at 32 degrees, but poultry flesh doesn’t freeze solid until it reaches 25 degrees. The extra few degrees will lengthen the shelf life of the chicken.
While many cooks are in the habit of rinsing poultry before cooking, it really isn’t necessary. You always cook poultry to a temperature that kills any harmful bacteria. In fact, it could be more dangerous to rinse the poultry, as you can end up splashing contaminated water all over the sink and kitchen counter.
After preparing poultry, reduce the chance of bacteria contamination by washing the cutting board, prep utensils, and your hands with hot, soapy water. It’s a good idea to reserve one cutting board for raw meat and poultry and a second board for other ingredients.
Broiler-fryer chickens are the all-purpose chicken, but you usually see them labeled simply as whole chicken. They used to average 3 1/2 pounds, but these days, you’ll find them up to 5 pounds, which means you get more servings per chicken. Roaster chickens tip the scales at 5 to 7 pounds, and are usually cooked whole in the oven. Even if you are serving a small group, it is worth roasting one of the larger chickens so you have leftovers for other meals.
The standard supermarket chicken is grown according to USDA standards, which allow antibiotics in the feed. Hormones and growth stimulants have been outlawed in poultry production since the 1950s.
Free-range chickens have access to the outdoors, which does not mean they live outdoors. The standards for organic chickens vary from state to state. In general, these birds, which are often also free range, must be fed organically grown feed and raised without antibiotics. Many cooks believe the flavor of free-range or organic birds is superior to that of supermarket chickens.
If you need to roast a chicken in record time, then butterfly it and roast it at a high temperature. With its entire surface exposed to the oven heat, the skin will be crisp and golden brown.
Be sure that whatever vessel you use for roasting a chicken can also be used on the stove top, so you can deglaze the drippings and turn them into a pan sauce. Enameled cast-iron baking dishes are a good choice.
You’ve paid for the entire chicken, so don’t throw anything away. The neck, heart, kidneys, and fat can be turned into quick chicken stock that will make just enough for many recipes, including a sauce for serving with the chicken. Don’t use the liver, as it will make the stock bitter. If you have butterflied the chicken, chop up the backbone and add the pieces to the stock, too. The stock won’t be as rich as a long simmered one, but it’s just fine when combined with pan juices.
Herbs are a wonderful flavoring for roast chicken, but they can burn if simply rubbed onto the skin. Combine the herbs with softened butter, and carefully slip the herb butter under the chicken skin, spreading it evenly. Roast away without worrying about singed herbs.
“Work With What You Got!”
© Victoria Hart Glavin Tiny New York Kitchen © 2017 All Rights Reserved
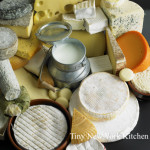
I don’t know a single person who doesn’t love the taste of melted cheese. Not every cheese oozes the same way. Some just melt better than others. When it comes to classic cheesy dishes, you want a cheese that’s going to melt into something creamy and smooth with a strong flavor.
Basically, the more moisture in a cheese, the better it melts. Cheddars and Goudas with high moisture content can make for a nice fondue. Emmental, Challerhocker, Comté, and Gruyere are excellent for making fondue as well. These cheeses beg to be melted. Their smooth, dense texture and nutty flavor make them the top choice for classic fondue. Bread, pickles, crackers, meats, and charcuterie are perfect fondue pot divers.
Cheddars are, of course, excellent for making mac & cheese, grilled cheese, and cheeseburgers. I tend to go for sharp or extra sharp Cheddars because I like to really taste the tanginess.
Soft cow’s milk cheese like Brie and Camembert don’t take much time to get to that beautiful melted soft texture. Just put them in the oven for a few minutes and you’re good to go. Because they come in their own serving vessel you can dip whatever you like in there.
“Work With What You Got!”
© Victoria Hart Glavin Tiny New York Kitchen © 2017 All Rights Reserved
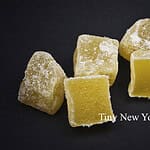
Crystallized ginger is fresh ginger that has been slowly cooked in sugar water and rolled in coarse sugar for preservation. It has a sweet, spicy taste and can easily be made at home.
“Work With What You Got!”
© Victoria Hart Glavin Tiny New York Kitchen © 2017 All Rights Reserved
I grew up in the Midwest where it was considered a mortal sin to waste food. The motto was “waste nothing and make the most of every ingredient.” Here are some ways for you and your family to make the most of ingredients that otherwise may make their way into the trash bin.
Stewed Fruit does double duty as a topping for pancakes, waffles and ice cream while giving you a serving of fruit. Get started with apples and dried fruits.
Super Stems. Don’t waste the nutrients in stems of greens like collards and kale, or vegetables like broccoli and cauliflower. Use them in longer cooking soups and stews.
Save The Soft. Baked desserts are a great way to use up slightly overripe fruit.
Use It, Don’t Lose It. When you by a special ingredient for a recipe, don’t waste what’s left. Get creative and add them to some of your favorite recipes.
Make Soup with leftovers. Vegetables, grains, and meats make wonderful soups. If you don’t have time to make soup right away, freeze the leftovers until you have a good cooking day. Don’t forget to label and date what you’re freezing for later.
“Work With What You Got!”
© Victoria Hart Glavin Tiny New York Kitchen © 2017 All Rights Reserved
Corn kernels contain a small drop of water that is stored inside a circle of soft starch. The soft starch is surrounded by the kernel’s hard outer surface. As the kernel heats up, the water begins to expand, and pressure builds against the hard starch. When this hard surface gives way, the popcorn explodes. As it explodes, the soft starch inside the popcorn inflates and bursts, turning the kernel inside out.
“Work With What You Got!”
© Victoria Hart Glavin Tiny New York Kitchen © 2017 All Rights Reserved

