
Heart healthy beets are packed with nutrients and are perfect for late winter meals. You will love them for their vibrant color, sweet flavor, and versatility.
There are just 60 calories in 1 cup of beets. While low calorie, beets are also packed with potassium, iron, vitamin C, and heart healthy nitrates. The greens are rich in vitamins A and K. Try using beets in soups and sautés.
While red beets are the most common variety, other varieties of beets do exist. Golden beets, as their name implies, are a golden yellow color. Chioggia beets contain red and white stripes on the inside, which is why they are often referred to by their nickname – candy cane beets.
To store fresh beets, separate the leaves from the root and place in separate plastic bags in the refrigerator. The greens should be used within a few days while the roots can last up to two to three weeks.
To peel uncooked beets, use a vegetable peeler to remove the thin skin. For roasted beets, use a paper towel to gently rub off the skins. This gives you a better grip and helps keep beet juice from staining your hands.
Beet juice has been used as far back as the 16th century for makeup, hair dye, and fabric dye. It’s still used commercially as a natural food coloring and clothing dye.
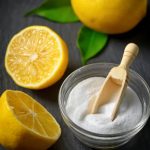
To remove beet juice stains from your cutting board, sprinkle with salt and rub with a lemon half before rinsing. You can remove stains from your hands by rubbing them with a little baking soda, then washing with soap.
Beets are high in nitrates, natural compounds that may help lower your blood pressure and help your body use oxygen more efficiently. Many pro athletes and Olympians drink beet juice to improve their performance.
Beets get their deep red color from compounds called betalains, which have strong antioxidant and anti-inflammatory properties.
37% of the recommended daily intake of folate for adults is in 1 cup of raw beets. Folate needs increase during pregnancy, as this vitamin helps babies develop in the womb, making beets a great addition to a pregnant woman’s diet.
©Tiny New York Kitchen © 2021 All Rights Reserved
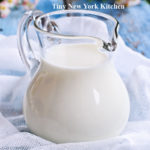
Buttermilk is a fermented dairy drink that was traditionally the liquid left behind after churning butter out of cultured cream. Today, most modern buttermilk is cultured. Cultured buttermilk was first commercially introduced in the US in the 1920s. Commercially produced buttermilk is milk that has been pasteurized, homogenized, and then inoculated with a culture of Lactococcus lactis to simulate the naturally occurring bacteria in the old-fashioned buttermilk. The tartness of cultured buttermilk is primarily due to lactic acid produced by lactic acid bacteria while fermenting lactose, the primary sugar in milk.
Condensed buttermilk and dried buttermilk are very important in the food industry. Liquid buttermilk is used primarily in the commercial preparation of baked goods and cheese. Buttermilk solids are used in ice cream manufacturing as well as being added to pancake mixes to make buttermilk pancakes.
Buttermilk reacts with the baking soda and powder to give quick breads their rise and tender crumb. The reaction is best at the beginning, you’ll want to get the loaf in the oven right after mixing the wet and dry ingredients. Buttermilk can also be used in marinating meats, especially chicken and pork, because the lactic acid helps to tenderize, retain moisture, and allows added flavors to permeate the meats.
©Tiny New York Kitchen © 2021 All Rights Reserved
Keeping a house clean is important and keeping your cleaning arsenal simple and healthy is even more important.
Store your DIY concoctions in glass bottles, which contain no harmful chemicals and are better for the environment than plastic. Look for a brown variety to help keep light from breaking down compounds within.
Use essential oils. They smell wonderful, but many plant-derived essential oils also possess antimicrobial attributes, meaning they can help negate unwanted elements such as bacteria, fungi, and viruses. Add a drop or two to a cleaning solution to amp up the aroma and the cleaning power.
All-Purpose Cleaning Spray
Make this your go-to cleaner.
1 1/4 Cups Water
1/2 Cup White Vinegar
10 Drops Essential Oil
Pour ingredients into a glass spray bottle, using a funnel if you have one, and mix contents. Spray liberally on surfaces and wipe clean with a soft cleaning cloth.
Sink Scrub
Works on porcelain, stainless- steel, acrylic, copper, stone, and solid surfaces.
2 Cups Baking Soda
20 Drops Essential Oil
Castile Soap Or Dish Soap
Put baking soda in container. Add essential oils and stir to combine. Wet sink, sprinkle scrub liberally, add a squirt or two of castile or dish soap, and scrub. Rinse thoroughly.
Glass & Mirror Cleaning Spray
Toss the blue stuff and use this instead.
2 Cups Water
2 Tablespoons White Vinegar
2 Tablespoons Rubbing Alcohol
5 Drops Peppermint Essential Oil
Pour ingredients into a glass spray bottle, attach sprayer, and shake to mix.
“Work With What You Got!”
©Tiny New York Kitchen © 2020 All Rights Reserved

Have you ever found yourself making a recipe and realize that you don’t have an ingredient that it’s calling for? Here are a few ingredient alternatives that you might have on hand instead.
Mayonnaise
For 1 cup of mayonnaise use 1 cup sour cream or 1 cup plain yogurt with a pinch of salt.
Honey
For 1/4 cup of honey use 1/4 cup maple syrup or light corn syrup.
Buttermilk
For 1 cup of buttermilk use 1 tablespoon vinegar or lemon juice mixed with enough milk or plant-based milk to reach 1 cup.
Butter
If butter is used for baking or in a solid form, solid coconut oil is a good 1 to 1 substitution. If it’s melted or for cooking use olive oil.
Oil
When it comes to oil for baking, applesauce is a great substitute. For 1 cup of oil, use 3/4 cup applesauce mixed with 1/4 cup melted butter. In cooking, any neutral refined oils like canola, olive, vegetable, corn, and peanut oils are interchangeable.
Breadcrumbs
For 1 cup of breadcrumbs use 1 cup of cracker crumbs, finely crushed potato chips, tortilla chips, or pretzels pulsed in your food processor.
Brown Sugar
For 1 cup of light brown sugar, use 1 cup white sugar plus 1 tablespoon molasses. For 1 cup of dark brown sugar, use 2 tablespoons molasses. The sugar and molasses should be mixed together thoroughly.
Baking Powder
For 1 teaspoon baking powder, stir or sift together 1/4 teaspoon baking soda plus 5/8 teaspoon cream of tartar.
“Work With What You Got!”
©Tiny New York Kitchen © 2020 All Rights Reserved

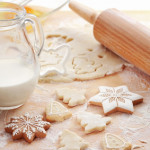
Turn out amazing treats with these easy tips and tricks to help you bake your best every time.
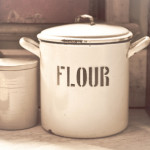
Measure Flour Accurately
Using a measuring cup to scoop directly from the bag can pack in too much flour, leading to dry, dense baked goods. Use the “spoon and sweep” method by gently stirring the flour in the bag with a spoon. Spoon the flour into your measuring cup. With the back of a knife, level off the cup and sweep the excess back into the bag.
Warm Eggs To Room Temperature
Room temperature eggs blend more easily in batter and dough, and whites whip up with bigger volume. Take eggs out of the refrigerator a couple hours before baking or add cold eggs to a large-size bowl. Cover with warm, not hot, tap water. Rest for 5 to 7 minutes while you measure other ingredients.
Test Your Baking Soda And Baking Powder
These leaveners help baked goods rise. If they aren’t active, quick breads and pancakes will be flat instead of fluffy. Spoon baking powder and baking soda into separate small bowls. Pour boiling water into baking powder. Pour distilled white vinegar into baking soda. If the ingredients fizz, they’re still active.
Measure Liquid And Dry Ingredients Separately
Too much or too little liquid can change the texture and taste of the finished recipe. Liquid measuring cups give you room to pour right up to the fill line without spilling. Use clear measuring cups with pour spouts for liquids. Use flat-bottomed measuring cups for dry ingredients and use the “spoon and sweep method.”
Prevent Overbaking
Know your oven’s quirks. All ovens run slightly differently, and some spots are hotter than others. Keep an eye on how your baked goods are browning, the temperature, and the time to make the best estimate. Use an oven thermometer to see if your oven runs hot or cold (a few degrees above or below what the dial says), and adjust accordingly. Set a kitchen timer, and check for doneness a few minutes early. Rotate your pan halfway through for even baking.
“Work With What You Got!”
©Tiny New York Kitchen © 2019 All Rights Reserved
Tips For Baking A Better Cookie
After making thousands and thousands of cookies over the years one learns a few important tricks on how to make a better cookie. Here are some tips from the Tiny New York Kitchen’s kitchen.
Making Dough:
Bring butter to room temperature for 30 minutes to 1 hour before you start (unless otherwise directed). If you’re short on time, cut the butter into pieces and microwave in 5-second intervals, just until butter is soft, but not melted.
To measure flour, spoon it into your measuring cup, then level it with a knife. If you pack flour into the cup, your cookies could turn out dry and heavy.
Check the expiration dates on your baking powder and baking soda, or test the freshness by dropping a pinch into vinegar: If the baking soda or powder foams and bubbles, it’s still good.
Use pure extracts. The imitation stuff just isn’t the same.
Baking Cookies:
Buy an inexpensive oven thermometer and adjust your oven setting accordingly.
If you’re baking more than one tray of cookies at a time, switch the positions of the pans from top to bottom halfway through baking and give each pan a 180-degree turn.
Cool and quickly wash your baking sheets between batches. If you drop dough onto a hot baking sheet, the butter will start melting instantly and the cookies could lose their structure.
Line baking sheets with parchment paper for easy cleanup.
Let cookies cool for a few minutes on the baking sheets (just until they’re firm enough to move), and then remove them to a rack to cool completely (unless otherwise directed). If you leave the cookies on the pan, they could end up too crisp.
"Work With What You Got!”
© Victoria Hart Glavin Tiny New York Kitchen
Substitution Guide
|
Ingredient |
Substitution |
|
Allspice (1 tsp.) |
1/2 tsp. cinnamon + 1/4 tsp. nutmeg + 1/4 tsp. ground clove |
|
Baking Powder (1 tsp.) |
1/4 tsp. baking soda + 1/2 tsp. cream of tartar |
|
Baking Soda (1 tsp.) |
2 tsp double-acting baking powder + replace acidic liquid ingredient in recipe with non-acidic liquid |
|
Balsamic Vinegar |
Equal amount of sherry or cidar vinegar |
|
Bread Crumbs (1 cup) |
3/4 cup cracker crumbs |
|
Brown Sugar (1 cup) |
1 Tbsp. light molasses + enough sugar to fill 1 dry measure cup or 1 cup raw sugar |
|
Butter, salted (1 cup or 2 sticks) |
1 cup or 2 sticks unsalted butter + 1/4 tsp. salt or 1 cup margarine or 7/8 cup lard or vegetable shortening |
|
Buttermilk (1 cup) |
Place 1 Tbsp. white vinegar or lemon juice in a liquid measure. Fill to 1 cup with room temp whole or 2% milk and let stand for 5 minutes or 1 cup milk + 3/4 tsp. cream of tartar or 1 cup plain yogurt |
|
Canola, Sunflower and Vegetable Oils |
Substitute one for one |
|
Chocolate, Bittersweet or Semi-Sweet (1 oz.) |
1/2 oz. Unsweetened chocolate + 1 Tbsp. granulated sugar |
|
Cocoa Powder (3 Tbsp. Dutch-processed) |
1 oz. Unsweetened chocolate + 1/8 tsp. baking soda + reduce fat in recipe by 1 Tbsp. or 3 Tbsp. natural cocoa powder + 1/8 tsp. baking soda |
|
Corn Starch (as a thickener) |
Equal amounts of Minute Tapioca for cornstarch, use slightly less for flour |
|
Cream of Tartar (1/2 tsp.) |
1/2 tsp. white vinegar or lemon juice |
|
Egg (1 whole large egg) |
3-1/2 Tbsp. thawed frozen egg or egg substitute or 2 egg whites |
|
Garlic (1 fresh clove) |
1 tsp. Garlic Salt or 1/8 tsp. Garlic Powder or 1/4 tsp. dried minced garlic |
|
Gingerroot (1 Tbsp. minced) |
1/8 tsp. ground ginger powder or 1 Tbsp. rinsed and chopped candied ginger |
|
Half & Half (1 cup) for cooking or baking |
1-1/2 Tbsp. butter or margarine + enough milk to equal 1 cup |
|
Heavy Cream (1 cup) for cooking or baking |
3/4 cup milk + 1/3 cup butter or margarine |
|
Herbs, Fresh (1 Tbsp.) |
1 tsp. dried herbs |
|
Honey (1 cup) for cooking or baking |
1 1/4 cups granulated sugar + 1/4 cup of liquid appropriate for recipe |
|
Italian Seasoning (1 tsp.) |
1/2 tsp. dried basil + 1/4 tsp. dried oregano + 1/4 tsp. dried thyme |
|
Molasses (1 cup) |
1 cup honey or 1 cup dark corn syrup or 3/4 cup light or dark brown sugar dissolved in 1/4 cup liquid |
|
Mushrooms, fresh (1 cup sliced and cooked) |
1 can (4 oz.) mushrooms, drained |
|
Mustard, Prepared (1 Tbsp.) |
1/2 tsp. dry mustard powder + 2 tsp. white vinegar |
|
Onion (1 small minced) |
1/2 tsp. onion powder |
|
Poultry Seasoning (1 tsp.) |
1/4 tsp. ground thyme + 3/4 tsp. ground sage |
|
Pumpkin Pie Spice (1 tsp.) |
1/2 tsp. ground cinnamon + 1/4 tsp. ground ginger + 1/8 tsp. allspice + 1/8 tsp. nutmeg |
|
Sour Cream (1 cup) |
1 cup plain yogurt or 1 Tbsp. lemon juice and enough evaporated milk to equal 1 cup |
|
Tomato Juice (1 cup) for cooking |
1/2 cup tomato sauce + 1/2 cup water |
|
Tomato Sauce (1 cup) for cooking |
1/2 cup tomato paste + 1/2 cup water |
|
Wine, Red (1 cup) |
1 cup nonalcoholic wine, apple cider, beef broth or water |
|
Wine, White (1 cup) |
1 cup nonalcoholic wine, white grape juice, apple juice, chicken broth or water |
|
Yogurt (1 cup) |
1 cup buttermilk or 1 Tbsp. lemon juice and enough milk to equal 1 cup or 1 cup sour cream |
"Work With What You Got!"
© Victoria Hart Glavin Tiny New York Kitchen


