
Eating well just got easier. Use one or more ingredients from each of the five categories. Stick with one international flavor profile. Find a sauce in your market’s global-foods section: ssamjang, chutney, hot sauce, salsa, pesto, chimichurri, romesco, aioli, tahini, or peanut sauce. Save money by using leftovers. Save time by using prechopped fresh vegetables.
CHOOSE A BASE INGREDIENT
1/2 Cup
Cooked Brown Rice, Quinoa, Millet, Bulgur, Farro, Barley, Whole Grain Pasta
CHOOSE A LEAN PROTEIN
3 To 4 Ounces
Cooked Meat, Poultry, Seafood, Legumes, Eggs, Tofu
CHOOSE VEGETABLES
1 To 2 Cups
Vary Colors And Textures
CHOOSE A SAUCE
1 To 3 Tablespoons
Sriracha, Harissa, Soy, Sweet Chili, Ssamjang, Chutney, Hot Sauce, Salsa, Pesto, Chimichurri, Romesco, Aioli, Tahini, Peanut Sauce
Bowl Ideas
Korean: Cooked noodles or rice, shredded carrot, sliced cucumber, sliced daikon radish, bean sprouts, sliced grilled beef, runny fried egg, ssamjang, kimchi
Middle Eastern: Cooked bulgur, roasted eggplant, roasted cauliflower, sautéed spinach, cooked chickpeas, grilled chicken, minted yogurt sauce, roasted pumpkin seeds, za’atar spice blend
Italian: Cooked faro, sautéed zucchini, sautéed kale, roasted red peppers, roasted cherry tomatoes, tuna, pesto, olives, marinated artichoke hearts, pine nuts
“Work With What You Got!”
©Tiny New York Kitchen © 2019 All Rights Reserved

Beautiful autumn! The tapestry of autumn is tinged with splendor, as nature sheds its robe of green and garbs itself in the richly textured colors of fall. As leaves begin to turn deep shades of burnt orange, russet, gold, umber burgundy, cooks seek out lavish and luscious seasonal ingredients.
Apples
Pears
Cranberries
Persimmons
Pomegranates
Cabbage
Rutabaga
Turnips
Cauliflower
Beets
Sweet potatoes
Pumpkins
Squash
“Work With What You Got!”
©Tiny New York Kitchen © 2018 All Rights Reserved

I grew up in the Midwest where it was considered a mortal sin to waste food. The motto was “waste nothing and make the most of every ingredient.” Here are some ways for you and your family to make the most of ingredients that otherwise may make their way into the trash bin.
Stewed Fruit does double duty as a topping for pancakes, waffles and ice cream while giving you a serving of fruit. Get started with apples and dried fruits.
Super Stems. Don’t waste the nutrients in stems of greens like collards and kale, or vegetables like broccoli and cauliflower. Use them in longer cooking soups and stews.
Save The Soft. Baked desserts are a great way to use up slightly overripe fruit.
Use It, Don’t Lose It. When you by a special ingredient for a recipe, don’t waste what’s left. Get creative and add them to some of your favorite recipes.
Make Soup with leftovers. Vegetables, grains, and meats make wonderful soups. If you don’t have time to make soup right away, freeze the leftovers until you have a good cooking day. Don’t forget to label and date what you’re freezing for later.
“Work With What You Got!”
© Victoria Hart Glavin Tiny New York Kitchen © 2017 All Rights Reserved
September
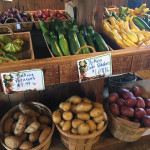
September is a wonderful time for enjoying the beautiful array at local farmers’ markets. September is a delightful time for gathering ingredients that will showcase fleeting flavors of summer. A walk among colorful baskets filled with fresh produce is incredibly inspiration.
Blazing scarlet tomatoes, sun-sweetened and fattened from their time on the vine, are joined by zesty green, bright yellow, and almost purple-colored varieties. Turn this beautiful rainbow into a final summer tomato salad by simply cutting thick slices of each colorful variety of tomato, and arranging them on a big platter. Drizzle the slices with olive oil and balsamic vinegar, sprinkle with a bit of sea salt, and finish the dish with finely minced basil.
Fill your shopping cart with crisp cucumbers, glossy purple or creamy white eggplant, pale green or buttery yellow summer squashes, string or wax beans, spicy jalapeno peppers, fragrant peaches, lush melons, sugary corn on the cob and great bunches of finely scented fresh herbs.
As September evenings grow quietly cooler, take pleasure in preparing dishes that feature these ingredients, such as nutmeg-scented roasted peaches, a delectable eggplant parmesan, velvety corn soup, garlic string beans or summer squash stuffed with ground lamb or turkey, breadcrumbs, fresh basil, oregano and parsley, cinnamon and bit of cheese. Cucumbers can be turned into simple refrigerator pickles, jalapeños can be roasted on the grill and packed away in the freezer, ensuring that a bit of summer will still be served as the season marches on.
There is also a hint of fall to be found at the farmers’ market. While all of the summer crops are still available to be savored, the new season is sneaking in. Freshly dug potatoes, dark purple plums, crisp early apples, succulent pears, Brussels sprouts, earthy mushrooms, carrots, cauliflower and kale will provide culinary creativity for weeks to come.
Cooking and eating with the seasons is the most excellent and efficient way to introduce high quality nutrients into the body. When we enjoy what nature has prepared for us, we are giving our bodies the gift of exceptionally luscious flavor, along with important healing properties. I can’t think of a better way to prepare a delicious life.
www.tinynewyorkkitchen.com
“Work With What You Got!”
© Victoria Hart Glavin Tiny New York Kitchen © 2016 All Rights Reserved

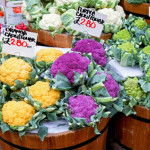
Cauliflower
Whether roasted, mashed, raw or added to pasta dishes, there’s something so comforting about cauliflower’s mild, creamy flavor. Plus, it’s one of the most nutritious vegetables around. What’s not to love?
Cauliflower is a member of the cruciferous family, along with broccoli, cabbage, and kale. These vegetables are an important part of a heart-healthy lifestyle, high in nutrients and fiber and very low in calories.
It’s easier than you might think to separate a whole cauliflower into florets, but if you’re really pressed for time, take advantage of prepared fresh or frozen cauliflower.
To prep cauliflower you will need to first remove the cauliflower’s leaves and cut out the core. Then break into evenly sized florets, cutting any very large ones. Add to a pot of boiling salted water and cook for about 5 minutes. Drain thoroughly. Rinse with cold water if you plan on using it later.
Cauliflower works great as a replacement for higher starch foods like rice, couscous, and potatoes. Steam and mash it to replace potatoes or pulse it in a food processor to create cauliflower “rice” that can be sautéed or steamed and served with curry or chili.
“Work With What You Got!”
© Victoria Hart Glavin Tiny New York Kitchen © 2015 All Rights Reserved

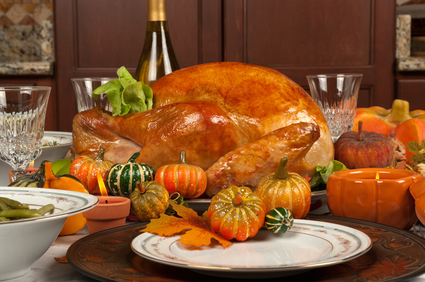
Thanksgiving is nearly here. If you’re hosting Thanksgiving dinner don’t panic. Here are some important tips that will help you get organized and ensure that your meal goes smoothly and tastes delicious. What’s important is enjoying being with family and friends.
- Plan your menu according to the number of guests you’ll have.
- Order your turkey! Just how big should your turkey be? It’s recommended to have at least 1 1/4 pounds per person. If you round up a bit from that number, you’ll be able to enjoy leftovers.
- Finish your food shopping, and pick up your turkey two days before Thanksgiving. I hope that you’re turkey is a fresh one at this point. How long does a frozen turkey take to defrost? You’ll need to allow ample time to defrost your turkey in the REFRIGERATOR. Turkeys less than 12 pounds will take as long as two days to defrost. A turkey more than 20 pounds can take up to five days to defrost.
- Prepping is important. Make pie crust and store in the refrigerator. Finish any baking (cornbread, muffins, pies). Peel and cut potatoes, and store in water in fridge. Make fresh cranberry sauce. Cut carrots, celery, onions, and mushrooms for stuffing. Sauté and store in fridge. Place white wine in fridge to get nice and chilled.
- The day before Thanksgiving prep green beans, Brussels sprouts, cauliflower, or any other vegetables, and store in a Ziploc bag in the fridge. Set the table and label serving dishes.
- Thanksgiving Day prepare stuffing and other side dishes. Prepare turkey for roasting and place in oven at determined time. If you choose to stuff the turkey, do it right before you put it in the oven. Take stuffing out of the turkey immediately after cooking. While turkey is roasting, make mashed potatoes.
- How do you know when your turkey is done? Use a meat thermometer inserted into the meatiest part of the turkey. Wait for the reading to reach at least 165 degrees. If you’ve stuffed the bird, make sure that also reaches the same temperature for food safety purposes.
- Those glorious leftovers! If you refrigerate the turkey within two hours of serving, your leftovers will last three to four days.
- Try to relax and wait for your guests to arrive.
- Have a wonderful Thanksgiving!
"Work With What You Got!"
Victoria Hart Glavin Tiny New York Kitchen
Cauliflower is nothing but cabbage with a college education. – Mark Twain

Thanksgiving Menu Guide
In the spirit of getting organized here is a Thanksgiving Menu guide that can help you plan according. Print this list out and add your own notes. Remember that the key to a successful Thanksgiving dinner is organization.
Soups & Starters
Italian Wedding Soup (Tiny Meatballs, Tortellini & Escarole)
Creamy Mushroom Soup (Rich Mushroom Broth With Sliced Mushrooms)
Sweet Potato Kale Soup (Sweet Potatoes, Corn & Peppers Simmered in Broth, Topped With Kale)
Butternut Squash Soup (Sweet Butternut Squash Simmered in a Light Vegetable Broth With Ginger & Mace)
Chicken Stock (Chicken Bones & Fresh Vegetables Simmered For Hours)
Wild Mushroom Strudel (Portabello, Shitake & Button Mushrooms Cooked With Garlic & Herbs Finished With a Mix of Goat, Mozzarella, Gruyere & Cream Cheese Wrapped In a Crispy Puff Pastry Shell
Bacon Wrapped Scallops (Sea Scallops Wrapped in Smoked Bacon)
Sides
Garlicky Greens (Steamed Kale & Chard Seasoned with Roasted Garlic)
Roasted Brussels Sprouts (Roasted Brings Out Their Natural Sweetness)
Green Beans With Almonds (Fresh Green Beans With Sliced Crisp Almonds With a Touch of Tarragon)
Creamed Spinach With Roasted Garlic (Spinach Seasoned With Nutmeg & Tossed With Cream & Garlic)
Roasted Corn Pudding (A Savory American Classic)
Roasted Butternut Squash With Dried Cranberries (Squash, Roasted With Onions & Herbs)
Cornbread Stuffing With Sausage & Spinach (Sausage In Rustic Stuffing)
Traditional New England Stuffing (Moist Bread Stuffing With Herbs & Spices)
Classic Mashed Potatoes (Velvety Smooth Made With Cream & Butter)
Maple Bourbon Sweet Potatoes (Mashed Sweet Potatoes Sweetened With a Bourbon Maple Syrup
Home-style Green Beans (Fresh Green Beans With Cherry Tomatoes)
Apple Fennel Slaw (Granny Smith Apples, Horseradish & Fennel)
Green Salad (Mixed Green Salad With Cider Dressing)
Sweet & Sour Cabbage (Red Cabbage Braised in Duck Fat)
Peas With Pearl Onions (3 Types of Peas With Pearl Onions)
Autumn Vegetable Ragout With Soft Polenta (Vegetables & Polenta)
Roasted Beets With Orange Vinaigrette (Warm Roasted Beets With Orange Dressing)
Celery Root Salad
Warm Spinach Salad With Goat Cheese & Apples
Sweet Potato & Banana Puree
Apple Bacon Cornbread Stuffing
Mashed Potatoes And Parsnips With Crisp Root Vegetable Strips
Roasted Cauliflower And Shallots With Chard & Dukkah
Brussels Sprouts and Wheat Berry Slaw With Smoked Paprika Dressing
Rich Turkey Gravy (Smooth With Deep Roasted Flavor)
Vegan Wild Mushroom Gravy (Deep, Robust Flavor From Wild Mushrooms and a Splash of White Wine)
Organic Cranberry Orange Relish (Organic Whole Berry Relish With Orange & a Touch of Cinnamon)
Brandied Cranberry Sauce With Pecans (Whole Cranberries Cooked With Pecans, Brandy & Sugar)
Main Attraction
Organic Whole Turkey (Brined or Un-brined)
Roast Turkey With Sage Butter
Cherry Glazed Turkey
Turkey Breast
Orange Pecan Cornish Hens
Vegetarian Eggplant Parmesan
Breads
Family Style Cornbread
Parker House Rolls
Boston Brown Bread
Parmesan Garlic Biscuits
Popovers
Desserts
Pumpkin Pie
Apple Pie
Blueberry Pie
Cherry Pie
Pecan Pie
Apple Crumb Pie
Carrot Cake
Pumpkin Cake
Maple Bread Pudding
Cranberry Pear Crisp
Black Mission Fig Tart
Assorted Cookies
Make Ahead Items
Many Thanksgiving dishes or parts of dishes can be made in advance which is a big help. After writing out your menu and shopping lists look to see what can be done ahead of time.
Most soups can be made 1 or 2 days before serving.
Most appetizers (or parts of them) can be made 1 day before serving.
Roux for gravy can be made several hours before using. Just mix butter and flour together, reheat and add stock and pan drippings when time to make gravy.
Vegetables can be chopped 1 or 2 days before using.
Grate cheese or spices 1 to 2 days before using.
Wash, dry, and wrap lettuce in paper towels, and store in a ziplock bag. Place in the refrigerator until ready to toss 1 day before serving.
Most salad dressings can be made 1 to 2 days before serving.
Have turkey as prepped as possible (salted, spiced and rubbed with butter, in its pan) and ready to go in the oven.
Stuffing items such as onions, celery, mushrooms, etc can be cooked 1 day before combining with bread and stuffed into the turkey.
Bread for stuffing can be cut up the day ahead and stored in a paper bag. Dried out bread is the best for stuffing.
Desserts or parts of desserts can often be made 1 to 2 days ahead such as sauces, crusts, pie filings or toppings.


Constitution Week – Foods of Our Forefathers Part V
In her food preparation and preservation, the early American housewife was tied tightly to the calendar and the clock – much more tightly than today’s homemaker is. Local availability of foodstuffs and the limitations of existing food preservation techniques meant that nature largely called the shots on timing. Fruits and vegetables had to be picked at the right moment and processed quickly. Animals had to be slaughtered at their peak to keep best, and the peak varied from animal to animal. Even cheese and butter had a better likelihood of successful preservation depending on the season of the year in which they were processed.
Weather conditions played a major role: herbs had to be picked on a dry day to retain color and flavor; slaughter had to be done in cold weather to allow the carcass to cool rapidly; milk winters produced little ice for the following summer.
Also, once begun, preservation techniques sometimes had to be carried uninterruptedly through a long and tedious series of steps. There was no turning back – or time for vacations. Hams being cured had to be turned regularly, fish being dried had to be restacked four times a day, pickles had to have their brine skimmed and changed – or the product would be lost.
The labor involved in such food preservation was frequently heavy, but the routine of the rest of the house went on as usual. Organizational ability and endurance were essential, and woe betide the housewife who didn’t “keep up appearances” with her neighbors.
Just as the make-up of the early American’s diet varied with his geographic location, so did his needs – and abilities – in food preservation.
For example, the southern areas had access to a more varied food supply over the course of the year and consequently had less need to provide stores for the hard winter. At the same time, it was more difficult and expensive to get ice for short-term protection against the warmer climate. Ice was actually shipped from Massachusetts to the Southern states and to Cuba and Jamaica in the early 19th century, but it was obviously only available to the wealthier residents. The ice-box itself didn’t become popular until the mid 1800’s.
The shorter growing season in the North reduced the variety of produce available, but it also made cold storage in root cellars practical in small towns and rural areas. Above-ground ice houses and ice-saws, invented in the mid-nineteenth century, drastically reduced the cost of storing ice into the summer, and simplified storage of dairy products, fish and meat.
In many respects, the northern colonies had the greatest difficulty in providing a nutritious, varied diet throughout the year. Although fruits, berries, and summer vegetables were plentiful from the midsummer to early fall, proving vitamin-rich foodstuffs, during the winter and spring took special care. Many food items, of course, could be stored in relatively simple root cellars – where winter temperatures hovered between 30 and 40 degrees. In especially cold weather, a large tub of water was placed on the floor. This water gave off heat as it froze, which kept the vegetables safe. Turnips, beets and squash were kept in the driest areas. Carrots would keep anywhere. Cabbages and celery were buried in sand, cauliflower was set in holes and covered with straw, while cranberries were floated in water in a tub. Other crops were arranged loosely on slatted shelves for free air circulation, sometimes lying on straw.
Some vegetables, such as summer squash and potatoes, kept better at somewhat higher temperatures, and these were usually stored in the dark basement of the home. Temperatures between 50 and 60 degrees were ideal.
Eggs could also be stored in the root cellar, or in the basement of the house. Two methods were common. In one, the eggs (which the housewife was instructed to collect “in fine weather”) were dipped in boiling water for 20 seconds, then coated all over with butter or “sweet oil” (glycerin) and packed in sawdust. They would keep this way for some two to three weeks. Other housewives kept their eggs in crocks, submerged in “water glass” (sodium silicate). In this technique, it was important not to wash the eggs first, since their shells possess a natural coating which prevented the water glass from penetrating through the shell and ruining the egg. Even stored at room temperature, such eggs would keep for several months, while the hens sulked through the dark winter days.
If a family didn’t have room for a root cellar, it could accomplish somewhat the same effect with a pit, with the vegetables in layers separated by straw, and the whole covered with earth. Obviously, retrieving vegetables thus buried was a messy chore, and needed careful planning.
Under either type of storage, frequent examination was necessary, in order to detect spoilage and eliminate those items of fruit or vegetables which had gone rotten. The proverb about “one rotten apple spoiling the barrel” was not taken lightly! In fact, many housewives wouldn’t put apples in barrels, but spread them out, in order to “pick them over” more easily as the winter progressed. Spoiling apples were cut up, and the good parts made into applesauce as the winter progressed. Early cookbooks instructed the housewife to add a teaspoon of tartaric acid to the apples when making sauce late in the winter, as the apples lost their flavor. New Englanders even had a name for the period after the vegetables had spoiled or been used up, but before the dandelion greens appeared. They called it “the six weeks want.”
In the South, storage of this sort was less necessary, and the typical New England vegetables such as Hubbard squash and turnips were rarely seen on Southern menus.
To Be Continued…

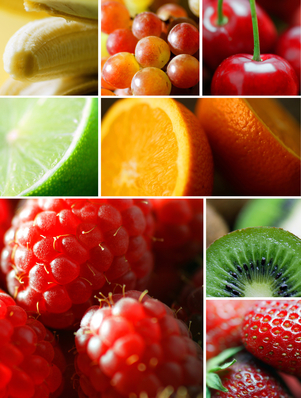 Fruit Essentials
Have you ever come home from the market after purchasing fruit to find that you spent money for nothing? I have plenty of times and it ticks me off every time. Here are some Fruit Essentials that may help you have more fruit shopping success.
Did you know that many plants that are botanically fruits are not sweet? We think of them as vegetables or non-fruits. Avocados, beans, coconuts, corn, cucumbers, eggplants, green peppers, okra, peas, pumpkins, sugar peas, string beans and tomatoes all fall in the fruit category. Some cookbooks make a distinction between fruit, vegetables and fruit vegetables. Fruit vegetables are foods that are botanically fruits, but are most often prepared and served like vegetables. These fruits are considered fruit vegetables: Aubergine, autumn squash, avocado, bitter melon, cantaloupe, chayote, chile, courgette, cucumber, eggplant, gherkin, green bean, green sweet pepper, hot pepper, marrow, muskmelon, okra, olive, pumpkin, red sweet pepper, seedless cucumber, squash, sweet pepper, tomatillo, tomato, watermelon, wax gourd, yellow sweet pepper and zucchini.
Pectin is a substance contained in some fruit which is used for making jams and jellies thicker. High pectin fruits are apples, cranberries, currants, lemons, oranges, plums and quinces. Low pectin fruits are bananas, cherries, grapes, mangos, peaches, pineapples and strawberries.
Low pectin fruits seem to discolor quicker than high pectin fruits ( bananas and eggplants). Lemon juice or vinegar slows the discoloring process. Other fruits and vegetables that discolor quickly are avocados, cauliflower, celery, cherries, figs, Jerusalem artichokes, mushrooms, nectarines, parsnips, peaches, pears, potatoes, rutabaga and yams.
Bruising: When a fruit is bruised the cell walls break down and discoloration begins. The process can be slowed down by refrigeration.
Cleaning: It is important to clean our fruit and vegetables. Rinse fruit in cold running water and scrub as needed before cooking or eating. Soaking fruit in water for more than a few minutes can leach out water soluble vitamins.
Peeling: The fruit skin usually contains a lot of important nutrients, but if you need to peel a thick-skinned fruit cut a small amount of the peel from the top and bottom. Then on a cutting board cut off the peel in strips from top to bottom. A good way to peel thin skinned fruit is to place the fruit in a bowl with boiling water and let stand for about 1 minute. Remove and cool in an ice water bath. You could also spear the fruit with a fork and hold over a gas flame until the skin cracks OR quarter the fruit and peel with a sharp paring knife or potato peeler.
Wax: Oh those beautiful waxed apples that wink at us at the market. They are beautiful because they are waxed. I don’t know about you, but I would rather not eat wax. Wax can be removed from the surface of fruits by washing them with a mild dishwashing soap and then thoroughly rinsing them. This will remove most of the wax, but probably not all of it.
Purchasing Ripe: Purchase these fruits fully ripe: Berries, cherries, citrus, grapes and watermelon. All of the fruits in this list, except berries, can be refrigerated without losing flavor.
Purchasing Not-So-Ripe: Apricots, figs, melons, nectarines, peaches and plums develop more complex flavors after picking. Store these fruits at room temperature until they are as ripe as you would like them.
Refrigeration: You can refrigerate apples,ripe mangos and ripe pears as soon as you get them. Do not refrigerat bananas.
Seasonal Fruit: Winter is the season for citrus. Fall is the season for apples and pears. Late spring is the season for strawberries and pineapples. Summer is perfect for blueberries, melons, peaches and plums.
Washing: Dry fruit with paper towels or kitchen towels and then use a blow dryer on the cool setting to completely dry fruit.
Squeezing: A microwave can be used to get more juice from citrus fruits. Microwave citrus fruits for about 20 seconds before squeezing the fruit for juice.


