
Cut Your Cooking Time In Half
Let’s face it. It takes time to cook and many of us are so incredibly busy during the day that there never seems to be enough time to cook delicious and healthy meals. We all know that it’s so much better to eat a home cooked meal nightly, but when families get home after work it might seem so much easier to order out. Here are a few tips to help make cooking at home easier. It’s mostly about planning ahead which takes the guesswork out of cooking nightly meals.
Stock Up Weekly. It’s important to plan ahead. Make a list and purchase enough groceries to get you through the week. A last minute trip to the store is a big headache.
Stock Your Pantry & Fridge. It’s so much easier to cook a meal when you have a fridge and pantry stocked with nourishing foods that are ready to cook. For example having cans of tuna, jars of olives, and dried pasta in your pantry means you can cook up a quick tuna & olive pasta dish. I also make sure to have cans of crushed tomatoes on hand for a quick pasta sauce.
Find Sister Recipes. Dishes that feature similar ingredients make planning, buying, and prep much easier. For example, you could make a big batch of brown rice to serve with a stir-fry one night, and save extras to use in burritos later in the week.
Prep Ahead. Prep is probably the biggest time consumer in cooking. Do all of your chopping and measuring when you have time. This way later in the week when you’re spread thin you will be able to whip together a meal in minutes.
Buy Some Time! If you have room in your budget, pick up pre-washed, pre-chopped fruits and vegetables. Use packaged or frozen vegetables. They are already the perfect size and cut for most recipes.
Make Your Own Frozen Meals. The next time you create a tasty meal, consider doubling the recipe. I do this often. Leftovers can be portioned out into individual containers and placed in the freezer for quick weeknight dinners and easy take to work or school lunches.
Use the Microwave. Microwaving a potato takes less than half the time of baking in the oven. Just poke a few holes in it with a fork and cook it on high for about 10 minutes. You can also steam vegetables and other dishes in just mere minutes in the microwave too.
"Work With What You Got!"
© Victoria Hart Glavin Tiny New York Kitchen

Storing Candy
One of the nice things about homemade candy is that it can be eaten when it is at its freshest. In addition, it contains no chemicals, artificial flavoring, or preservatives, although the lack of preservatives does limit its storage capabilities. Most homemade candy, however, will keep well for several weeks if it is stored properly. The exception is divinity, which gets stale quickly and should be eaten within two days of preparation.
Here are some rules for storing candy successfully.
Sticky and chewy candies, like taffy, nougat, and caramels, and hard candies, like butterscotch, should be individually wrapped in waxed paper, plastic wrap, or foil.
All candy keeps best in an airtight container in a cool, dry place. Some chocolate candies, like truffles, are best stored in the refrigerator.
Do not store brittle candies in the same container with soft, creamy candies. The moisture from the soft candies may make the hard candies sticky.
Candy freezes well. Place the candy, individually wrapped if appropriate, in a cardboard box or plastic container. Overwrap the container with freezer paper or foil. To thaw the candy, let it stand for several hours, or overnight, and come to room temperature before opening the container. This will prevent moisture from collecting on the candies because of the temperature change.
"Work With What You Got!"
© Victoria Hart Glavin Tiny New York Kitchen
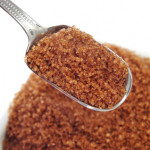
Brown Sugar
Most brown sugars are made of white granulated sugar to which a dark syrup has been added. Dark brown sugar has a mild molasses, and light brown sugar has a milder, lighter syrup, which may also be molasses. Dark brown has a slightly stronger flavor, but they may be used interchangeably.
You can easily make your own brown sugar, as you need it by blending together 1/2 cup of granulated sugar with 2 tablespoons of unsulphured molasses. The yield is equivalent to 1/2 cup of brown sugar.
Brown sugar is moist and if it dries out it will harden. It should be stored airtight at room temperature. If it has small lumps in it they should be strained out. With your fingertips press the sugar through a large strainer over a large bowl. If your brown sugar has been left open and becomes hard, place a dampened (not wet) paper towel inside the airtight container for 12 hours or more. A slice of apple can be used in place of the dampened towel.
"Work With What You Got!"
© Victoria Hart Glavin Tiny New York Kitchen

Old Fashioned Food Coloring
Next time you have a need to use food-coloring trying using natural dyes the old fashioned way. Just do what grandma did, and use fresh beet juice for red; turmeric for yellow, and blueberry juice for blue. You’ll save money and have peace of mind that you used truly natural dyes.
"Work With What You Got!”
© Victoria Hart Glavin Tiny New York Kitchen

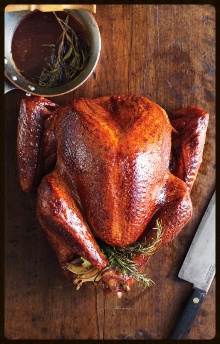
Turkey Roasting Instructions
Remove turkey from refrigerator at least 1 hour prior to roasting.
Preheat oven to 325 degrees.
Place turkey in sink and remove neck and giblets.
Place in roasting pan and brush with melted sage butter and season with kosher salt and pepper.
Place turkey in lower third of oven and roast for 12 minutes per pound.
To determine if turkey is done, place a thermometer between thigh and breast. The temperature should register between 160 to 165 degrees and juices should run clear.
When turkey is done, remove from oven, cover loosely with foil, and allow to “rest” for 30 to 45 minutes which allows you time to heat all your other side dishes.
Carve and enjoy!!
Approximate cooking times for an unstuffed turkey (based on 12 minutes per pound at 325 degrees):
9 Pound Turkey 1 3/4 Hours
12 Pound Turkey 2 1/2 Hours
14 Pound Turkey 2 3/4 Hours
16 Pound Turkey 3 1/4 Hours
18 Pound Turkey 3 1/2 Hours
20 Pound Turkey 4 Hours
22 Pound Turkey 4 1/2 Hours
25 Pound Turkey 5 Hours
"Work With What You Got!"
© Victoria Hart Glavin Tiny New York Kitchen
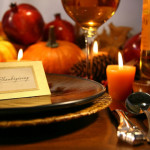
Thanksgiving is nearly here. If you’re hosting Thanksgiving dinner don’t panic. Here are some important tips that will help you get organized and ensure that your meal goes smoothly and tastes delicious. What’s important is enjoying being with family and friends.
- Plan your menu according to the number of guests you’ll have.
- Order your turkey! Just how big should your turkey be? It’s recommended to have at least 1 1/4 pounds per person. If you round up a bit from that number, you’ll be able to enjoy leftovers.
- Finish your food shopping, and pick up your turkey two days before Thanksgiving. I hope that you’re turkey is a fresh one at this point. How long does a frozen turkey take to defrost? You’ll need to allow ample time to defrost your turkey in the REFRIGERATOR. Turkeys less than 12 pounds will take as long as two days to defrost. A turkey more than 20 pounds can take up to five days to defrost.
- Prepping is important. Make pie crust and store in the refrigerator. Finish any baking (cornbread, muffins, pies). Peel and cut potatoes, and store in water in fridge. Make fresh cranberry sauce. Cut carrots, celery, onions, and mushrooms for stuffing. Sauté and store in fridge. Place white wine in fridge to get nice and chilled.
- The day before Thanksgiving prep green beans, Brussels sprouts, cauliflower, or any other vegetables, and store in a Ziploc bag in the fridge. Set the table and label serving dishes.
- Thanksgiving Day prepare stuffing and other side dishes. Prepare turkey for roasting and place in oven at determined time. If you choose to stuff the turkey, do it right before you put it in the oven. Take stuffing out of the turkey immediately after cooking. While turkey is roasting, make mashed potatoes.
- How do you know when your turkey is done? Use a meat thermometer inserted into the meatiest part of the turkey. Wait for the reading to reach at least 165 degrees. If you’ve stuffed the bird, make sure that also reaches the same temperature for food safety purposes.
- Those glorious leftovers! If you refrigerate the turkey within two hours of serving, your leftovers will last three to four days.
- Try to relax and wait for your guests to arrive.
- Have a wonderful Thanksgiving!
"Work With What You Got!"
Victoria Hart Glavin Tiny New York Kitchen

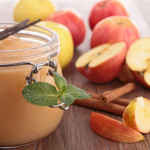
To make a refreshing, savory applesauce, I recommend using Fuji apples. There is no need to add sugar because they are extra sweet on their own. If you prefer your applesauce a bit more tart, McIntosh apples will do nicely as their tangy flavor balances with a tender texture.

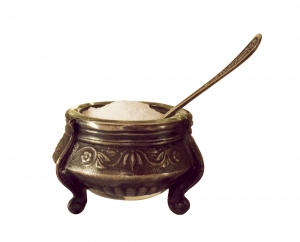 Why I Like Kosher Salt
I nearly always cook with kosher salt (coarse salt) for its ease and its pure mild flavor. It’s coarser in texture than standard table salt, but the crystals are actually fine flecks that cling to food and dissolve quickly. The large irregular flakes also make it easier to sprinkle evenly and discriminately, especially when seasoning food to taste with a pinch of the fingers. If you are substituting table salt for kosher salt in a recipe, begin with half the amount listed.
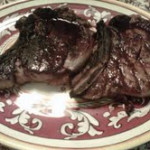
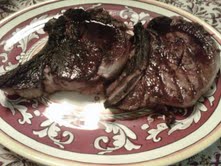 A Note About Grilled Steaks
Steak is perfect for the grill. A well marbled, cut thin and flat steak is made for searing over a bed of hot coals. A grilled steak is mouthwatering if it is brown and crisp on the outside and pink & juicy on the inside. There really isn’t an easier and less complicated dinner than a grilled steak with a green salad on the side. Plus, the cleanup is practically effortless. Most any cut of steak is great for grilling. The classics are rib eye, New York, filet, tenderloin and porterhouse. The lesser cuts are cheaper and usually every bit as tasty if they are marinated. A flatiron, chuck, skirt steak, hangar steak, top sirloin or tri-tip are lesser cuts of steak that I tend to marinate overnight. Steaks can be grilled as a single portion or larger steaks can be grilled whole and sliced for more than one. A steak is best cut 1 to 2 inches thick. If a steak is thinner, then the inside will be overdone before the outside is properly seared. If a steak is thicker then the outside, it will start to char before the inside is ready. Trim off all but a fourth of an inch layer of fat. The less dripping fat means fewer flare-ups.
Seasoning a steak is simple. All you really need is kosher salt and freshly ground black pepper. Some people like an herb crust. Chopping fresh herbs together in any combination is great. You can combine thyme, rosemary, oregano and/or oregano; however, you should always use rosemary. Mix the fresh herbs with kosher salt and freshly ground pepper. Rub onto the steak with some olive oil an hour or so before grilling. You should take the steaks out of the refrigerator about 1 hour before grilling to allow the steaks to come to room temperature.
Clean your grill with a wire brush and then prepare a hot fire. Oil the grill and put on the steaks. Your grill should be so hot that you shouldn’t be able to tolerate the heat for more than a couple seconds. Cook for 5 to 6 minutes. Turn the steaks over and cook for another 5 to 6 minutes. If your steak has a border of fat then turn this onto the grill by holding the steak up with your tongs. Sear the fat for 1 to 2 minutes. After you flip your steaks you should start checking for doneness after about 2 minutes. Press the back of your tongs into the steak. If it is rare it will be soft. If it springs a bit then it is medium rare. If it is resilient then it is well done. Keep testing by using the “back of the tong” method. You can check by cutting into the steaks, but I really think that it is better not to cut into the steaks. Keep working on the “back of the tong” method and you will become a good judge pretty quickly. I think that it is a good idea to take the steaks off of the grill when they are a little less done than you want them to be. They will continue to cook while they rest. A 1 inch steak will be grilled rare in about 8 minutes and for medium it should take about 12 minutes. Check your fire while the steaks are cooking. Move the coals as needed to make the fire hotter or cooler. If your fire flares up then move the steaks out of the flames right away or the fire will burn up your steak. This will form a black and acrid crust. When you remove your steaks from the grill let them take a little rest for a few minutes before serving. Resting stabilizes the internal juices so that they don’t run out excessively when you cut into the steaks. If you are not going to serve right away, make sure to cover loosely with aluminum foil to help keep warm. Don’t seal tightly or they will continue to cook.
Happy Grilling!


