
You may substitute any berries for this delicious mug cake.
“Work With What You Got!”
©Tiny New York Kitchen © 2019 All Rights Reserved
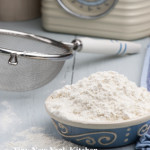
Have you ever wondered what the difference between cake flour, bread flour, and pastry flour is? Is it ok to substitute all-purpose flour that call for a specific flour type? These are questions that I get asked often.
Choosing the correct flour is about controlling the amount of gluten in your dough. Gluten is a protein structure that makes dough both firm and elastic. Bread flour comes from “hard” flour, which has a higher protein content (produces more gluten) making it perfect for bread, pizza dough, and any recipe that needs a little more elasticity and cohesion.
Pastry flour is made with “soft” flour, which has a much less protein content and produces less gluten. Dough made with pastry flour is tender, flaky and doesn’t hold together firmly. That’s a good thing because no one wants a rubbery piecrust! Cake flour has even less protein content than pastry flour, but not by much. It has just enough protein to give the cake a little structure, but not enough to make it tough.
All-purpose flour is a blend of “hard” and “soft” flours, which falls in the middle of the gluten spectrum, and works well in most baked goods. Your cakes might not be quite as tender, but in most cases they’ll still come out beautifully. It’s all a matter of degree. Cookies, piecrusts, muffins, quick breads, and scones all do well with all-purpose flour.
Gluten development is also the reason why recipes instruct you not to over mix your dough. Once you add water or any other low-fat liquid to flour, gluten bands start forming and the more you knead or stir the dough, the more these elastic bands start connecting. If you are using all-purpose flour in a cake or piecrust, make sure to stop mixing just when everything comes together.
“Work With What You Got!”
©Tiny New York Kitchen © 2018 All Rights Reserved
These little tweaks really do add up to lighter and more nutritious meals.
CUT CARBS
All types of vegetable noodles, from beet to squash, are available in the produce aisle or make your own. Serve in place of pasta or mix with whole-wheat spaghetti to bump up the fiber and cut calories.
SAY YES TO YOGURT
Creamy and delicious, yogurt is a great way to add calcium and probiotics to dishes that require cream or mayonnaise. Enjoy it baked into muffins, stirred into sauces, or whisked into dressings.
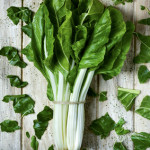
GO GREEN
Greens like kale, collards, and Swiss chard bring color and nutrients to your plate. Stir them into soups, sauté them for a side, or add them to sandwiches.
“Work With What You Got!”
©Tiny New York Kitchen © 2018 All Rights Reserved

Pumpkins range in size from small, creamy white specimens to giant orange globes. Ever so useful as autumnal décor, pumpkins are a versatile and vital source of healthy nutrition.
This festive fall fruit offers a rich source of vitamin C and potassium, both of which may be effective at lowering the risk of heart disease, as well as normalizing blood pressure. The brilliant orange hue of many pumpkin varieties is the result of an abundance of beta-carotene, an antioxidant that transforms into vitamin A in the body. This vitamin may have an effect on boosting the efficiency of immune systems, as well as helping to repair free radical damage to cells.
Pumpkin adds a fabulous, smooth, silky texture and unique flavor to risotto, soup, muffins, cakes, breads, stews, chili, pasta, shakes and so much more. Fresh pumpkin is delightfully delicious and contains an added bonus; pumpkin seeds! Also known as pepitas, roasted pumpkin seeds are lightly crunchy, little gems that are a potent source of zinc, which may be helpful in promoting prostate health.
Pumpkin seeds also offer a significant amount of magnesium, phosphorous, copper, iron, manganese, and omega-3 fatty acids, which may help relieve symptoms of high cholesterol, depression, high blood pressure, and arthritis.
“Work With What You Got!”
© Victoria Hart Glavin Tiny New York Kitchen © 2017 All Rights Reserved

Just a few fresh berries add color and nutrients to a salad, cocktail, or mocktail.
Stock up on fresh berries, wash and freeze them in a single layer on a sheet pan. Then transfer to a freezer bag for future smoothies and baked goods.
Add a handful of berries to a parfait, with yogurt for breakfast or ice cream for dessert.
Gently fold berries into muffin and pancake batter. Cook a big batch and freeze some for easy breakfasts later.
Make into a savory salsa and serve as a dip or over grilled chicken or wild-caught salmon.
“Work With What You Got!”
© Victoria Hart Glavin Tiny New York Kitchen © 2017 All Rights Reserved

Love The Lumps!
Don’t use an electric mixer when combining wet and dry muffin ingredients. Beating will cause gluten to overdevelop, which will produce tough muffins. Mix just enough to wet the dry ingredients; a lumpy batter is the goal.
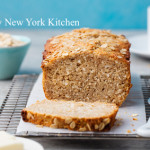
Quick Breads
For mouth-watering breads that don’t require a lot of time, turn to quick breads. By using baking powder, baking soda, steam, or air instead of yeast to leaven dough. An advantage of quick breads is their ability to be prepared quickly and reliably, without requiring time-consuming skilled labor and the climate control needed for traditional yeast breads. Quick breads include banana bread, beer bread, biscuits, cornbread, cookies, muffins, cakes, pancakes, brownies, scones, and soda bread.
Almost all quick breads have the same basic ingredients: Flour, leavening, eggs, fat (butter, margarine, shortening, or oil) and a liquid such as milk. Ingredients beyond these basics are added for variations of flavor and texture. The type of bread produced varies based predominantly on the method of mixing, the major flavoring, and the ratio of liquid in the batter. Some batters are thin enough to pour and others are thick enough to mold into lumps.
There are four main types of quick bread batter:
Pour Batters: Such as pancake batter, have a liquid to dry ration of about 1:1 and so pours in a steady stream – also called a “low-ratio” baked good.
Drop Batters: Such as cornbread and muffin batters, have a liquid to dry ratio of about 1:2.
Soft Doughs: Such as many chocolate chip cookie doughs, have a liquid to dry ratio of about 1:3. Soft doughs stick significantly to work surfaces.
Stiff Doughs: Such as pie crust and sugar cookie doughs, have a liquid to dry ratio of 1:8. Stiff doughs are easy to work in that they only minimally stick to work surfaces, including tools and hands – also called “high-ratio” baked goods.
Preparing a quick bread generally involves two mixing containers. On contains all dry ingredients (including chemical leavening agents or agent) and one contains all wet ingredients (possibly including liquid ingredients that are slightly acidic in order to initiate the leavening process). In some variations, the dry ingredients are in a bowl and the wet ingredients are heated sauces in a saucepan off-heat and cooled.
During the chemical leavening process, agents (one or more food-grade chemicals – usually a weak acid and a weak base) are added into the dough during mixing. These agents undergo a chemical reaction to produce carbon dioxide, which increases the baked good’s volume and produces a porous structure and lighter texture. Yeast breads often take hours to rise, and the resulting baked good’s texture can vary greatly based on external factors such as temperature and humidity. By contrast, breads made with chemical leavening agents are relatively uniform, reliable, and quick. Usually, the resulting baked good is softer and lighter than traditional yeast breads.
Chemical leavening agents include a weak base, such as baking soda (sodium bicarbonate) plus a weak acid, such as cream of tartar, lemon juice, or cultured buttermilk, to create an acid-base reaction that releases carbon dioxide. Quick bread leavened specifically with baking soda is often called “soda bread.” Baking powder contains both an acid and a base in dry powdered form, and simply needs a liquid medium in which to react. Other alternative leavening agents are egg whites mechanically beaten to form stiff peaks, as in the case of many waffle recipes, or steam, in the case of cream puffs.
There are three basic methods for making quick breads, which may combine the “rise” of the chemical leavener with advantageous “lift” from other ingredients.
The Stirring Method: Also known as the quick-bread method, blending method, or muffin method is used for pancakes, muffins, corn bread, dumplings, and fritters. This method calls for measurement of dry and wet ingredients separately, then quickly mixing the two. Often the wet ingredients include beaten eggs, which have trapped air that helps the product to rise. In these recipes, the fats are liquid, such as cooking oil. Using mixing is done using a tool with a wide head such as a spoon or spatula to prevent the dough from becoming over-beaten, which would break down the egg’s lift.
The Creaming Method: Frequently used for cake batters. The butter and sugar are “creamed” or beaten together until smooth and fluffy. Eggs and liquid flavorings are mixed in, and finally dry and liquid ingredients are added in. The creaming method combines rise gained from air bubbles in the creamed butter with the rise from the chemical leaveners. Gentle folding in of the final ingredients avoids destroying these air pockets.
The Shortening Method: Also known as the biscuit method, is used for biscuits and scones. This method cuts solid fat (whether lard, butter, or vegetable shortening) into flour and other dry ingredients using a food processor, pastry blender, or two hand-held forks. The layering from this process gives rise and adds flakiness as the fold of fat melts during baking. This technique is said to produce “shortened” cakes and breads, regardless of whether or not the chosen fat is vegetable shortening.
Quick bread originated in the United States at the end of the 18th century. Before the creation of quick bread, baked goods were leavened with either yeast or by mixing dough with eggs. The discovery of chemical leavening agents and their widespread military, commercial, and home utilization in the United States dates back to 1846 with the introduction of commercial baking soda in New York by Church and Dwight of “Arm & Hammer” fame. This development was extended in 1956 by the introduction of commercial baking powder in Massachusetts, although the best known form of baking powder is “Calumet”, which was first introduced in West Hammond and Hammond, Indiana (later Calumet City, Illinois) in 1889. Both forms of food-grade chemical leaveners are still being produced under their original names.
During the American Civil War (1861-1865) the demand for portable and quickly made food was high, while skilled labor for traditional bread making was scarce. This encouraged the adoption of bread, which was rapidly made and leavened with baking soda, instead of yeast. The shortage of chemical leaveners in the American South during the Civil War contributed to a food crisis.
As the Industrial Revolution accelerated, the marketing of mass-produced prepackaged foods was eased by the use of chemical leaveners, which could produce consistent products regardless of variations in source ingredients, time of year, geographical location, weather conditions, and many other factors that could cause problems with environmentally sensitive, temperamental yeast formulations. These factors were traded off against the loss of traditional yeast flavor, nutrition, and texture.
www.tinynewyorkkitchen.com
“Work With What You Got!”
© Victoria Hart Glavin Tiny New York Kitchen © 2016 All Rights Reserved
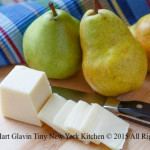
Bartlett Pears
Bartlett pears are the only pears that change color when they’re ripe. Eat them out of hand like an apple, slice them onto a salad, or present on a platter with cheese & nuts. Poach them in fruit juice, or bake them into tarts, quick breads, or muffins.
In 17th century England, a schoolmaster named John Stair sold some pear tree cuttings to a grower named Williams, who quite narcissistically named the variety after himself. The Williams Pear became a staple variety, and when brought to the New World at the end of the 18th century, one Enoch Bartlett of Massachusetts planted it on his farm. Mr. Bartlett named it after himself and, from then on, throughout the United States, the Williams Pear became known as the Bartlett Pear.
“Work With What You Got!”
© Victoria Hart Glavin Tiny New York Kitchen © 2015 All Rights Reserved
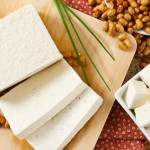
How To Eat More Protein On A Meat-Free Diet
If you’re new to a meat-free diet or you struggle with ways to get the protein you need here are some important tips that may help you. It really isn’t as hard as you might think.
Snack on protein rich munchies and skip the carbs. Eat roasted chickpeas, edamame, roasted peanuts, or raw nuts. Keep away from heavily salted nuts.
If you’re looking for a frozen treat then purée coconut milk, almond butter, cashew butter, honey, and cocoa powder. Freeze in an ice cream maker for a protein rich frozen treat.
Make an easy cream sauce by whisking cashew butter with vegetable stock, garlic, and minced parsley. Toss with cooked pasta.
Crumble tempeh (fermented soybean protein) into pasta sauce or soups, or wherever you might use hamburger meat.
Purée cooked black beans and add to brownies. For blondies or light colored muffins or cakes, use cooked, puréed chickpeas.
Sprout sunflower seeds and add them to salads. Just soak raw seeds overnight in water to cover. Drain and let sprout for 24 to 48 hours.
Add ground flaxseeds to muffins, waffles, breads, or cookies for a protein boast and added omega 3 fats.
Make a protein packed pudding. Purée silken tofu with cocoa powder, honey, and vanilla extract.
Use hemp or rice protein powder instead of flour to make waffles, pancakes, and baked goods. Instead of eggs, use flax as a binder.
Lentils are awesome! Eat lentils more often. They are fast cooking and easy to use. Add to soups, toss in salads, and stir in cooked rice.
Spread sandwiches and wraps with hummus instead of mayonnaise. I do this all the time. Purée hummus with roasted red peppers or chipotle peppers for an added zing.
If you can tolerate gluten, seitan (wheat protein) is a great substitute for sliced deli meat. Use it in wraps or sandwiches for an easy lunch.
“Work With What You Got!”
© Victoria Hart Glavin Tiny New York Kitchen

Thanksgiving is nearly here. If you’re hosting Thanksgiving dinner don’t panic. Here are some important tips that will help you get organized and ensure that your meal goes smoothly and tastes delicious. What’s important is enjoying being with family and friends.
- Plan your menu according to the number of guests you’ll have.
- Order your turkey! Just how big should your turkey be? It’s recommended to have at least 1 1/4 pounds per person. If you round up a bit from that number, you’ll be able to enjoy leftovers.
- Finish your food shopping, and pick up your turkey two days before Thanksgiving. I hope that you’re turkey is a fresh one at this point. How long does a frozen turkey take to defrost? You’ll need to allow ample time to defrost your turkey in the REFRIGERATOR. Turkeys less than 12 pounds will take as long as two days to defrost. A turkey more than 20 pounds can take up to five days to defrost.
- Prepping is important. Make pie crust and store in the refrigerator. Finish any baking (cornbread, muffins, pies). Peel and cut potatoes, and store in water in fridge. Make fresh cranberry sauce. Cut carrots, celery, onions, and mushrooms for stuffing. Sauté and store in fridge. Place white wine in fridge to get nice and chilled.
- The day before Thanksgiving prep green beans, Brussels sprouts, cauliflower, or any other vegetables, and store in a Ziploc bag in the fridge. Set the table and label serving dishes.
- Thanksgiving Day prepare stuffing and other side dishes. Prepare turkey for roasting and place in oven at determined time. If you choose to stuff the turkey, do it right before you put it in the oven. Take stuffing out of the turkey immediately after cooking. While turkey is roasting, make mashed potatoes.
- How do you know when your turkey is done? Use a meat thermometer inserted into the meatiest part of the turkey. Wait for the reading to reach at least 165 degrees. If you’ve stuffed the bird, make sure that also reaches the same temperature for food safety purposes.
- Those glorious leftovers! If you refrigerate the turkey within two hours of serving, your leftovers will last three to four days.
- Try to relax and wait for your guests to arrive.
- Have a wonderful Thanksgiving!
"Work With What You Got!"
Victoria Hart Glavin Tiny New York Kitchen


