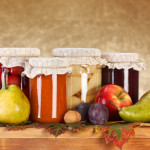
Many of us are preserving summer’s bounty to enjoy during colder months.
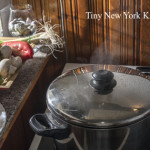
Here are tips on how to preserve using the hot water bath method. It’s really not difficult if you follow these easy steps.
High acid foods like tomatoes, pickles, salsa, jelly, pie filling, jam, fruit, and chutney are great for canning using the hot water bath method.
Preheat Jars
Fill water bath canner (or large pot) to cover empty jars by at least 1 inch of water. Heat jars to simmer (180 degrees F) to prevent jar breakage.
Fill Jars
Following a canning recipe, fill a hot jar with prepared food leaving enough space between the food and the rim (headspace) as indicated in the recipe.
Tighten Lids And Bands
Wipe any food from the rim of the jar. Center new lid on the jar, then twist on band just until fingertip tight.
Process Jars
Place filled jars onto rack in simmering water. If you don’t have a rack designed for home preserving, use a cake cooking rack. Filled jars should be covered by 1 inch of water. Place lid on canner and heat to a steady boil. Boil jars for the time specified in recipe. Adjust for high altitudes.
Altitude Adjustment
1,001 to 3,000 ft increase processing time 5 minutes; 3,001 to 6,000 ft increase 10 minutes; 6,001 to 8,000 ft increase 15 minutes; 8,001 to 10,000 ft increase 20 minutes.
Cool Down
Turn off heat and remove canner lid. Let jars stand in water for 5 minutes. Remove from water and cool jars upright on cutting board, wire rack or towels on countertop for 12 to 24 hours.
Check The Seal
After cool down, press on center of lid. If jar is fully sealed, the lid will NOT flex up or down. Remove the bands and gently attempt to lift lids off with your fingertips. Properly sealed lids will remain attached. Wipe canning jars, lids, and bands clean. Store sealed jars in pantry for up to 18 months. Jars may be stored with or without bands. If a lid fails to seal within 24 hours, immediately refrigerate the food product.
©Tiny New York Kitchen © 2020 All Rights Reserved
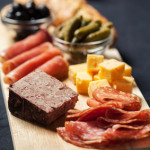
A Charcuterie Board makes entertaining super easy. Whether you call it a charcuterie plate or a charcuterie board, it’s easy to make when you begin with quality smoked, cured, and cooked meats. The perfect charcuterie board will contain at least 3 to 5 types of charcuterie representing different styles and textures, an assortment of cheese, plus something acidic, like pickles and olives, and something sweet like fruit chutney to complement the flavors. Nuts, fresh and dried fruits, bread, and crackers also make wonderful accompaniments.
Start with a wooden board, plate, platter, or piece of slate as the base.
Choose at least 3 to 5 charcuterie items that represent various styles and textures: smoked and meaty, dry-cured and firm, cooked and creamy. Allow two ounces per person, and slice your charcuterie into easily manageable, bite-sized pieces.
Spread the pieces out on the board, leaving space between them for accompaniments.
Add mustard, cornichons, olives, or chutney, so the acidity can balance the fat in the charcuterie.
Fresh fruits like grapes, figs, sliced pears, and apples, and any dried fruits like raisins, currants, apricots, cherries, and pears will round out the board, and add color. Use the fruits as palate cleansers between bites of charcuterie.
Place sliced bread, or various types of crackers, around the edges of the board, or tuck them between sections of charcuterie.
Cheese is a welcome addition to a charcuterie board. Choose 2 to 3 types of different textures to complement the spread.
Add truffle butter, which is especially tasty on a slice of bread with dry-cured meats like saucisson sec.
A hearty red wine makes a good accompaniment, such as Côtes-du-Rhône, Gigondas or Madiran.
Types Of Charcuterie To Consider:
Prosciutto: Probably the most recognizable pork offering on the list. Each region of Italy has its own signature recipe and flavor profile, but the most common are from Parma, Tuscany, and San Daniele. Culatello is a boneless cousin of prosciutto with a higher meat-to-fat ration. If you’d like to avoid the fat, Spanish lomo and Italian lonzaare alternatives made with pork loin.
Soppressata: We like to think of soppressata as the adult pepperoni. This salumi is generally made from dry-cured, coarse ground pork with red pepper flakes from Southern Italy, though regional variations do exist.
Finocchiona: Packed with fennel seeds, this skinny Italian salami was first created during the Renaissance. If you’re not a fan of anise, try French saucisson sec, made with garlic and pepper.
Chicken Liver Mousse: This creamy, butter spread is a nice introduction pâté for those who are new to offal.
Pork Rillette: If you love pulled pork then this is for you. This rillette is slow cooked with spices, cut up, often pounded into a paste and topped off with rendered fat.
Speck: This lightly smoked prosciutto comes from Northern Italy. Also, worth getting is guanciale, cut from the jowl, or a spice-cured fatback called lardo.
Chorizo Picante: A Spanish pork salami, chorizo picante is spiced with hot paprika, not to be confused with the fresh chorizo sausages of Latin America.
Coppa: Short for capocollo, coppa is an Italian and Corsican dry-cured pork neck and shoulder salume (capo is Italian for head, while collo means neck). A spicy version is also available.
Duck Rillette: In this rillette, duck leg confit is shredded before being mixed with spices and Armagnac. It’s then crowned with duck fat, which is more delectable and slightly lower in saturated fats than pork.
Mousse du Périgord: A signature creation of Les Trois Petits Cochons, a famed charcuterie formed in New York City’s Greenwich Village, this blend of chicken and turkey livers is infused with herbs and bits of black truffle. Expect a bite that’s silky and smooth, with a top layer of aspic, a meat jelly.
Jamón Ibérico de Bellota: This is where jamon reaches its peak. It’s a Spanish ham where the pigs are allowed to graze acorns and herbs freely, which gives the meat a very unique aroma. A more affordable version is jamón serrano. For a woodsy addition, Bauernschinken is a similar option that’s smoked with juniper.
Bresaola: An air-dried beef round from Northern Italy’s Lombardy region.
Black Truffle Salami: Creminelli offers a tartufo salami that’s delicious. It’s embedded with summer truffles whose flavors and aroma integrate beautifully with the pork.
Rabbit Rillette: Versions of this rillette can be perfumed with juniper, mace and/or thyme. Rabbits aren’t as fatty as other animals, so these are often topped with duck fat.
Pâté de Campagne: Country pâté can be tough for some people because of its visible parts of offal and fat. Trust in a high-quality pâté that showcases beautiful chunks of ham. For an impressive upgrade, try pâté en croûte, a rustic loaf of pâté wrapped in pastry.
Tips For Serving:
Charcuterie can be enjoyed as an appetizer or a meal. If you want prosciutto for breakfast, go for it. For entertaining, charcuterie is a popular option because it can be put together ahead of time and covered with plastic wrap.
Remove all inedible material like twine, cloth, and tough salami casing before slicing.
Cubes are fine for cheese and cold cuts, but chunky charcuterie might be hard to bite or deliver too much salt per portion. Salted cured meats are best sliced thin and served immediately.
When you place charcuterie, drape each slice like you just shaved it yourself. Not only does it look attractive, it keeps each piece separated so that guests won’t struggle to peel them apart.
Choose a flat board or platter so everything can get picked up with tongs or a fork. It’s especially important if anything needs to be sliced, like a loaf of pâté.
Lipped, round serving trays are great if there are jars, small bowls, or ramekins that may be prone to slipping. To prevent small containers from sliding, wet a small cocktail napkin and fold it so it is hidden beneath the container.
Eat sliced meats with your hands, forks, or toothpicks. Don’t forget a knife for the pâté and rillettes.
Have fun with thin sliced meats by wrapping them around melon, asparagus, batons of cheese or grissini.
Since charcuterie tends to be in the red-brown range of the color spectrum, lay down a bed of sturdy greens like arugula as a base. In addition to being visually impressive, it makes cleaning much easier.
Invite cultured butter and cheese to the party. Let butter soften to room temperature so it’s easy to spread. Cheese from the same regions as your meats will complement each other nicely.
“Work With What You Got!”
©Tiny New York Kitchen © 2019 All Rights Reserved
I don’t know a single person who doesn’t love the taste of melted cheese. Not every cheese oozes the same way. Some just melt better than others. When it comes to classic cheesy dishes, you want a cheese that’s going to melt into something creamy and smooth with a strong flavor.
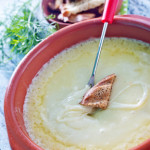
Basically, the more moisture in a cheese, the better it melts. Cheddars and Goudas with high moisture content can make for a nice fondue. Emmental, Challerhocker, Comté, and Gruyere are excellent for making fondue as well. These cheeses beg to be melted. Their smooth, dense texture and nutty flavor make them the top choice for classic fondue. Bread, pickles, crackers, meats, and charcuterie are perfect fondue pot divers.
Cheddars are, of course, excellent for making mac & cheese, grilled cheese, and cheeseburgers. I tend to go for sharp or extra sharp Cheddars because I like to really taste the tanginess.
Soft cow’s milk cheese like Brie and Camembert don’t take much time to get to that beautiful melted soft texture. Just put them in the oven for a few minutes and you’re good to go. Because they come in their own serving vessel you can dip whatever you like in there.
“Work With What You Got!”
© Victoria Hart Glavin Tiny New York Kitchen © 2017 All Rights Reserved
Rosh Hashanah
Rosh Hashanah is the Jewish New Year (the first day of the Jewish High Holy Days) and is also known as the Feast of Trumpets. The holiday , which is also a day of remembrance, is at once solemn and festive. Joy comes not only from trust in God’s compassion, but also the anticipation of renewal and fresh starts.
The Rosh Hashanah meal becomes more than mere rejoicing as it is also a form of prayer. The table is transformed into an altar to supplicate God, partaking of symbolic foods: honeyed and sugared treats for a sweet year; round foods for a fulfilled year, unbroken broken by tragedy; foods that grow in profusion at this season and those eaten in abundance, such as rice, signifying hopes for fecundity, prosperity, and a wealth of merits.
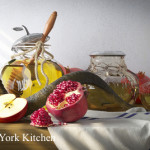
Dinner begins with a prayer for a sweet year, dipping challah, or other sweet bread, and apples into fragrant honey. Some start with sugared pomegranates, dates, figs, or quince in rose petal syrup.
It is customary for the first course to be fish, which symbolizes fertility and God’s blessings. Seasonal vegetables like leeks, Swiss chard, black-eyed peas, and pumpkins appear throughout the meal in major and supporting roles. Delicious main dishes follow, and usually two or more sweet desserts (such as a plum tart, honey cake, or noodle kugel) conclude the meal.
A few foods, however, are unwelcome at the Rosh Hashanah table. Many Ashkenazi Jews do not eat nuts (because the numerical value of the Hebrew word for nuts is equal to the value of the word for sin). Others do not eat pickles, horseradish, or other sour foods, while Moroccans avoid foods that are black, like olives and grapes (which are considered bad omens).
“Work With What You Got!”
© Victoria Hart Glavin Tiny New York Kitchen © 2016 All Rights Reserved
English Stew (1860)
English stew is the name given to the following excellent preparation of cold meat. Cut the meat in slices, pepper, salt, and flour them, and lay them in a dish. Take a few pickles of any kind, or a small quantity of pickled cabbage, and sprinkle over the meat. Then take a tea-cup half full of water; add to it a small quantity of the vinegar belonging to the pickles, a small quantity of catsup, if approved of, and any gravy that may be set for use. Stir all together and pour it over the meat. Set the meat before the fire with a tin behind it, or put it in a Dutch oven, or in the oven of the kitchen range, as may be most convenient, for about half an hour before dinner-time. This is a cheap, simple way of dressing cold meat.
“Work With What You Got!”
© Victoria Hart Glavin Tiny New York Kitchen © 2016 All Rights Reserved
Labor Day Weekend is the perfect weekend for a picnic. To celebrate the end of summer I’ve organized a feast of some of America’s favorites – from fried chicken to chocolate cake, cheeseburgers to homemade strawberry ice cream.
Parsley Potato Salad
Mushroom Artichoke Salad
Chile-Spiced Bean Salad
Crusty Parmesan Chicken Breasts
Deviled Eggs
Pickled Beets
Barbecued Cheeseburgers
Tomatoes
Radishes
Lettuce
Red Onions
Pickles
Olives
Chocolate Buttercream Cake
Strawberry Ice Cream
Strawberries
Beer
Lemonade
Coffee
Packing the picnic: The salads can be prepared a day in advance. It’s probably not necessary to double the recipes unless you have a large crowd to feed. Be sure to include a serving spoon for each salad. The Crusty Parmesan Chicken Breasts can be served either cold or warm. Either bake it a day ahead, refrigerate it, and carry it in a cooler; or pop it in the oven about an hour before you leave and transport it hot. The deviled eggs can be made from your favorite recipes or one from Tiny New York Kitchen. They will need several hours to chill and must be packed in a cooler, along with the assortment of vegetables (each in a plastic container). Take along a basket or platter for the chicken, a tray for the eggs, and serving forks.
All of the barbecue equipment can travel in a sturdy cardboard box, if there’s room, lay the buns and cheese on top so they don’t get squished. The hamburgers and condiments should be packed in a cooler.
You can bake the cake and prepare the frosting well in advance; both can be stored in the freezer. After thawing, the frosting should be beaten for a few minutes with an electric mixer. A round plastic serving plate with a high, tight-fitting cover is ideal for transporting the cake; remember to carry along a knife and a cake server.
In a cooler, pack the ice cream custard, berry mixture, and ice, each in its own container. Take a hammer and large, heavy dishtowel for crushing the ice cubes, and rock salt for the ice cream freezer (which would be a non-electric one). Pack the fragile ice cream cones and berries for garnish last.
Keep the beer in the cooler. For the lemonade and coffee, you will need a couple of thermoses. Preheat the one for the coffee; don’t forget to take cream (kept cold) and sugar. Pre-chill the other thermos and fill it with cold lemonade.
At the site: Assemble the ice cream freezer and begin hand-cranking, taking turns so that everyone can participate. If the ice cream is ready before it’s time for dessert, remove the dasher, cover the container, and let it stay in the freezer to ripen; don’t forget to dump out the salty water and pack the freezer with fresh ice.
Fire up the barbecue about 30 minutes before you want to begin cooking. Grill the cheeseburgers when the coals are gray. Arrange the chicken in a basket, set out the rest of the food, and dig in.
It’s that time again! Time to can jams, jellies, fruits, tomato sauces, pickles, vegetables and whatever else you can think up. The good news is that canning is making a comeback as new generations discover the joys of serving and sharing home preserved foods. Here are some basic guidelines to follow for safe and delicious results.
Equipment
Boiling Water Canner
I like to use a Boiling Water Canner and not a pressure canner. A boiling water canner (or water bath) is used for fruits, jams, jellies, pickled vegetables, pickles, relishes and tomatoes. It is a large pot that has a lid and a rack designed to hold canning jars. Any large cooking pot can be used if it has a rack, a tight fitting lid and enough depth for briskly boiling water to cover the jars by 1 inch. A pressure canner must be used for vegetables and other low acid foods. It is a large heavy pot that has a rack and a tight fitting lid with a vent, a dial or weighted pressure gauge and a safety fuse. It sometimes has a gasket. Pressure canners allow foods to be heated to 240° F and held at the temperature as long as necessary. When using a pressure canner, always refer to the manufacturer’s instructions before beginning.
Jars
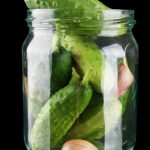
Canning jars come in many sizes, from 4 ounces to 1 quart; those with wide mouths are perfect for pickles. Use the size and style called for in each recipe.
Use only standard canning jars. These are tempered to withstand the heat inside a canner, and their mouths are specially threaded to seal with canning lids. Inspect all jars before using them, discard any that are cracked or have chipped rims.
Lids
Use screw bands and flat metal lids that have a built-in sealing compound. Prepare them according to the manufacturer’s directions. The flat lids are designed for one-time use only. Screw bands can be reused if they are not bent or rusty.
Other Essentials
Special kits can be purchased that include all the canning essentials in one box. Kits typically contain the following: A jar lifter for removing hot jars from the boiling water; a magnetic lid want for retrieving sterilized lids from the hot water; a nonmetallic spatula which often has measuring increments for judging headspace (You certainly could use a ruler instead); and a funnel for directing hot liquids into jars. You may also want to have a food scale, food mill or sieve and a colander. Make sure to wash any utensils that will directly touch the food with soap and warm water before beginning.
General Canning Steps
For a boiling water canner, pack food into the canning jars by the raw pack (cold pack) or hot pack method. In raw packing, uncooked food is packed into the canning jar and covered with boiling water, juice or syrup. In hot packing, food is partially cooked, packed into jars and covered with cooking liquid. The following applies to both methods.
*Wash empty canning jars in hot, soapy water. Make sure to rinse thoroughly. Place the jars in the boiling water canner. Cover the jars with hot water and then bring to a simmer over a medium heat. For food processed under 10 minutes, boil the jars 10 minutes and keep warm in simmering water until needed. Set screw bands aside; place the lids in a separate saucepan. Cover with water; bring to a simmer over medium heat (do not boil).
*If you are using a separate pot for sterilizing the jars, fill the boiling water canner half full; bring to boiling. Heat additional water in another large pot (to top off water in the canner); keep it hot but not boiling.
*Prepare only as much food as needed to fill the maximum number of jars your canner will hold at one time. Keep your work area clean.
*Remove sterilized jars from the hot water; place the hot jars on cloth towels to prevent them from slipping during packing.
*Pack food into jars using a wide mouth funnel, allowing for adequate headspace. Ladle boiling liquid over the food, leaving adequate headspace.
*Check the headspace. The space between the top of the food and the container rim is the headspace, leaving the correct amount is essential. Headspace allows a vacuum to form and the jar to seal. Use a ruler to make sure that you have the amount specified in each recipe.
*Release trapped air bubbles by gently working a sterilized nonmetal utensil (such as one provided in a canning kit) down the jar’s sides. Add liquid, if needed, to maintain necessary headspace.
*Wipe jar rims with a clean, damp cloth, food on the rims prevents a perfect seal. Place the prepared lids on the jars, add the screw bands, and tighten according to the manufacturer’s directions.
*Set each jar into the rack in the canner as it is filled and sealed. Jars should not touch each other. Replace the canner cover each time you add a jar.
*When all jars have been added, ladle hot water from the extra pot into the canner to cover the jars by 1 inch.
*Cover, heat to a full rolling boil. Begin processing time, following recipe procedures and times exactly. If necessary adjust for altitude. Keep the water boiling gently during the processing, adding additional boiling water if the water level drops. If the water stops boiling when you add more, stop timing, turn up the heat, and wait for a full boil before resuming counting.
*At the end of processing, remove the jars; place them on a rack or on towels in a draft-free area to cool. Leave at least 1 inch of space between jars to allow air to circulate.
*After the jars are completely cooled (12 to 24 hours), press the center of each lid to check the seal. If the dip in the lid holds, the jar is sealed. If the lid bounces up and down, the jar isn’t sealed. Check unsealed jars for flaws. Contents can be refrigerated and used within 2 to 3 days, frozen, or reprocessed within 24 hours. To reprocess, use a clean, sterilized jar and a new lid; process for full length of time specified. Mark the label so you can use any recanned jars first. If the jars have lost liquid but are still sealed, the contents are safe. However, any food not covered by liquid will discolor, so use these jars first.
*Wipe jars and lids. Remove, wash, and dry screw bands; store for future use. Label jars with contents and date; include batch number if you can more than a load a day. If a jar spoils, you can identify others from the same batch. Store jars in a cool (50° to 70° F), dry, dark place. Use within 1 year.
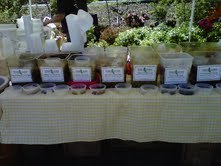 I went to Gossett's Farm Market in South Salem, New York today. It was a cute little market. The big hit for me was the great variety of pickles from Pickle Licious. I picked up a variety of pickles, sauerkraut, gardinaria and olives.
Gossett's Farm Market
http://www.gossettnursery.com/farmers-market/
Pickle Licious

