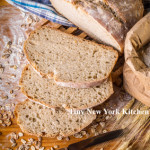
Many people are making bread these days and there’s nothing quite like the smell of bread baking in the house. Here are some answers to frequently asked bread making questions.
Never allow salt to come into direct contact with yeast because it removes the water that yeast needs to live. Instead, add salt to the flour used to make the dough, so the flour can act as a buffer.
A heavy-duty stand mixer is a great appliance for making bread dough. You can use the dough hook for mixing and kneading. If the dough isn’t coming together with the dough hook, switch over to the paddle attachment and mix just until the ingredients are combined, then switch back to the dough hook.
After the dough is mixed, let it rest. Professional bakers call this period, autolyze. It lets the flour fully hydrate and strengthens the gluten in the flour before kneading. Cover the work bowl with plastic and let the dough stand for 20 minutes and then knead on medium speed until the dough is smooth and elastic.
Dough made with a high proportion of whole-grain flour should feel tacky when you are kneading it. In general, moist or even sticky dough makes the best bread. Don’t add too much flour to the dough or the bread will bake up dry and tough.
How can you tell when the dough has been kneaded long enough? Use the windowpane test. Pull off a golf ball knob of dough and pat it into a rectangle. Pulling slowly and consistently from all four corners, stretch the dough into a thin, translucent membrane. If the dough tears easily, knead it longer. This technique won’t work with dough that includes seeds, nuts, or raisins, as they will tear the dough even if it has been kneaded sufficiently. If such ingredients have been used, check for stretchy and resilient dough.
Many bakers use a bowl to hold bread dough, but a straight-sided clear plastic tub is ideal for keeping track of dough as it rises. Mark the beginning level of the dough on the outside with a pen or a piece of tape, and then you can easily see when the dough has doubled. You can also use a glass bowl, but the doubling is a bit harder to define in a slope-sided container. Gently poke a finger into the dough. If the hole doesn’t refill, the dough has probably finished rising.
Many crusty artisanal are baked with steam to help keep the crust soft and pliable, allowing the bread to expand fully. Professional ovens have built-in steam injectors, but home bakers have to be more creative. One recommended method: When you turn on the oven to preheat it, place an empty heavy-duty rimmed baking sheet or pan on a rack near the top of the oven, When the bread dough is added to the oven, toss a handful of ice cubes into the pan and close the door. The ice will melt quickly and create a burst of steam. While the oven door is open, cover the glass on the door with a towel to catch any drips (the cold water could crack the glass) and remove the towel before closing the door.
A common way to test bread for doneness is to rap on the bottom of the loaf and listen for a dull thump. Using a thermometer is more reliable. Insert an instant-read thermometer in the bottom of the loaf, being sure to the tip reaches the center of the loaf. Butter and egg laden breads are finished when their internal temperature reaches 185 to 190 degrees F. Leaner and crispier breads are ready at 200 to 205 degrees F. For breads baked in loaf pans, insert the thermometer just above the rim of the pan, angling the tip down to the center of the loaf.
“Work With What You Got!”
©Tiny New York Kitchen © 2020 All Rights Reserve

Start small, with goals that work for you and your family. These are the habits you’ll keep in the long run.
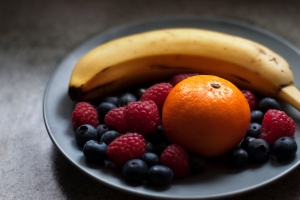
1. Add More Color To Your Plate
More color on your plate means more variety, more nutrients, and more flavor. The next time you shop, try putting the rainbow in your cart: orange citrus, yellow pineapple, and dark leafy greens.
2. Eat Seasonally
Keep a produce calendar handy so you know what to look for. In season produce is fresher and typically less expensive. January is good for root vegetables, kale, and citrus.
3. Drink More Water
Stay hydrated by infusing your water with citrus slices, herbs, berries, or cucumber. Making water more interesting will encourage you to drink more.
4. Try A Whole Grain Swap For Pasta And Bread
Once in a while replace regular pasta and bread with a whole grain alternative. These complex carbs will help you feel full. Look for whole wheat, whole grain, and multigrain alternatives.
5. Pack Your Snacks
Opt for high fiber and protein snacks like hummus and pretzels or apples and peanut butter. Unlike sugar and empty carbs, fiber ad protein will keep you full.
6. Eat Breakfast More Often
Stock up on on-the-go options. Egg muffins in the freezer, instant oatmeal in the pantry, and a bowl of fruit on the counter. The morning rush won’t be an excuse for skipping this important meal.
7. Make A Shopping List
Check your refrigerator, freezer, and pantry before making a list. Organize your list based on the layout of your store. You’ll save time at the store and won’t accidently buy what you already have.
8. Try A Plant-Based Swap For Meat
Try a meatless version of a weeknight staple like burgers, pizza, or pasta. You’ll get more nutrients into your meals by swapping meat for plant-based options.
9. Stock Your Freezer
Keep staples like frozen meatballs or chicken tenders and steam-in-bag vegetables for last minute meals. A fully stocked freezer is better than takeout. You’ll save money and get dinner on the table even on busy weeknights.
10. Reduce Your Food Waste
Use overripe fruit in smoothies and muffins. Turn leftover vegetables into stir fries and soups. Turning leftover produce into nutrient-dense meals is a win-win for your wallet and your health.
11. Make A Meal Plan
Write meals on the calendar at the start of the week. Everyone knows the menu and you won’t be scrambling for dinner ideas at 5pm.
12. Bring Your Lunch 3 Days Per Week
Instead of swearing off midday takeout, start with 3 days a week. When you pack school lunches, pack office lunches too. You’ll save time waiting in line, save money, and eat better.
13. Try A New Recipe
Shake up your dinner routine with a recipe or ingredient you haven’t use before. You’ll avoid a recipe rut and learn new kitchen skills.
14. Eat Out One Less Time Each Week
Try a speedy dinner or slow cooker meal that’s ready when you get home. Home cooked meals allow you to control the ingredients and choose more healthful options.
15. Drink Less Soda
Swap for flavored seltzer, iced tea, or sparkling fruit juice. Instead of cutting out soda try drinking 1 less can a day. Quitting cold turkey makes habits hard to break. Start with a smaller goal and eventually it will make a big difference.
16. Eat Together One More Night Each Week
Make dinner device-free, with everyone eating together. Keep it fun with a top-your-own taco, baked potato, or burger night. Enjoying a meal together as a family has been shown to encourage healthy eating habits and better communication.
17. Cook With Your Children Once A Week
Children who help choose, shop for, and prepare a recipe will be more interested in eating it.
18. Get Ahead On Sunday
Prep components instead of entire meals. Roast vegetables, cook grains, and bake extra chicken, then mix and match for quick lunches and dinners during the week. Planning ahead helps you save time, eat better, and reduce the stress of busy weeks.
19. Embrace Healthy Fats
Look for sources of unsaturated fats, like olive oil, nuts, seeds, and avocados. Good-for-you fats help regulate cholesterol, absorb vitamins, and prevent heart disease.
20. Give Plants More Plate Real Estate
Fill about half of your dinner plate with plants, then divide the rest between your starch and protein. Rebalancing your plate is an easy way to eat healthfully.
“Work With What You Got!”
©Tiny New York Kitchen © 2019 All Rights Reserved

Welcome Spring. We rejoice in longer days and the vision of growth and rebirth after a long winter. The seeds planted last autumn have germinated over the winter, have become buds, and are beginning to break through the cold earth. These are signs of renewal and hope that start to stir within each of us. The seeds of change that we planted within ourselves now push through with the new energy we feel. A sense of renewal gives us the vision and inspiration to bring our creative energy to fruition.
“Work With What You Got!”
©Tiny New York Kitchen © 2018 All Rights Reserved

Paleo Diet
The Paleo Diet (short for Paleolithic) is fashioned around the eating habits and available foods of our hunter-gatherer ancestors. These ancestors had to nourish themselves with the meat, fish, fruits, vegetables, nuts, and fats available to them in nature. With the benefit of large supermarkets, it’s easy today to mimic these foods in wider variety. Specific recommendations for eating Paleo will vary; however, the main ideas are the same: Reduce the risk of debilitating diseases and optimize health by eating whole, fresh, unprocessed foods and avoid foods that were not available prior to the advent of modern agriculture.
Research studies looking at the Paleo Diet have noted that eating a Paleo Diet for a short term improved the glucose control and lipid profiles in people with type 2 diabetes, compared to eating a diet containing low-fat dairy, moderate salt intake, whole grains, and legumes. Additional research indicates similar results may be possible in people without type 2 diabetes as well. The Paleo diet may result in higher levels of satiety (fullness) throughout the day when compared with a low-fat, low-calorie diet.
Paleo Do’s
Eat plenty of non-starchy vegetables and fruits.
Make fresh meat, poultry, fish, and seafood your primary sources calories.
Avoid highly processed meats that contain preservatives, artificial flavors, and sugar, such as some sausages, bacon, deli meats, and smoked fish products.
Consume nuts and seeds.
Use coconut oil, grass-fed butter, olive oil, avocado oil, nut and seed oils, and animal fats, such as goose fat or duck fat, for cooking and eating.
Balance the intake of acid-producing foods (meats, fish, salt, and cheese) with base-producing foods (fruits and vegetables) for optimal health.
Use sea salt to season foods, but try to decrease sodium intake in general.
Paleo Don’ts
Consume highly processed packaged foods.
Get heavy handed with the salt shaker.
Eat grains of any kinds. Quinoa, bulgur, rice, wheat, bread, pasta, etc., are all out.
Consume sugar (including honey and maple syrup), sweets, candy, or desserts.
Use artificial sweeteners, such as monk fruit extract, stevia, NutraSweet or Equal (aspartame), Splenda (sucralose), or sugar alcohols, such as xylitol, sorbitol, or maltitol.
Eat legumes, beans, peas, lentils, or soy, or foods make from soybeans.
Use canola or soybean oils or consume hydrogenated oils (trans fats).
Consume dairy, with the exception of fermented dairy or raw milk cheese on occasion.
“Work With What You Got!”
© Victoria Hart Glavin Tiny New York Kitchen © 2016 All Rights Reserved

Quinoa (pronounced KEEN-wah) is the high protein dried fruits and seeds of a goosefoot plant (Chenopodium quinoa); these are used as a food staple and ground into flour. Quinoa is washed before cooking to remove a bitter residue from the spherical seeds. It is treated like a grain, but it is actually the fruit of an herb and it cooks twice as fast as rice. Quinoa produces its own natural insect repellent.
“Work With What You Got!”
© Victoria Hart Glavin Tiny New York Kitchen © 2015 All Rights Reserved
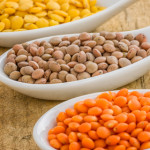
Lentils
The lentil is a Eurasian herb grown for its small, flat, edible seeds and are considered a legume. They are lens shaped (the word comes from the Latin lens, “lentil”), variously colored on the outside, and yellow/orange on the inside. The earliest written mention of lentils is in the book of Genesis: Esau sold his birthright in exchange for a dish of lentils. Lentils are high in fiber, vegetable proteins, and complex carbohydrates and fairly rich in iron and protein; they are low in sodium and fat-free.
Work With What You Got!”
© Victoria Hart Glavin Tiny New York Kitchen

 Healthy & Whole Foods
Many Americans have been struggling with weight issues for years. People may lose a few pounds by trying various diets, but only to gain a few extra pounds when resuming old eating patterns. As we get older we find that losing weight becomes much more difficult with our metabolisms slowing substantially. Being overweight brings on serious health risks such as diabetes, cancer and heart disease. It is important for us to make a real connection between what we eat and our overall health. Here are some eating tips that typically make a difference in weight loss and, of course, incorporating exercise into your daily routine helps significantly.
Breakfast
Eat a healthy breakfast every day. A healthy breakfast is one that consists of
Protein, fruit and whole grains. Avoid processed foods. Eating breakfast helps
prevent overeating later in the day. Try eating an egg sandwich with a piece of fruit or whole grain cereal with low fat or skim milk and a banana.
Water
Drink more water. Most of us don’t drink enough water. Substitute water for sodas, juices, alcoholic drinks and even diet sodas. Substitute water for those high calorie drinks and you will begin to see the pounds melt away. I like to drink sparkling water when I crave a soda.
Fish
Fish is great for giving you those good omega-3 fatty acids that we all need and
is lower in calories. Stay away from eating processed meats like hot dogs and sausages. Eat fish two to three times per week and eat red meat once a week at most.
Whole Grains
Whole grains are chock full of vitamins, minerals and high in fiber. Eat whole wheat bread, whole wheat pasta and brown rice. Stay away from refined grains such as white bread and white pasta.
Fruits & Vegetables
We need our fruits and vegetables. They are antioxidant rich foods that help in weight loss. Fresh produce contains water so we feel full and satisfied longer. Berries are great antioxidants.
Dairy
Including low-fat dairy food into our diets is important. These foods are rich in calcium and vitamin D. Many of us are deficient in obtaining these bone building vitamins.
“Diet” Foods
Just because the label says “diet” or “low-fat” or “fat-free” doesn’t mean that they are healthy for us or will promote weight loss. These foods are typically loaded with sugar and are highly processed which means empty calories. It would be better to eat a hand-full of nuts than to turn to these impostors.
Home Cooking
As you know I am big on cooking at home. I rarely use processed foods and would rather cook my own meals. It takes time, money and energy, but in the end it’s worth it. When we eat out in restaurants we truly don’t know how our food is cooked. Chefs tend to put butter on “everything” and that’s why the meals taste good. Also, we tend to eat much larger portions when we go out for dinner. For certain stay away from fast food restaurants.
Portion Sizes
I am a visual person. It sounds ridiculous but the serving size for fruits and vegetables should be fist size. Look at your fist and get a visual of what a fruit/veggie serving size should be. A serving size of meat should be the size of a deck of cards and a serving size of fish should be the size of a checkbook. Eat smaller meals!
Slow Down
Eat slower. We should spend 30 minutes eating a meal. Eat at the table sitting down.
Food Labels
Read those food labels for calories and other nutrients. Scan the food labels for how many grams of sugar an item has. Just because a food item my say it is low in fat it just may have a high amount of sugar.
Snacking
Snacking twice a day on healthy snacks helps from overeating later in the day. Healthy snacks are items such as fruit, carrots or a handful of nuts (not sugar coated candy type nuts). Don’t forget that water!
Gum
Believe it or not chewing gum can help keep that weight off. I like to nibble so when I get the urge to nibble I will pop a couple pieces of gum in my mouth.
Sleep
Sleep at least 7 hours per night.
Exercise
Join a gym and go at least 3 times a week. If you can’t make it to a gym then walk. Go for a walk after lunch or after dinner for 45 minutes to an hour. Incorporate lifting some free weights into your routine.
Foods To Avoid
Butter
Ice Cream
Chips
Crackers
Instant Oatmeal
Fish Sticks
Sugary Cereal
White Pasta
Cereal Bars
Candy Bars
Fried Chicken
Regular Pretzels
Potato Chips
White Bread
White Potatoes
Prepared Salad Dressings
White Rice
Cookies
Foods To Eat
Olive Oil
Greek Yogurt
Nuts
Seeds
Steel Cut Oats
Broiled Salmon
High Fiber Cereal
Whole Wheat Pasta
Blueberries
Piece of Dark Chocolate
Grilled/Roasted Chicken
Whole Wheat Pretzels
Unbuttered Popcorn
Whole Wheat Bread
Sweet Potatoes
Oil & Vinegar Salad Dressing
Brown Rice
Figs