
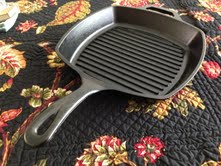
 Cast Iron
I’m in love with my new Cast Iron pan. I made the best fried chicken with it over the weekend. Actually, the best fried chicken that I have ever made and believe me I’ve made a lot. When my husband’s mother passed away, quite a few years ago, his aunt showed up at the funeral to get her sister’s coveted Cast Iron pan. She briefly said her hellos, retrieved the prized Cast Iron pan and abruptly left never to be heard from again. She got what she came for!
Cast Iron absorbs heat more slowly than other materials, but retains its heat well and uniformly. Cast Iron pots and pans can be used on the stove, in the oven, under a broiler and even on the grill. It is great for high temperature cooking. Uncoated Cast Iron will react with acidic ingredients such as tomatoes and wine which is why many cooks prefer cast iron coated with a hard porcelain enamel that makes it nonreactive. An enameled Cast Iron Dutch oven is a must have in a well-stocked kitchen.
Brand-new, uncoated Cast Iron is brittle and must be seasoned before using. Many manufacturers are now selling preseasoned Cast Iron cookware so make sure to check the label. If your cookware is uncoated then you will need to season well. To season your pans rub the inside of the pan with a flavorless vegetable oil. Put the pan on a baking sheet and put into a preheated 350° F oven for 1 hour. Turn the oven off and let cool in the oven. Remove it from the oven and wipe off any residual oil with paper towels. With constant use, uncoated Cast Iron will develop a natural nonstick coating. Try to use your Cast Iron cookware as much as you can. If you don’t use often then make sure to season every 6 months or so. You do not need to season enameled Cast Iron.
Do not wash uncoated Cast Iron with soap and water or you will remove the seasoning. NEVER use scouring pads and, of course, NEVER put your Cast Iron (coated or uncoated) cookware into the dishwasher. Just rinse your pans with hot water and scrape out cooked-on food with a wooden spatula. Sprinkle with coarse salt and then rub clean with paper towels. You must keep Cast Iron pans well-seasoned. It is all right to wash a coated pan briefly with a little soapy water after it has been seasoned as long as the pan is then thoroughly dried. To make sure that your Cast Iron cookware doesn’t rust make sure to dry well and then place the pan over a medium heat to evaporate any lingering moisture. Do not store your Cast Iron cookware in a plastic bag to “protect” it. The plastic bag will trap moisture and cause rusting.
Cast Iron is an alloy of iron containing so much carbon that it cannot be wrought but must be melted and shaped by casting. Cast iron generally has 1.8% to 4.5% carbon, .5% to 3% Silicon and small amounts of sulfur, manganese and phosphorus. The word, Cast Iron, was first recorded in English in 1664. Cooking with Cast Iron pans greatly increase the iron content of food because the surface releases fine particles. Some foods cooked in Cast Iron contain up to double their original iron content.
Enjoy your Cast Iron cookware. If you treat them well you will have many happy years with them. 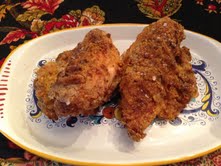

 A Few Words About Hamburgers
A delicious, juicy, tender hamburger can be yours, if you choose the right ground beef. The amount of fat directly contributes to the juiciness of the burger, so the leaner the beef, the drier the burger. Some markets state the cut of beef used for grinding while other indicate the percentage of fat in the grind. Some markets do both. Here are the three grinds that most shops carry:
Ground Sirloin
Ground sirloin has only 7 percent fat which makes it the leanest ground beef, but it can make a dense burger if overcooked. To combat dryness add 2 tablespoons of a wet condiment like teriyaki sauce, pesto, Dijon mustard, ketchup or mayonnaise for every pound of ground sirloin.
Ground Round
Ground round is a great choice for hamburgers because it has 15 percent fat.
Ground Chuck
Ground chuck is the ground beef of choice for many burger lovers. It has a relatively high fat content at 20 percent fat which makes a very juicy and very rich burger.
Ground Turkey or Ground Chicken
There are some people who prefer ground turkey or chicken for their burgers. Both must be cooked through so care must be taken to prevent dryness. Make sure to incorporate moisture by adding one of the ingredients suggested for ground sirloin. Also mix in 2 tablespoons of dried bread crumbs. As the meat heats and the fat melts the bread crumbs absorb and retain the fat that would otherwise drip out of the patty.
Shrinkage
Hamburgers shrink during cooking and a perfectly shaped raw patty can end up looking like a hockey puck. To avoid this, shape about 5 ounces of ground meat into a 4 inch round. Then make an indentation about 2 inches wide and 1 inch thick in the top. As the meat cooks the indentation will equalize the shrinkage.
No Don’t Do It!
Never Ever press on a hamburger to speed its cooking. You’ll squeeze out the precious fat and juices that make the burger taste so good. Yes, we’ve all done it…just resist that innate urge to do it again!
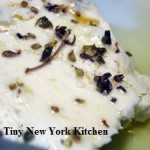
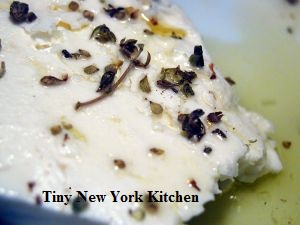 Feta Cheese
Choose the right Feta for your dish!
Goat’s Milk Feta: Goes with pita bread, olives, grapes, cherry tomatoes & pasta
Sheep’s Milk Feta: Goes with watermelon and red onion salad, pizza, lamb & anchovies
Cow’s Milk Feta: Goes with Greek salad, olive oil, rosemary and thyme, black beans, soup or casseroles.
Did you know that Traditional Greek Feta is made with a combination of sheep and goat milk?
Feta is a white, semi-firm, crumbly, salty cheese made from sheep’s or goat’s milk (sometimes cow’s milk) and cured in brine. Originally from Greece, feta translates to “slice,” for one of the stages in its making. The word came into English around 1956. Feta is one of the world’s oldest cheeses. It has been made in Greece and other Balkan countries for centuries. Homer wrote about it, describing how the gods made the cheese.
The finest feta cheese should be purchased direct from its brine bath. If it is prepackaged, it should have some of the brine in the packaging to keep it moist. Feta cheese is best when eaten fresh, so always check the date. If you will not be consuming it immediately, store the feta in a brine or milk bath in the refrigerator. The milk bath will reduce the saltiness and help keep the cheese moist and last for up to 3 months. Freezing is not good for feta cheese. Feta that has been aged in barrels and sold straight from the barrel may be wrapped in a lightweight paper. You may want to wrap your feta in a plastic bag or plastic wrap and store in the fridge however there is some controversy about storing cheese in plastic. You may want to keep the feta in the paper, even when the paper gets soggy from the cheese moisture. Allow at least 30 minutes for feta to come to room temperature, to fully enjoy its rich, tangy flavor and creamy texture.
If you are one who doesn’t like feta’s salty taste then you may want to soak the cheese in fresh water to leach out some of the salt or tone down the salt in dishes that feta is used in. This allows the cheese to supply the salt.
Feta Vinaigrette
The slight sharpness of the feta combined with fresh green herbs makes a versatile vinaigrette dressing that goes beautifully with lightly steamed asparagus or sliced tomatoes as well as artichokes. It is a lovely dressing on potatoes, pasta or shrimp salad as well.
INGREDIENTS
1/4 Cup White Wine Vinegar
1 Teaspoon Minced Fresh Basil
1 Teaspoon Minced Fresh Dill
1 Teaspoon Minced Fresh Mint
1/2 Cup Finely Crumbled Feta Cheese
1/2 Cup Olive Oil
1/4 Cup Safflower Oil
1/4 Teaspoon Kosher Salt
1/4 Teaspoon Freshly Ground Pepper
In a small size bowl, whisk together the vinegar, herbs and cheese. Add the olive oil and safflower oil in a slow thin stream. Whisk constantly until combined and emulsified. Add the kosher salt and pepper. Set aside until you are ready to use. Cover and refrigerate. It will keep for up to 1 week. Stir or shake well before using. Makes 1 cup.
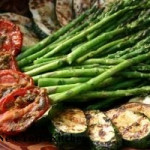
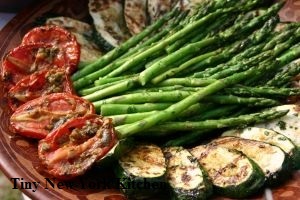 Ways To Enjoy Asparagus
Spring is here and asparagus is in-season. Here are some ways to enjoy such a wonderful seasonal vegetable.
Quick Pickle: Combine vinegar, cumin, coriander, garlic and chile flakes and pour into a jar. Add the asparagus spears and place in the fridge for a few days. They should be nice and pickled. Eat them for a spicy snack or toss them into a salad.
Side Dish: Toss boiled slices of asparagus, leeks with mint and melted butter for a savory side dish.
Shave Raw: Shave raw asparagus spears and Parmigiano Reggiano, and then toss with tender asparagus tips, olive oil and lemon juice for a vibrant salad.
Grilled: Marinate the asparagus in olive oil and garlic for two hours before grilling. Grill alone or with other vegetables.
Roasted: Roast in the oven at 400º F drizzled with olive oil.
To Prepare For Cooking: Start at the base of each asparagus spear and work toward the tip. Bend the spear a few times until you find a place where it breaks easily. Snap off the woody base at that point. If you would like a clean, smooth look then use a vegetable peeler to scrape off the scales on the spears.
Standard Preparation: For 1 pound of asparagus (15 to 24 spears) Wash and snap off the woody bases where the spears break easily. If you like scrape off the scales. Leave the spears whole or cut into 1 inch pieces. You should get about 2 cups of asparagus pieces. Cook, covered, in a small amount of boiling salted water for 3 to 5 minutes or until crisp-tender. Or you can steam them for 3 to 5 minutes in a steamer insert. To microwave place in a baking dish or casserole dish with 2 tablespoons of water. Cover and microwave on high for 2 to 4 minutes or until crisp-tender.
Roasted Asparagus
INGREDIENTS
2 Pounds Asparagus
2 Tablespoons Olive Oil
1/4 Teaspoon Kosher Salt
1/4 Teaspoon Freshly Ground Pepper
1/4 Cup Shredded Parmesan or Asiago Cheese
Preheat your oven to 400º F. Snap off and throw away the woody bases from the asparagus. I you like, scrape off the scales. Please the asparagus in a medium size baking dish. Drizzle with olive oil and toss to coat. Spread the asparagus in a single layer. Sprinkle with the kosher salt and pepper. Place in the oven and roast, uncovered, for 15 to 20 minutes or until the asparagus are crisp-tender. Turn once halfway through the cooking process. Remove from the oven and transfer to a serving platter. Sprinkle with the shredded cheese. Serves 4

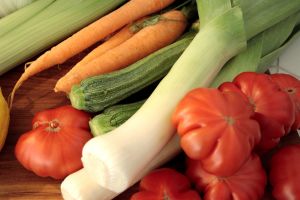 Vegetable Stock
It doesn’t really take too long to make a nice and rich vegetable stock because the vegetables release their juices into the broth very fast. You can make it from almost any combination of vegetables. If you have parsnips, fennel, pea pods, bell peppers, mushrooms or leftover corncobs they will add great flavor to your stock. You can even use vegetable scraps and trimmings just as long as they are clean. You should avoid using broccoli, artichokes and any members of the cabbage family, however, as they will give your stock a bitter flavor.
INGREDIENTS
1 Large Chopped Leek
2 Large Quartered Spanish Onions
3 Large Chopped Carrots
5 Large Chopped Celery Ribs
3 Large Garlic Cloves
1 Cup Crushed Fresh Tomatoes
1 Small Bunch Fresh Parsley
3 Bay Leaves
1 Small Bunch Fresh Thyme
2 Quarts Water
2 Tablespoons Kosher Salt
Place the parsley, bay leaves and fresh thyme into a large square of cheesecloth and tie it up. In a large size stockpot add the water and kosher salt. Chop the leek, carrots and celery into large hunks. Chop the garlic into fairly large hunks as well. Add the leeks, onions, carrots, celery garlic, tomatoes and herb bundle into the pot of water. Bring to a boil over a high heat. When it boils turn the heat down to medium and let simmer, partially covered, for 1 hour. You will want the onions to be translucent and the other vegetable to be limp. Remove from the heat and let sit, completely covered, for another 45 minutes. Pour the contents of the pot through a fine mesh sieve or a colander lined with cheesecloth. Press the vegetable solids with the back of a spoon to extract the juices. Throw away the vegetable solids and let cool. Pour into large mason type jars and place in the refrigerator or the freezer. Makes 5 to 6 cups of vegetable stock.
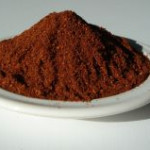
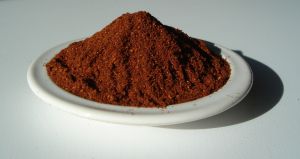 Chili Powder
Commercial chili powder can be used for making sauces for tacos or enchiladas, salsas and dishes like chili con carne. When using store-bought powder look at the labels to see what spices are included. You can also make your own chili powder. Here is a perfect version.
INGREDIENTS
6 Ounces Dried Chiles (Mild, Hot or a Combination)
2 Tablespoons Ground Cumin
2 Teaspoons Ground Paprika
4 Teaspoons Salt
2 Teaspoons Garlic Salt
2 Teaspoons Oregano
2 Teaspoons Onion Salt
2 Teaspoons Fresh Dried Cilantro
Cut off the stems of the dried chiles with a knife. Blend all of the ingredients with the chiles in a food processor or a blender until powdery. Makes 2/3 cup of zesty chili powder. Store in an air-tight glass jar.
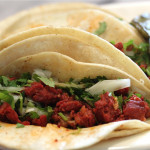
 Chorizo
Did you know that you can make your own chorizo? Well I’ve got news for you! It’s easy to make and the payoff is big. Chorizo is simply Mexican sausage. It can be prepared and stored uncooked or cooked until you are ready to use it. Uncooked chorizo can be kept in the freezer until you are ready to use it. Tacos with chorizo filling are super tasty!
INGREDIENTS
1 Pound Ground Beef
1/2 Pound Ground Pork
2 Cloves Minced Garlic
1/2 Diced Onion
3 Tablespoons Vinegar
2 1/2 Tablespoons Chili Powder
1/2 Teaspoon Paprika
1 Teaspoon Ground Cumin
1/4 Teaspoon Freshly Ground Black Pepper
1/4 Teaspoon Ground Cloves
1 Teaspoon Kosher Salt
1 Teaspoon Oregano
2 Finely Crushed Chilitepins
In a large size bowl combine the ground beef and ground pork. Mix in the minced garlic, ground cloves and onions. In a small bowl combine the vinegar, chili powder, paprika, cumin, pepper, kosher salt, oregano and crushed chilitepins. Mix well and add to the meat mixture. Blend thoroughly. Form into a roll and place into an airtight ziplock bag. Place into the fridge until ready to use. To use simply cook the desired amount of the chorizo over a medium heat until the chorizo turns a rich brown color and the meat is fully cooked. Drain and use. Makes approximately 2 pounds of chorizo.
Chilitepins are tiny hot peppers which give the chorizo its zestiness. Use only two. They go a long way. When working with chilitepins make sure to wash your hands thoroughly and avoid touching your eyes.

 Victoria's Solutions For Special Diets
EVERYONE deserves a special holiday so it is important to be prepared for friends and family who may have dietary preferences or restrictions. We all know that food allergies are no joke. Here are some tips for special diets.
When you shop read the labels for dairy free, gluten free, etc.
When making mashed potatoes or creamy soups for dairy free guests or vegan make sure to replace milk or cream with unsweetened almond milk, ricemilk or soymilk.
When baking and sautéing replace butter with olive oil, non-hydrogenated butter spread or margarine or coconut oil.
When making gravy choose gluten free cornstarch or arrowroot instead of flour. For vegan guests use vegetable broth, sautéed onions and mushrooms.
When making stuffing use gluten free cornbread or sandwich bread. For vegetarian guests swamp vegetable broth for chicken broth.
When making salads and desserts use toasted pumpkin seeds or sunflower seeds instead of nuts.
When making desserts and dips use tofu instead of milk, cream cheese or sour cream.
When serving dinner make sure to label each prepared dish for special diets or which ones contain ingredients that should be avoided.
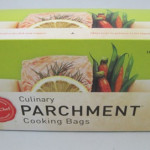
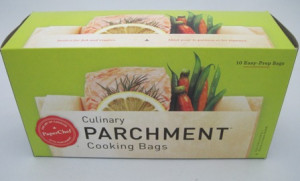 Cooking Parchment
I love cooking in parchment packets or “en papillote.” It gives big rewards without much effort. Cooking chicken or fish with vegetables in a sealed parchment paper packet may look fancy, but it’s actually a great no frills technique. Just place a few ingredients into the packets and let them do their work. You can prepare most ahead of time. They lock in flavor and moisture and are impressive looking. You can fold pretty much any way you want as long as you create a tight seal. Create your own recipes with protein, vegetables and herbs that you have on hand. Cook in the oven or on the grill.
Technique: Fold a 14×12” piece of parchment paper in half. Using kitchen shears cut the parchment into a heart shape. Arrange vegetables and herbs on one side of the paper. Top with fish or chicken. Add olive oil or butter and a splash of wine to keep the meat moist and create a sauce. Season with salt and pepper. Brush the edges of the paper with a beaten egg white for a tighter seal. Working from one end begin by tightly folding the open edge of the paper. Continue folding the paper’s open edge to form a seal. Transfer the packet to a rimmed baking sheet and bake or grill.
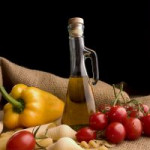
 Basic Italian Meal Ingredients To Keep On Hand
No pantry should be without these basic Italian meal ingredients.
- Dry Pasta of Various Shapes & Sizes
- Crusty Italian Round Bread
- Garlic
- Flat Italian Parsley
- Extra Virgin Olive Oil
- Fresh Native Tomatoes or Canned Plum Tomatoes
- Fresh Mozzarella
- Oregano
- Cannelloni Beans & Chick Peas
- Parmesan Cheese
- Fresh Fruits & Vegetables
- Fresh Fish


