
When making cookies make sure not to overcream the butter and sugar. Unlike cake batter baked in a pan, cookie dough is baked free-form. When the dough is heated and the chemical leaveners expand the air bubbles, the bubbles burst without a pan to force the dough upward, producing flat cookies. For cookies, cream the butter and sugar for only 1 to 2 minutes, just until the mixture is smooth but has not lightened in color.
Another insurance policy against flat cookies, chill butter-based cookie dough before baking. Butter has a low melting point, and starts to soften as soon as it is exposed to oven heat. Refrigerate the chilled dough for at least 30 minutes and up to 2 days before shaping and baking. This only works with dough that uses baking powder for leavening. Don’t do this with dough that includes baking soda as the leavener, which loses its rising power soon after it is mixed with wet ingredients.
Professionals use spring-loaded ice cream scoops to portion cookie dough, making cookies the same size that will bake at the same rate. A tablespoon-size scoop is the right capacity for most recipes.
For even baking and easy cleanup, bake your cookies on heavy-duty, rimmed aluminum baking sheets (half sheet pans) lined with parchment paper. To help the paper adhere, butter the baking sheet first. You can also line baking sheets with silicone baking mats instead of parchment paper.
If you’re using silicone mats, you may want to do a test run. Some cookie bottoms won’t crisp as well on the mat as they do on parchment lined baking sheets. Of course, this can be an advantage if you prefer soft, cakelike cookies.
There is no need to transfer cookies to a wire rack to cool. In fact, more harm can be done by transferring warm, delicate, pliable cookies to a rack than by letting them stand on the baking sheet. If you need to remove the cookies to use the baking sheet again, just let them cool on the sheet until they are firm enough to move.
To discourage overbrowned cookie bottoms (which can happen when an oven heats unevenly), insulate the baking sheet by placing it inside a second baking sheet of the same size. The think layer of air between the baking sheets will protect the top sheet from getting too hot.
Don’t store different types of cookies together or they will exchange flavors and textures. Tin or stainless steel covered containers work best for storage, but plastic containers can also be used as long as they are airtight and fragrance free.
To revive crisp cookies that have softened, bake them for 5 to 10 minutes in a 300 degree oven. Let them cool completely before storing.
To help soft cookies keep their texture, store them in an airtight container with a ceramic brown sugar softener, or with a piece of apple on a piece of aluminum foil, or soft bread. Make sure to remove the apple after 24 hours.
“Work With What You Got!”
© Victoria Hart Glavin Tiny New York Kitchen © 2017 All Rights Reserved

I grew up in the Midwest where it was considered a mortal sin to waste food. The motto was “waste nothing and make the most of every ingredient.” Here are some ways for you and your family to make the most of ingredients that otherwise may make their way into the trash bin.
Stewed Fruit does double duty as a topping for pancakes, waffles and ice cream while giving you a serving of fruit. Get started with apples and dried fruits.
Super Stems. Don’t waste the nutrients in stems of greens like collards and kale, or vegetables like broccoli and cauliflower. Use them in longer cooking soups and stews.
Save The Soft. Baked desserts are a great way to use up slightly overripe fruit.
Use It, Don’t Lose It. When you by a special ingredient for a recipe, don’t waste what’s left. Get creative and add them to some of your favorite recipes.
Make Soup with leftovers. Vegetables, grains, and meats make wonderful soups. If you don’t have time to make soup right away, freeze the leftovers until you have a good cooking day. Don’t forget to label and date what you’re freezing for later.
“Work With What You Got!”
© Victoria Hart Glavin Tiny New York Kitchen © 2017 All Rights Reserved

The modern day Christmas tree was developed in early modern Germany, with predecessors that can be traced to the 16th and even possibly the 15th century. Devout Christians brought decorated trees into their homes. During the second half of the 19th century Christmas trees (also known as the Yule-tree) became popular beyond Germany, at first among the upper classes. Trees were traditionally decorated with apples, nuts, and other foods. During the 18th century people began to add illuminated candles, which were ultimately replaced by Christmas lights after the invention of electrification. During the early 19th century the Christmas tree became very common in the United States due to German immigrants settling Eastern and Midwestern towns. News spread of the Christmas tree between 1850 to 1860 by “Godey’s Lady’s Book,” and soon it became a common Christmas tradition.
www.tinynewyorkkitchen.com
“Work With What You Got!”
© Victoria Hart Glavin Tiny New York Kitchen © 2016 All Rights Reserved

The turkey came originally from America and was first domesticated by the Aztecs in Mexico. The Spanish introduced turkeys into Europe and they soon became a popular choice in France, Italy and Britain.
When early settlers from Britain, France and Holland crossed the Atlantic to North America, the vast flocks of turkey that roamed wild provided them with sustenance. They were plentiful and so easy to trap or shoot that the older children of the family were given the responsibility of catching them. The Native Americans meanwhile taught the new settlers the rudiments of farming, and in November 1621, on the first anniversary of their arrival, the Pilgrims entertained the locals to a feast, at the center of which was the turkey. Ever since, this has been the traditional bird served at Thanksgiving.
Turkeys are available fresh, chilled, or frozen all year round. When buying a whole bird, look for a plump well-rounded breast and legs and clear, soft and evenly colored skin. Avoid birds that are bruised, with blemishes or torn skin or any that have been badly or unevenly plucked. Turkeys vary enormously in weight.
When you’re ready to purchase your turkey it’s easy to get confused on what size to get. A good guild to go by is to figure approximately 1 1/4 pounds per person. This makes enough for the meal and provides a decent amount of leftovers.
To store your turkey place it in a large, deep dish and cover it completely with plastic wrap. Store it in the coolest part of the refrigerator; making sure that it does not come in contact with other foods.
Thaw a frozen turkey in the refrigerator for 2 to 4 days. Estimate 24 hours for every 5 pounds, so 2 days for a 10 pounder, 3 days for a 15 pounder, etc.
And then there is always the frozen turkey emergency that goes like this, “Help, help, it’s Wednesday, and my turkey is still frozen!!!” It’s been a long time, but I’ve been in this predicament. What you do is leave the turkey in its wrapper and put it in a large-size container. A lobster pot works well. Fill the container with cold tap water and let it sit for 30 minutes. Dump out the water and refill. Let it sit another 30 minutes. Repeat until the turkey is thawed, then roast immediately or transfer to the refrigerator.
The good news is that you can brine or dry cure your turkey while it defrosts in the refrigerator. What a Godsend that is! Use a lighter brine solution, which is about 1/2 cup kosher salt per gallon of water, plus sugar and spices). If you’re dry curing, use the standard recipe. You’re turkey should stay below 40 degrees while brining. You don’t need to brine or cure a kosher or butterball type supermarket frozen turkey. These come pre-brined. If you want to be able to put your own flavor stamp on your meal, then get a natural or untreated bird and do it yourself. If you plan on brining for 2 days use the weaker solution that I just mentioned. If you plan to brine for 24 hours or less, then bump it up to 1 cup kosher salt per gallon of water. Then add an equal amount of sugar. I don’t always brine, but when I do I’ve been known to throw an assortment of flavorings in the brine. Flavorings that you could add to your brine could be: apples, lemons, oranges, onions, garlic, shallots, peppercorns, bay leaves, cinnamon sticks, cloves, allspice berries, juniper berries, mustard seeds, fennel seeds, coriander seeds, rosemary, sage, thyme, savory, parsley, or oregano. You can also replace half the water with sweet cider, hard cider, vegetable stock, turkey stock, chicken stock, beer, white wine, or red wine. If you want to dry cure then use about 1/2 teaspoon kosher salt for every pound of turkey. Then add spices to your taste.
Stuffing your turkey is a personal preference. I always stuff the bird because I love how it tastes when cooked inside the turkey. It does slow down the cooking process, however. Never stuff the turkey in advance of cooking. The stuffing can be made in advance, but the turkey should not be stuffed until just before it is placed in the oven. Weigh the stuffing and add this to the weight of the bird before calculating the cooking time. Thoroughly rinse the body cavity of the bird under cold running water, and then drain it well. Wipe the turkey, inside and out, with paper towels. Press the stuffing inside the shallow neck cavity. Make sure not to pack it in too tightly. Turn the bird over and pull the neck skin over the stuffing. Now it’s time for a little turkey bondage and truss the bird (tuck the wing tips under the breast and tie the legs together) and then cook for the calculated time. Never shorten the cooking time because although the meat may appear cooked, extra time must be allowed for cooking the stuffing thoroughly.
If you choose not to stuff your turkey then place aromatics in the body cavity of the bird. Cut a large onion in half and stud each half with 4 to 6 cloves. Place this in the body cavity of the bird. Cut an orange and a lemon into quarters and add these, together with 3 or 4 bay leaves, 4 to 6 fresh sage sprigs, and 2 to 3 fresh thyme sprigs. Add 1 cinnamon stick or 1 blade of mace for a festive hint of warm spice.
Turkeys are super easy to roast, but require a little more attention than smaller birds. Check to make sure the oven shelves are in the correct position before heating the oven. Preheat the oven to 350 degrees. Place the prepared bird on a rack in a large-size roasting pan. Smear the turkey breast generously with butter, season with salt & pepper and place in the oven. Baste the turkey from time to time during cooking. When the breast has browned, cover with foil to protect it and continue cooking. Remove the covering foil for the final 20 minutes of cooking. To check if the meat is cooked, insert a skewer into the thickest part of the thigh. If the juices run clear and the meat is white, it is cooked. If the juices are pink and the meat is soft and pink, the turkey is not ready. Return it to the oven and check again after 20 minutes. Cooking times will differ depending on whether your bird was purchased fresh or frozen. Plan on 20 minutes per pound in a 350 degree oven for a defrosted turkey and 10 to 15 minutes per pound for fresh. Remember to add more time if you’re turkey is stuffed. You should have an instant-read thermometer in your kitchen drawer. Insert the thermometer into the breast (all the way to the bone) and if it reads 160 degrees you’re good to go. You may also measure the thigh by inserting the thermometer into the thickest part, but not touching the bone, and it should read 165 degrees.
Remove the turkey from the oven and cover it closely with foil. Leave it to rest for at least 30 minutes. This will even out the temperature and make it easier to carve. I know some chefs who let it rest for 2 hours, but I don’t think that one needs to wait that long. If you wish to make gravy in the roasting pan, transfer the bird to a carving plate.
When you’ve let your bird rest awhile remove the trussing string. Hold the bird steady in position with a carving fork. Cut off the legs, then cut these in half or carve the meat from the bones. Make a horizontal cut across the breast above the wing. Carve neat and even vertical slices off the breast. Repeat on the other side of the bird. Arrange slices on a warmed platter. Add the turkey legs or sliced meat to the platter or set them aside for serving separately. Scoop out the stuffing and serve with the meat.
“Work With What You Got!”
© Victoria Hart Glavin Tiny New York Kitchen © 2016 All Rights Reserved
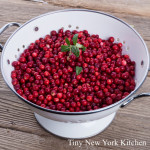
Cranberries
These tart, bright ruby-red berries grow wild on evergreen shrubs in peaty marshland all over northern Europe and North America. They are closely related to blueberries and bilberries, but are much more sour and are always served cooked. They are closely related to cowberries and lingonberries.
Cranberries are sometimes known as bouceberries since they were traditionally tested for firmness by being bounced seven times. Any berries that failed the bounce test were too squashy and were, therefore, discarded. Because of their waxy skins, cranberries keep for much longer than other berries, which helps to explain their popularity.
Cranberries contain useful amounts of vitamins C and D, potassium and iron. They used to be considered to be good protection against scurvy, and they are known to contain a natural antibiotic. Cranberry juice has long been recommended as a natural remedy for cystitis, kidney, bladder and urinary tract infections.
Look for plump, firm, bright, red berries and check the base of the carton in case of squashed or shriveled berries. Fresh cranberries will keep in the refrigerator for four weeks, or freeze them in plastic bags.
Cranberries can be used in both sweet and savory dishes or can be juiced and served as a drink. Their most famous incarnation is as cranberry sauce. The berries are high in pectin, so they make excellent jams and jellies. They also combine well with orange and apple, and can be mixed with blackberries and raspberries for an autumn version of summer pudding. Cranberry sorbet is a delicious treat. When cooking them for a sweet dish, do not add the sugar until the skins have popped or they will become tough.
“Work With What You Got!”
© Victoria Hart Glavin Tiny New York Kitchen © 2016 All Rights Reserved
The Best Apples For Apple Pie
It’s apple pie season and it’s important to choose the best apples for apple pie. Choosing the right apples for baking can be a daunting task. I mean, seriously, there are over 7,5000 apple varieties. When it comes to pie not all apples are created equal. Choose a mix of firm & tart and firm & sweet varieties. Doing this adds diversity and depth of flavor, while holding their shape during the cooking process. No one wants a mushy pie.
Braeburn: A Firm & Sweet/Tart Variety Originating from New Zealand, Braeburn has a skin that’s muted red with golden-yellow undertones and tinges of faint green. It produces a firm, crisp bite and offers a pleasing balance between sweet and tart. Firm to the touch and great for baking as well as eating raw. Excellent when paired with Honeycrisp. Can be found in most supermarkets.
Granny Smith: A Firm & Tart Variety Classic green apple is firm, slightly sour, and perfect for pie making. It’s available everywhere.
Esopus Spitzenburg: A Firm & Tart Variety This is an heirloom variety that has flavors bright enough to make an excellent snack or pressed into cider. You’ll find this variety at farmers’ markets and makes a delicious pie filling.
Northern Spy: A Firm & Tart Variety Northern spy is thought to be the best apple variety for pies. Difficult to find at supermarkets, but many farmers’ markets have them.
Idared: A Firm & Tart Variety This tart and spicy apple is bright red in color when fully ripe. Not so easy to find in supermarkets, but popular at pick-your-own orchards and farmers’ markets.
Pink Pearl: A Firm & Tart Variety This variety is delicious and you’ll want to seek this variety out. Difficult to find, but can be found at some pick-your-own orchards. Search online in your area for a place to Pink Pearl.
Ginger Gold: A Firm & Sweet Variety Ginger Gold is a baker’s champion. This delicately sweet and crisp variety works well in pies, muffins, and cakes. Can be found in most supermarkets during autumn.
Golden Delicious: A Firm & Sweet Variety This is a mild tasting variety and is best when paired with heftier flavors. Very popular in the U.S. and can be found in any supermarket.
Honeycrisp: A Firm & Sweet Variety This is a crisp and predominately sweet variety. Very popular in the U.S. and can be found in most supermarkets. Great when paired with Braeburn for pie making.
Jazz: A Firm & Sweet Variety Great for eating raw as well as pie making. From New Zealand and can be found in most supermarkets.
Jonagold: A Firm & Sweet Variety A cross between Jonathan and Golden Delicious varieties. Sweet and tart flavor and can be used on its own. Can be found in both supermarkets and farmers’ markets.
Pink Lady: A Firm & Sweet Variety The perfect combination of sweet and sour. Pink Lady is excellent for baking as well as eating raw. Can be found in supermarkets and farmers’ markets.
A Word About McIntosh Apples: Mcintosh variety is a popular choice for many bakers, but I don’t recommend them on their own if you’re using them for pies. They just don’t hold up well to heat and tend to cook down into a sauce before the pie crust is done cooking. If you love the flavor of McIntosh apples and just have to use them in pies then combine them with a much firmer variety like Pink Lady, Jonagold, Honeycrisp, or Northern Spy.
“Work With What You Got!”
© Victoria Hart Glavin Tiny New York Kitchen © 2016 All Rights Reserved

Rosh Hashanah
Rosh Hashanah is the Jewish New Year (the first day of the Jewish High Holy Days) and is also known as the Feast of Trumpets. The holiday , which is also a day of remembrance, is at once solemn and festive. Joy comes not only from trust in God’s compassion, but also the anticipation of renewal and fresh starts.
The Rosh Hashanah meal becomes more than mere rejoicing as it is also a form of prayer. The table is transformed into an altar to supplicate God, partaking of symbolic foods: honeyed and sugared treats for a sweet year; round foods for a fulfilled year, unbroken broken by tragedy; foods that grow in profusion at this season and those eaten in abundance, such as rice, signifying hopes for fecundity, prosperity, and a wealth of merits.
Dinner begins with a prayer for a sweet year, dipping challah, or other sweet bread, and apples into fragrant honey. Some start with sugared pomegranates, dates, figs, or quince in rose petal syrup.
It is customary for the first course to be fish, which symbolizes fertility and God’s blessings. Seasonal vegetables like leeks, Swiss chard, black-eyed peas, and pumpkins appear throughout the meal in major and supporting roles. Delicious main dishes follow, and usually two or more sweet desserts (such as a plum tart, honey cake, or noodle kugel) conclude the meal.
A few foods, however, are unwelcome at the Rosh Hashanah table. Many Ashkenazi Jews do not eat nuts (because the numerical value of the Hebrew word for nuts is equal to the value of the word for sin). Others do not eat pickles, horseradish, or other sour foods, while Moroccans avoid foods that are black, like olives and grapes (which are considered bad omens).
“Work With What You Got!”
© Victoria Hart Glavin Tiny New York Kitchen © 2016 All Rights Reserved
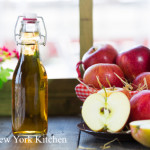
Know Your Vinegar
Pickling season is here and it’s important to know about the various vinegars. Vinegar is usually made by oxidation of the alcohol in wine, cider, or malt. Vinegar provides the tart pucker flavor in pickles, but it also acts as a preservative. If a recipe calls for vinegar, it will most likely call for a particular type. If a recipe does not specify the type, use a vinegar that fits the recipe. White vinegar has a sharp flavor and is used for pickling and in recipes where a clean, strong taste is desired. Cider vinegar, made from apples, has a faint fruity flavor and is used in recipes where a slightly milder taste is preferred. You can replace white vinegar with cider vinegar in pickling recipes, as long as the cider vinegar has a 5% acidity level.
Since vinegar is very acidic, bacteria grow very poorly in it, or not at all. However, vinegar will still deteriorate if exposed to air and/or heat. Keep your vinegar capped and store it in a cool, dark, dry place. Vinegars can be flavored by adding slightly bruised herbs or fruit, heating the vinegar almost to body temperature, and sealing the bottle.
www.tinynewyorkkitchen.com
“Work With What You Got!”
© Victoria Hart Glavin Tiny New York Kitchen © 2016 All Rights Reserved

French Toast Toppings
Ok, most of us love maple syrup on our pancakes and French toast, but sometimes it’s fun to change it up a bit. Here are some interesting alternatives that just may become your new favorites.
Apples & Thyme
Sauté 2 large Gala apples (cut into 1/2 inch thick pieces(, 1 tablespoon fresh thyme leaves and 1/4 teaspoon sugar in 2 tablespoons unsalted butter for 6 minutes until just tender.
Sweet & Spicy Bacon
Cook 1 pound bacon (cut into 1/2 inch pieces) in large-size skillet over a medium heat 10 minutes until nearly crisp. Using a slotted spoon transfer bacon to plate lined with paper towels. Wipe out skillet. Return bacon to skillet and cook 1 minute. Sprinkle with 1 tablespoon brown sugar and cook, tossing, until sugar melts. Drizzle with 2 tablespoons maple syrup and sprinkle with 1/8 teaspoon cayenne. Toss to coat.
Herbed Goat Cheese
In bowl combine 4 ounces goat cheese (at room temperature), 1 tablespoon chopped fresh tarragon and 1 tablespoon fresh parsley, 1 teaspoon lemon zest, and 1/4 teaspoon crushed red pepper flakes.
“Work With What You Got!”
© Victoria Hart Glavin Tiny New York Kitchen © 2016 All Rights Reserved

Apples are available year-round with peak season September through November.
When choosing apples, look for firm apples, free from bruises or soft spots. Apples are sold ready for eating. Select variety according to intended use.
Refrigerate for up to 6 weeks. Store bulk apples in a cool, moist place.
“Work With What You Got!”
© Victoria Hart Glavin Tiny New York Kitchen © 2015 All Rights Reserved


