
Kohlrabi (pronounced cole-rah-bee) is in season now. This funny looking vegetable is so versatile and delicious. Try it raw in a crunchy slaw, blended into a velvety soup, or in place of rice for a low-carb side.
Though it looks like a root, kohlrabi is actually a bulb that grows above ground. It’s in the same family as cabbage, kale, Brussels sprouts, and cauliflower.
When eaten raw, kohlrabi is crunchy and mildly peppery, like radishes. When cooked, it becomes slightly tender and sweeter (similar to turnips and parsnips). The skin, while colorful, is slightly tough and won’t soften when cooked. Go ahead and peel first.
You’ll find both green and purple varieties though they taste the same. Look for firm, solid bulbs. Refrigerate unpeeled bulbs in your crisper drawer for about 2 weeks.
If leaves are attached, remove and reserve for other recipes. Cook them as you would kale. Cut a thin slice off the bottom so the bulb sits flat. Peel off the tough outer skin with a vegetable peeler. Slice into quarters, lengthwise, then cut out the core from each piece. Dice, slice, or shave per recipe instructions. Roast kohlrabi to bring out its naturally sweet and nutty flavor.
Only 37 calories per 1 cup of raw diced kohlrabi. 472 mg potassium per cup of diced kohlrabi, or as much as a medium banana. Potassium is essential for keeping your heart and nervous system working in top condition.
“Work With What You Got!”
©Tiny New York Kitchen © 2020 All Rights Reserved

Tips to make every experience in the kitchen successful!
1. Set up your workspace by gathering clean tools, bowls, and utensils. Make sure to keep a trashcan within reach.
2. To create an egg wash, whisk together a large egg with one tablespoon of water until smooth. Use as a glue to seal pastries, then brush on top for a glossy appearance.
3. Peel tomatoes with ease by cutting an X in the top, and then simmer in a pot of hot water for 15 to 30 seconds. Cool down and the skin will fall right off.
4. Get comfortable. Wear comfortable clothes and an apron when you work in the kitchen and you won’t have to worry about getting dirty.
5. Invest in a baking scale. Scales are not only an accurate way to measure your cooking ingredients, but they streamline the entire process.
6. Always read and re-read your recipes before you start cooking.
7. Clean as you go.
8. Use 2 skewers instead of 1 when grilling or roasting to prevent your food from spinning.
9. Learn to practice the rule of thumb to check the readiness of steak.
10. To prevent butter from over-browning in your pan, add a little bit of lemon juice.
11. Embrace salt. Don’t be afraid to use salt. It pulls the flavors out of your dishes. Cook with kosher salt and season with sea salt.
12. No luck finding shallots? Replace with a combination of onions and garlic.
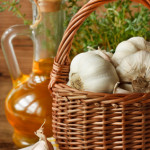
13. After handling garlic, rub your fingers on stainless steel, like your skink, to get rid of the odor.
14. Ovens can lie. Place a second thermometer in your oven to ensure proper preheating temperatures.
15. Ignore cooking times. Check your dishes by using your own senses (smell, taste, touch) to decide when they are done.
16. The most versatile and important tool is a sharp chef’s knife.
17. Learn all the different ways to cook an egg.
18. When poaching an egg, add a teaspoon of white vinegar to simmering water to help keep the yolk from breaking.
19. For a great hardboiled egg every time, bring your pot to a boil and then turn off the heat. Let your eggs sit in the heated pot for 12 minutes and then transfer to cold water.
20. Crack eggs on a paper towel on the counter (no shells and makes for easy cleanup.
21. Make an ideal sunny-side egg by covering your pan with a lid and letting the steam cook your egg. No flipping required.
22. Always taste your food before seasoning.
23. Anchor your cutting board to the counter with a damp paper towel to keep things steady and safe. You could also use a dish towel instead of a paper towel.
24. Hold a knife properly. Pinch the blade instead of gripping the handle.
25. Don’t rinse pasta.
26. Substitute half a lemon and half an orange as a replacement for a Meyer lemon.
27. When sautéing garlic, use sliced garlic instead of minced to prevent burning.
28. Invest in a seasoned cast iron skillet. This kitchen staple distributes heat evenly and is easy to clean.
29. Remove tough stems on leafy greens by pinching the stem and gently pulling off the leaves with your other hand.
30. If your recipe calls for buttermilk, you can use regular milk with lemon juice.
31. Prepping salad before serving is a huge time saver. Layer all the ingredients in a bowl and don’t add the dressing when it’s time to serve.
32. Keep your spices away from sources of heat like the stove or lights. Herbs and spices can lose their flavor when exposed to humidity and heat.
33. Save old, stale bread to make breadcrumbs in a food processor. You can freeze them for up to 6 months.
34. Let steaks come to room temperature before seasoning and grilling.
35. Store fresh herbs in a glass of water in your refrigerator.
36. To prevent tears, cut off the root of the onion before you slice.
37. For crispy fries or chips; slice the potato, then remove the starch by soaking in water for one hour before baking.
38. Celery getting floppy? Try wrapping it in aluminum foil before storing in the refrigerator.
39. Soften hard brown sugar by placing a piece of dry bread in the bag overnight.
40. Roll citrus on the counter using the palm of your hand to help release all of the juice pockets.
41. -50. Kitchen Pantry Essentials: Olive Oil, Flour, Broth, Salt, Brown Rice or Pasta, Beans, Vinegar, Sugar, Eggs, and Soy Sauce.
51. Increase the shelf life of a halved avocado by keeping the pit intact and placing it in your refrigerator.
52. To prevent sliced apples from browning, lightly squeeze lemon or lime juice on the pieces.
53. You can store butter in the freezer for up to 6 months.
54. Honey is a natural preservative and will never spoil.
55. To last longer, opened flour bags can be stored in the freezer.
56. Mushrooms should be kept dry, as they can easily soak and store water.
57. Never overcrowd your skillet with food. The heat will not distribute evenly.
58. Use an egg slicer to cut small fruits like kiwis.
59. Recipes are only a guideline. Feel free to substitute items that cater to your personal preferences.
60. To rehydrate sun-dried tomatoes, soak them in hot water or stock for about 20 minutes.
61. The basic ratio to make a classic vinaigrette is 3 parts oil to 1 part vinegar.
62. To keep garlic from going rancid, always store it at room temperature.
63. Keep knives sharp by using a sharpening tool frequently. A sharp knife is important for safety and efficiency.
64. Purchasing and preparing a whole chicken is cost-effective and resourceful.
65. Honey stuck in a jar? Place the container in hot water for about 5 minutes to loosen up the sticky residue.
66. Safely chop odd-shaped vegetables by cutting off both ends for an even surface.
67. Create simple syrup by simmering 1 cup of water and 1 cup of sugar in a medium heated pot until the sugar dissolves. Bottle and store in the refrigerator for up to 2 weeks.
68. Freeze leftover tomato paste in small ice cube containers.
69. To soften butter, cut slices into a bowl and let sit at room temperature for 10 to 15 minutes.
70. When serving ice cream to large groups, ditch the ice cream scoop. Break oven the whole container and slice the ice cream into portions.
71. If you need to grate soft cheeses, freeze the cheese for 30 minutes for a cleaner slice.
72. A cutting tool called a mandolin can be your best friend. It allows you to perfectly julienne, slice, and dice vegetables every time. Always slice slowly and use the safety guard to prevent you from cutting your finger.
73. When sautéing, it is important to first heat the pan, then heat the oil, then add the ingredients.
74. Moisturize dried coconut by adding a sprinkle of milk and letting it sit for 10 minutes.
75. Prevent bacteria growth by cooling hot food in a shallow dish.
76. Make stock in large quantities and freeze in plastic bags for later use.
77. Use Greek yogurt as a healthy substitute for mayo, sour cream, heavy cream and more.
78. Before baking, remove butter and eggs from the refrigerator and let them reach room temperature.
79. Invest in high-quality extra virgin olive oil for special meals or to drizzle over dishes to accent flavors.
80. Let cooked or grilled meat rest at room temperature before serving.
81. Plunge vegetables in ice water after blanching to help maintain a bright color.
82. For easy clean-up, line baking sheets with parchment paper.
83. Save money by purchasing in-season fruit and vegetables. You can freeze and store in airtight containers to save for later.
84. Always taste your dishes before serving.
85. Never over-season seafood. You want to still be able to taste the flavor of the fish. Simply use lemon juice, salt, and pepper.
86. Look for ground beef that has been freshly ground.
87. To preserve flavor and prevent burning, it’s important to cook slow and keep your heat low.
88. Always measure when baking. Baking is a science and any wrong measurements can be disastrous.
89. Rice Cookers can be your personal kitchen assistants. Let them do all the tedious work and you will never worry about monitory and watching boil.
90. To make leafy greens last longer, wrap them in damp paper towels and place in a sealable plastic bag before storing.
91. Test oil in a pan before adding all of your ingredients. Throw a small piece in and make sure it sizzles before adding the rest.
92. When cooking with chile peppers, protect your hands and eyes by wearing rubber gloves. Or coat your hands in vegetable oil and wash them with soap and water immediately after handling.
93. Homemade meals are good for the heart and soul. Cook often and cook with others.
94. To prevent sogginess, do not dress salads for large parties. Serve, then allow guests to add their own dressing.
95. Seafood should never smell overwhelmingly fishy; that’s a sure sign that it’s starting to go bad.
96. Chill cookie dough before putting it on a baking sheet. This will help prevent your butter from flattening and losing its fluffy texture.
97. Remove seeds from chile peppers to help reduce heat.
98. Keep key kitchen appliances, like a blender, on your countertop to encourage frequent use.
99. Overcooked vegetables lose important enzymes and nutrients.
100. Disinfect wood cutting boards by hand washing with vinegar.
101. Always keep it simple and work with what you got!
“Work With What You Got!”
©Tiny New York Kitchen © 2019 All Rights Reserved

As much as I love this hand-held summer superstar teamed or grilled, a little effort goes a long way in creating a more substantial summer side. I love cutting corn right off the cob, getting chunky clumps of corn kernels that I then lightly sauté – this brings out a bold sweetness. Sautéing tends to brighten the corn, and it holds up well on its own or tossed with other ingredients.
Please don’t open any ear of corn at the market looking for perfection. You can feel if it is a big intact fat ear. Corn holds up best cold and in its own packaging, the husk.
As soon as corn begins to warm, the sugars break down and corn gets starchy. Tearing it open exposes and warms the cob, and you’re ruining it for everyone.
To slice, hold the pointed stalk end in your hand like a handle, with the flat end on a clean cutting surface. Slice corn off the cob starting about halfway down, holding firmly running a knife down the cob. Go around the cob, then turn over to get the other half.
When sautéing, do not overcook. As soon as the corn darkens from its yellow-milky tone to a darker shiny kernel it is done. Remove from heat and to stop the cooking process, spread out on a sheet pan, and refrigerate just to cool.
“Work With What You Got!”
©Tiny New York Kitchen © 2019 All Rights Reserved

In theory, it should make little difference to your health whether you cook for yourself or let someone else do the work. But unless you can afford to hire a private chef to prepare meals exactly to your specifications, letting other people cook for you means losing control over your eating life, the portions as much as the ingredients. Cooking for yourself is the only sure way to take back control of your diet from the food scientists and food processors, and to guarantee you’re eating real food and not edible foodlike substances, with their unhealthy oils, high-fructose corn syrup, and surfeit of salt. Not surprisingly, the decline in home cooking closely parallels the rise in obesity, and research suggests that people who cook are more likely to eat a more healthful diet.
“Work With What You Got!”
©Tiny New York Kitchen © 2019 All Rights Reserved

The perfect combination of chicken Parm and hearty Italian meatballs. Each bite is packed with cheese and satiating protein. Pair with whole grain pasta or zucchini noodles.
“Work With What You Got!”
©Tiny New York Kitchen © 2019 All Rights Reserved

An ancient symbol of fertility, artichokes are fitting for spring, when we celebrate renewal. Find them year-round – fresh, frozen, canned, and jarred. Artichokes are at their best from March to June.
To Trim Artichokes
Pick off the tough outer leaves until you reach paler, more tender leaves.
With a chef’s knife, cut off the top one-third of the artichoke and all but an inch of the stem.
With a paring knife, cut off the tough green skin on the stem and any tough leaves near the base.
Cut the artichoke in half lengthwise.
With a melon baller or small spoon, scoop out and discard the “choke,” the spiky interior near the stem.
While trimming, keep artichokes in a bowl of water with lots of lemon juice so they don’t turn brown.
“Work With What You Got!”
©Tiny New York Kitchen © 2019 All Rights Reserved

We at Tiny New York Kitchen get it! Especially during the holidays you don’t want to ruin a good piece of meat. Here are some general guidelines for producing the best results for your holiday meal.
Remove meat from the refrigerator at least an hour before roasting so it can come closer to room temperature.
Start the roast at 450 degrees for 15 minutes to develop a nice crust.
Drop the oven to 350 degrees for an additional 15 to 20 minutes per pound.
Remember, you must cook to temperature, NOT time, because every oven and piece of meat is unique. So, take the temperature of the roast every 20 to 30 minutes to avoid overcooking. 120 degrees (50C) for rare and 130 degrees (55C) for medium-rare.
Always use a meat thermometer. An instant-read probe thermometer helps dispel any guesswork.
Remove from oven and loosely cover roast with foil to keep warm and rest it for 30 minutes. Don’t be alarmed when you see the temperature of the roast creep upwards a few degrees while it rests. This is perfectly normal and expected.
These directions will work for nearly all holiday roasts. The exceptions are thinner/smaller roasts like beef tenderloin or rack of lamb. These can be cooked at 400 degrees for the entire time, using a meat thermometer to monitor progress.
“Work With What You Got!”
©Tiny New York Kitchen © 2018 All Rights Reserved

If you’re looking for some useful tips on making and baking the best cookies you and your family has ever tasted then these basics will get you on the right path for cookie success.
Butter
It’s true that nothing is better for the flavor, richness, texture, and color of cookies than butter. If you have a dairy allergy then margarine can be substituted for butter if it contains enough fat. For best results, choose a stick margarine with at least 80 percent vegetable oil or one that contains at least 100 calories per tablespoon. Substituting shortening for butter will give cookies a softer, more cakelike texture and a different flavor.
Sheet Success
If your cookie sheets are thin, warped, or dark from years of baked-on grease, it’s time to go shopping. Purchase shiny, heavy-gauge cookie sheets that have low or no sides. Use jelly-roll pans (15x10x1 inch baking pans) only for bar cookies since their 1-inch sides prevent other cookie types from browning properly. Let hot cookie sheets cool between batches. Using a nonstick baking mat prevents cookies from sticking to cookie sheets by lining the sheets with this reusable mat. Parchment paper works well, too.
To The Freezer
Are you concerned you’ll have no time for last-minute holiday cooking baking? Get a head start by freezing baked and cooled cookies. Most cookies can be frozen for month, ready to be pulled out at a moment’s notice. Use airtight plastic bags and containers specifically labeled for freezer storage. Separate layers of cookies with sheets of waxed paper. Tightly seal filled bags and containers and freeze for up to three months. For best results, don’t frost or glaze cookies before freezing. Instead, freeze unfrosted cookies, thaw, then frost before serving. Most cookie dough (except bar batters and meringue or macaroon mixtures) can be frozen in an airtight freezer container for up to six months. Thaw dough in its container in the refrigerator. Shape and bake as directed.
Shipping
Sending cookies, not crumbs, to loved ones through the mail is possible – with a little care. For best results, send crisp or firm varieties (including most slice & bake) and avoid frosted moist, thin, or filled types. Wrap baked and cooled cookies individually, in back to back pairs, or in stacks in plastic wrap. Line a sturdy box with bubble wrap and pack cookies in layers of packing, peanuts or tissue paper so they won’t have room to shift. Write “perishable” on the box and ship early in the week so your package won’t be delayed over the weekend.
“Work With What You Got!”
©Tiny New York Kitchen © 2018 All Rights Reserved
What’s the deal with pre-minced garlic?! Here at Tiny New York Kitchen we’re generally not big fans of buying already prepped vegetables, but jarred minced garlic is actually the worst. Stored in water or oil and kept shelf-stable with the help of chemical preservatives, it smells and tastes like a bad joke about garlic. Bitter and funky (and not in a good way), it’s the stuff that gives the allium a bad name.
“Work With What You Got!”
©Tiny New York Kitchen © 2018 All Rights Reserved

Fresh herbs have delighted the senses and tantalized the taste buds for centuries. In medieval times great bundles of herbs were strewn on castle floors as a natural air purifier. Brides often chose to wear delicate crowns of flowers interwoven with herbs upon their heads, and both Western and Eastern medical practitioners may employ herbal remedies for their patients.
Many cooks are quite passionate about utilizing herbs in their favorite recipes. Especially bountiful herbs, which perfume our summer and fall gardens with beautiful scents and enhance the plate with their wonderful array of flavors. Using fresh herbs allows cooks to cut back on unnecessary salt, fat, and sugars, while naturally elevating main ingredients.
Brimming with health benefits, each herb plays a special role in beautifying and fortifying the body. Rosemary, for example, may improve memory. Parsley is packed with apigenin, which could potentially reduce the chances of cancerous growths and tumors. Oregano, like all other herbs, has anti-inflammatory properties that may reduce joint inflammation. Oregano is also particularly anti-bacterial and anti-fungal, and can contribute to flawless skin and glossy hair. The calcium content in basil and parsley can help maintain healthy teeth. Mint is calming and soothing and can be a digestive aid. The heady aroma of fresh herbs may help relieve any effects of nausea, as well as soothing and reviving the senses.
Basil’s affinity with tomatoes is a most engaging taste combination. Serve sun warmed tomatoes sprinkled with shards of fresh basil leaves and drizzled with olive oil. The slightly sharp bite of chives enlivens potatoes, eggs and salad dressings. Cilantro is a must for Mexican and Asian dishes. Dill adds a light, lovely layer to fish, while the snappy tang of parsley is delightful in tabouli, potato salad, and pasta. Mint is essential for tall glasses of cold ices tea or lemonade and also for embellishing summer fruit platters. Transport your taste buds by making a salad with a bounty of vegetables and a large handful of freshly minced oregano, basil, parsley, and dill. Or scent your grill with the woody stalks of rosemary. They make great skewers, infusing meat, fish, and vegetables with bright, strong flavors.
Clean herbs by soaking in a bowl of cool water, changing the water several times, or until you no longer see any dirt in the bottom of the bowl. Spin dry in a salad spinner or on layers of paper towels. For hot dishes, add herbs at the end of cooking time to avoid diluting their essence.
“An herb is the friend of physicians and the praise of cooks.” – Charlemagne
www.tinynewyorkkitchen.com
“Work With What You Got!”
©Tiny New York Kitchen © 2018 All Rights Reserved


