Many of us are preserving summer’s bounty to enjoy during colder months.
Here are tips on how to preserve using the hot water bath method. It’s really not difficult if you follow these easy steps.
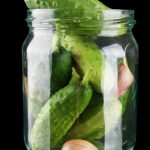
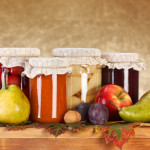
High acid foods like tomatoes, pickles, salsa, jelly, pie filling, jam, fruit, and chutney are great for canning using the hot water bath method.
Preheat Jars
Fill water bath canner (or large pot) to cover empty jars by at least 1 inch of water. Heat jars to simmer (180 degrees F) to prevent jar breakage.
Fill Jars
Following a canning recipe, fill a hot jar with prepared food leaving enough space between the food and the rim (headspace) as indicated in the recipe.
Tighten Lids And Bands
Wipe any food from the rim of the jar. Center new lid on the jar, then twist on band just until fingertip tight.
Process Jars
Place filled jars onto rack in simmering water. If you don’t have a rack designed for home preserving, use a cake cooking rack. Filled jars should be covered by 1 inch of water. Place lid on canner and heat to a steady boil. Boil jars for the time specified in recipe. Adjust for high altitudes.
Altitude Adjustment
1,001 to 3,000 ft increase processing time 5 minutes; 3,001 to 6,000 ft increase 10 minutes; 6,001 to 8,000 ft increase 15 minutes; 8,001 to 10,000 ft increase 20 minutes.
Cool Down
Turn off heat and remove canner lid. Let jars stand in water for 5 minutes. Remove from water and cool jars upright on cutting board, wire rack or towels on countertop for 12 to 24 hours.
Check The Seal
After cool down, press on center of lid. If jar is fully sealed, the lid will NOT flex up or down. Remove the bands and gently attempt to lift lids off with your fingertips. Properly sealed lids will remain attached. Wipe canning jars, lids, and bands clean. Store sealed jars in pantry for up to 18 months. Jars may be stored with or without bands. If a lid fails to seal within 24 hours, immediately refrigerate the food product.
©Tiny New York Kitchen © 2020 All Rights Reserved
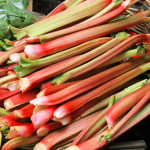
Rhubarb is a fabulous spring crop. The sour sweetness of rhubarb is absolutely nice in cakes, breads, pies, cobblers and jams, as well as sweet and savory compotes, chutneys, and sauces. Savory rhubarb chutney, cooked with onions and hot pepper is an exciting accompaniment to grilled pork, chicken, or shrimp. Sweeter versions employing brown sugar and lemon peel are superb served with pancakes, French toast, waffles or pound cake. Ladled atop frozen yogurt or ice cream, sweet rhubarb sauce is perfect for a spring sundae when the sun burns bright. This same sauce can be strained to yield a perfectly pink syrup. Combine with cold sparkling water or seltzer for a refreshing mocktail, or add to prosecco for a beautiful brunch beverage.
Rich in fiber, protein, vitamin C, potassium and calcium, rhubarb provides many valuable nutrients. A natural laxative, rhubarb may help east constipation. In fact, it is written that rhubarb was utilized in ancient Chinese medicine for treating stomach ailments. The vitamin K found in rhubarb may help strengthen bones, as well as possibly inhibiting inflammation in the brain. Rhubarb also supplies the body with vitamin A, which may help diminish signs of aging, particularly skin damage.
When choosing rhubarb at the supermarket or farm markets, look for glossy, firm stalks. Trim the leaves off when you bring your rhubarb home, as they are toxic. Store the stalks wrapped in a paper towel in your vegetable drawer. Wash before using. Rhubarb freezes beautifully, place chopped stalks on a parchment paper lined baking sheet and place in the freezer. When the chunks are frozen, store them in freezer bags and use within one year.
“Work With What You Got!”
©Tiny New York Kitchen © 2020 All Rights Reserved
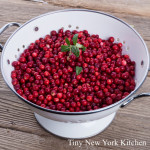
Cranberries
These tart, bright ruby-red berries grow wild on evergreen shrubs in peaty marshland all over northern Europe and North America. They are closely related to blueberries and bilberries, but are much more sour and are always served cooked. They are closely related to cowberries and lingonberries.
Cranberries are sometimes known as bouceberries since they were traditionally tested for firmness by being bounced seven times. Any berries that failed the bounce test were too squashy and were, therefore, discarded. Because of their waxy skins, cranberries keep for much longer than other berries, which helps to explain their popularity.
Cranberries contain useful amounts of vitamins C and D, potassium and iron. They used to be considered to be good protection against scurvy, and they are known to contain a natural antibiotic. Cranberry juice has long been recommended as a natural remedy for cystitis, kidney, bladder and urinary tract infections.
Look for plump, firm, bright, red berries and check the base of the carton in case of squashed or shriveled berries. Fresh cranberries will keep in the refrigerator for four weeks, or freeze them in plastic bags.
Cranberries can be used in both sweet and savory dishes or can be juiced and served as a drink. Their most famous incarnation is as cranberry sauce. The berries are high in pectin, so they make excellent jams and jellies. They also combine well with orange and apple, and can be mixed with blackberries and raspberries for an autumn version of summer pudding. Cranberry sorbet is a delicious treat. When cooking them for a sweet dish, do not add the sugar until the skins have popped or they will become tough.
“Work With What You Got!”
© Victoria Hart Glavin Tiny New York Kitchen © 2016 All Rights Reserved
 Canning Basics
It’s that time again! Time to can jams, jellies, fruits, tomato sauces, pickles, vegetables and whatever else you can think up. The good news is that canning is making a comeback as new generations discover the joys of serving and sharing home preserved foods. Here are some basic guidelines to follow for safe and delicious results.
Equipment
Boiling Water Canner
I like to use a Boiling Water Canner and not a pressure canner. A boiling water canner (or water bath) is used for fruits, jams, jellies, pickled vegetables, pickles, relishes and tomatoes. It is a large pot that has a lid and a rack designed to hold canning jars. Any large cooking pot can be used if it has a rack, a tight fitting lid and enough depth for briskly boiling water to cover the jars by 1 inch. A pressure canner must be used for vegetables and other low acid foods. It is a large heavy pot that has a rack and a tight fitting lid with a vent, a dial or weighted pressure gauge and a safety fuse. It sometimes has a gasket. Pressure canners allow foods to be heated to 240° F and held at the temperature as long as necessary. When using a pressure canner, always refer to the manufacturer’s instructions before beginning.
Jars
Canning jars come in many sizes, from 4 ounces to 1 quart; those with wide mouths are perfect for pickles. Use the size and style called for in each recipe.
Use only standard canning jars. These are tempered to withstand the heat inside a canner, and their mouths are specially threaded to seal with canning lids. Inspect all jars before using them, discard any that are cracked or have chipped rims.
Lids
Use screw bands and flat metal lids that have a built-in sealing compound. Prepare them according to the manufacturer’s directions. The flat lids are designed for one-time use only. Screw bands can be reused if they are not bent or rusty.
Other Essentials
Special kits can be purchased that include all the canning essentials in one box. Kits typically contain the following: A jar lifter for removing hot jars from the boiling water; a magnetic lid want for retrieving sterilized lids from the hot water; a nonmetallic spatula which often has measuring increments for judging headspace (You certainly could use a ruler instead); and a funnel for directing hot liquids into jars. You may also want to have a food scale, food mill or sieve and a colander. Make sure to wash any utensils that will directly touch the food with soap and warm water before beginning.
General Canning Steps
For a boiling water canner, pack food into the canning jars by the raw pack (cold pack) or hot pack method. In raw packing, uncooked food is packed into the canning jar and covered with boiling water, juice or syrup. In hot packing, food is partially cooked, packed into jars and covered with cooking liquid. The following applies to both methods.
*Wash empty canning jars in hot, soapy water. Make sure to rinse thoroughly. Place the jars in the boiling water canner. Cover the jars with hot water and then bring to a simmer over a medium heat. For food processed under 10 minutes, boil the jars 10 minutes and keep warm in simmering water until needed. Set screw bands aside; place the lids in a separate saucepan. Cover with water; bring to a simmer over medium heat (do not boil).
*If you are using a separate pot for sterilizing the jars, fill the boiling water canner half full; bring to boiling. Heat additional water in another large pot (to top off water in the canner); keep it hot but not boiling.
*Prepare only as much food as needed to fill the maximum number of jars your canner will hold at one time. Keep your work area clean.
*Remove sterilized jars from the hot water; place the hot jars on cloth towels to prevent them from slipping during packing.
*Pack food into jars using a wide mouth funnel, allowing for adequate headspace. Ladle boiling liquid over the food, leaving adequate headspace.
*Check the headspace. The space between the top of the food and the container rim is the headspace, leaving the correct amount is essential. Headspace allows a vacuum to form and the jar to seal. Use a ruler to make sure that you have the amount specified in each recipe.
*Release trapped air bubbles by gently working a sterilized nonmetal utensil (such as one provided in a canning kit) down the jar’s sides. Add liquid, if needed, to maintain necessary headspace.
*Wipe jar rims with a clean, damp cloth, food on the rims prevents a perfect seal. Place the prepared lids on the jars, add the screw bands, and tighten according to the manufacturer’s directions.
*Set each jar into the rack in the canner as it is filled and sealed. Jars should not touch each other. Replace the canner cover each time you add a jar.
*When all jars have been added, ladle hot water from the extra pot into the canner to cover the jars by 1 inch.
*Cover, heat to a full rolling boil. Begin processing time, following recipe procedures and times exactly. If necessary adjust for altitude. Keep the water boiling gently during the processing, adding additional boiling water if the water level drops. If the water stops boiling when you add more, stop timing, turn up the heat, and wait for a full boil before resuming counting.
*At the end of processing, remove the jars; place them on a rack or on towels in a draft-free area to cool. Leave at least 1 inch of space between jars to allow air to circulate.
*After the jars are completely cooled (12 to 24 hours), press the center of each lid to check the seal. If the dip in the lid holds, the jar is sealed. If the lid bounces up and down, the jar isn’t sealed. Check unsealed jars for flaws. Contents can be refrigerated and used within 2 to 3 days, frozen, or reprocessed within 24 hours. To reprocess, use a clean, sterilized jar and a new lid; process for full length of time specified. Mark the label so you can use any recanned jars first. If the jars have lost liquid but are still sealed, the contents are safe. However, any food not covered by liquid will discolor, so use these jars first.
*Wipe jars and lids. Remove, wash, and dry screw bands; store for future use. Label jars with contents and date; include batch number if you can more than a load a day. If a jar spoils, you can identify others from the same batch. Store jars in a cool (50° to 70° F), dry, dark place. Use within 1 year.
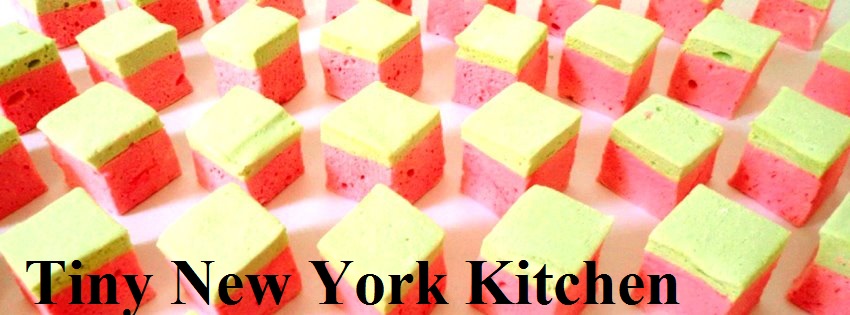
 Mitchmallows
Last week I attended New York City’s Fancy Food Show at the Javits Center. It was a very rainy and muggy day, but I decided to walk there from the East Side anyway. Naturally the place was packed with vendors and attendees which was exciting to see. I walked through isle after isle looking at and sampling many food items, but to be honest much of it was the same old jarred salsa, jams and ice cream. I probably spent a good 2 1/2 hours looking at everything and was getting ready to leave when I realized I had missed a “new products” isle. I forced myself to give the isle a quick run through even though I had a long walk back in the rain. I have to say that I was truly happy that I did because I ran into a new product called Mitchmallows. Typically, I am not a huge fan of marshmallows, but the bow-tie wearing guy behind the booth (Mitch) was super nice and invited me to try the different flavors that he had out for sampling. I couldn’t believe how good these marshmallows were and tried several different flavors just to make sure. There were trays of colorful marshmallows like Watermelon, Creamsicle, Pretzels & Beer, Ginger Wasabi, Banana Split, Pink Lemonade, Churros and Maple Syrup Pancake. My favorites were the Watermelon and Churros flavors.
Most of you know that I don’t write a review of a restaurant or a product unless I really like it. I am extremely happy that I ran into Mitch and his Mitchmallows. What a great idea and what a unique food product. If you’re a fan of marshmallows or even if you’re not into marshmallows you just may want to give these puppies a try. This was by far the best thing that I found at the Fancy Food Show and the added bonus was meeting the owner who was completely flip over his product. I’m not sure if Mitchmallows are sold in stores yet, but you can order them from the website. I saw the packaging and they come in cute little tins. Go to the website and check it out at http://www.mitchmallows.com/ and tell them that Tiny New York Kitchen sent ya.


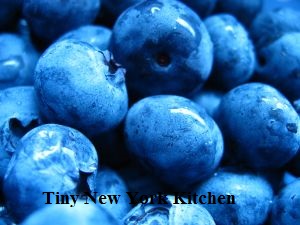 Blueberry Basics
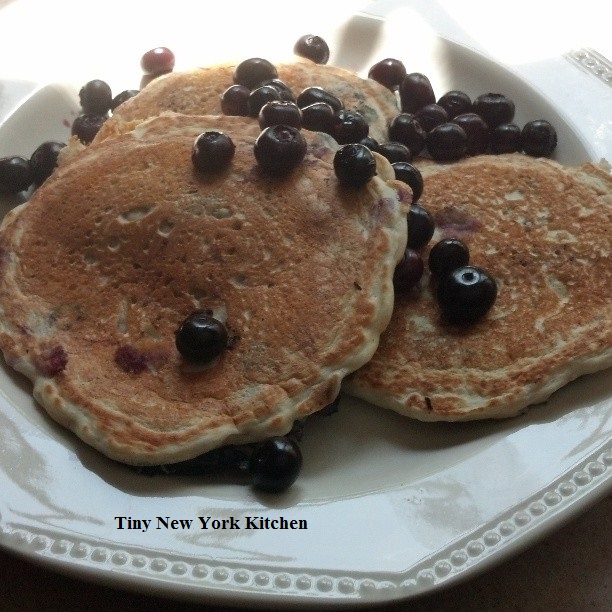
Select blueberries that are plump and juicy. You will want to make sure that they have NO trace of mold or discoloration. Look for firm and uniformly sized blueberries that are deep in color.
Store your blueberries in the refrigerator in a moisture-proof container for up to 3 days. If you will be eating your blueberries within 24 hours of picking then store them at room temperature. If you would like to use them at a later date then just pop them in the freezer. Make sure NOT to wash them before freezing.
Prepare your berries by washing just before using them.
Uses for blueberries are virtually endless. They can be eaten out of hand, in pies, pancakes, salads, salsa, jams, jellies and cakes. Be creative and create your own blueberry dishes!