
Kick up popcorn’s flavor with easy and creative combinations.
ITALIAN STYLE
Toss popcorn with finely grated Parmesan, a sprinkling of Italian seasoning, and red pepper flakes.
SAVORY SESAME
Drizzle lightly buttered popcorn with a small amount of sesame oil, then sprinkle with sesame seeds, and crushed seaweed snacks.
CRABBY CORN
Sprinkle buttered popcorn with Old Bay seasoning, kosher salt, and a small pinch of cayenne.
TEX MEX
Toss buttered popcorn with taco seasoning, garlic powder, and a pinch of chipotle chili powder.
CINNAMON SUGAR
Toss hot popcorn in cinnamon sugar immediately after popping to create a kettle corn-like crunch. Or combine sugar with a small pinch of pumpkin pie spice and toss for pumpkin kettle corn.
ALMOND JOY
Toss popcorn with mini chocolate chips, coconut flakes, and chopped roasted almonds.
SALTED CARAMEL
Sprinkle hot buttered popcorn with turbinado sugar, crushed hard caramel candies, and sea salt.
“Work With What You Got!”
©Tiny New York Kitchen © 2020 All Rights Reserved

Sometimes, the best way to cook fresh produce is the simplest way of all.
For roasting vegetables, put them on a baking sheet, sprinkle with olive oil and a bit of kosher salt, and cook in a hot oven until tender, turn once or twice.
For steaming vegetables, put a small amount of water in a saucepan and heat over a medium-high heat until tender, as little as 2 minutes or up to 10, depending on the vegetable.
“Work With What You Got!”
©Tiny New York Kitchen © 2018 All Rights Reserved

Cut Into Pieces (like you would broccoli)
Steam
Add 1 to 2 Tablespoons, Butter, Ghee or Clarified Butter
Add 1 Tablespoon Spice Mixture Of Your Choice
OR
Preheat Oven to 425 degrees. Line Baking Sheet With Parchment Paper
Scatter Pieces Onto Baking Sheet
Drizzle With Olive Oil
Season With Kosher Salt & Pepper
Place In Oven 15 to 20 Minutes Until Tender
“Work With What You Got!”
©Tiny New York Kitchen © 2018 All Rights Reserved

The turkey came originally from America and was first domesticated by the Aztecs in Mexico. The Spanish introduced turkeys into Europe and they soon became a popular choice in France, Italy and Britain.
When early settlers from Britain, France and Holland crossed the Atlantic to North America, the vast flocks of turkey that roamed wild provided them with sustenance. They were plentiful and so easy to trap or shoot that the older children of the family were given the responsibility of catching them. The Native Americans meanwhile taught the new settlers the rudiments of farming, and in November 1621, on the first anniversary of their arrival, the Pilgrims entertained the locals to a feast, at the center of which was the turkey. Ever since, this has been the traditional bird served at Thanksgiving.
Turkeys are available fresh, chilled, or frozen all year round. When buying a whole bird, look for a plump well-rounded breast and legs and clear, soft and evenly colored skin. Avoid birds that are bruised, with blemishes or torn skin or any that have been badly or unevenly plucked. Turkeys vary enormously in weight.
When you’re ready to purchase your turkey it’s easy to get confused on what size to get. A good guild to go by is to figure approximately 1 1/4 pounds per person. This makes enough for the meal and provides a decent amount of leftovers.
To store your turkey place it in a large, deep dish and cover it completely with plastic wrap. Store it in the coolest part of the refrigerator; making sure that it does not come in contact with other foods.
Thaw a frozen turkey in the refrigerator for 2 to 4 days. Estimate 24 hours for every 5 pounds, so 2 days for a 10 pounder, 3 days for a 15 pounder, etc.
And then there is always the frozen turkey emergency that goes like this, “Help, help, it’s Wednesday, and my turkey is still frozen!!!” It’s been a long time, but I’ve been in this predicament. What you do is leave the turkey in its wrapper and put it in a large-size container. A lobster pot works well. Fill the container with cold tap water and let it sit for 30 minutes. Dump out the water and refill. Let it sit another 30 minutes. Repeat until the turkey is thawed, then roast immediately or transfer to the refrigerator.
The good news is that you can brine or dry cure your turkey while it defrosts in the refrigerator. What a Godsend that is! Use a lighter brine solution, which is about 1/2 cup kosher salt per gallon of water, plus sugar and spices). If you’re dry curing, use the standard recipe. You’re turkey should stay below 40 degrees while brining. You don’t need to brine or cure a kosher or butterball type supermarket frozen turkey. These come pre-brined. If you want to be able to put your own flavor stamp on your meal, then get a natural or untreated bird and do it yourself. If you plan on brining for 2 days use the weaker solution that I just mentioned. If you plan to brine for 24 hours or less, then bump it up to 1 cup kosher salt per gallon of water. Then add an equal amount of sugar. I don’t always brine, but when I do I’ve been known to throw an assortment of flavorings in the brine. Flavorings that you could add to your brine could be: apples, lemons, oranges, onions, garlic, shallots, peppercorns, bay leaves, cinnamon sticks, cloves, allspice berries, juniper berries, mustard seeds, fennel seeds, coriander seeds, rosemary, sage, thyme, savory, parsley, or oregano. You can also replace half the water with sweet cider, hard cider, vegetable stock, turkey stock, chicken stock, beer, white wine, or red wine. If you want to dry cure then use about 1/2 teaspoon kosher salt for every pound of turkey. Then add spices to your taste.
Stuffing your turkey is a personal preference. I always stuff the bird because I love how it tastes when cooked inside the turkey. It does slow down the cooking process, however. Never stuff the turkey in advance of cooking. The stuffing can be made in advance, but the turkey should not be stuffed until just before it is placed in the oven. Weigh the stuffing and add this to the weight of the bird before calculating the cooking time. Thoroughly rinse the body cavity of the bird under cold running water, and then drain it well. Wipe the turkey, inside and out, with paper towels. Press the stuffing inside the shallow neck cavity. Make sure not to pack it in too tightly. Turn the bird over and pull the neck skin over the stuffing. Now it’s time for a little turkey bondage and truss the bird (tuck the wing tips under the breast and tie the legs together) and then cook for the calculated time. Never shorten the cooking time because although the meat may appear cooked, extra time must be allowed for cooking the stuffing thoroughly.
If you choose not to stuff your turkey then place aromatics in the body cavity of the bird. Cut a large onion in half and stud each half with 4 to 6 cloves. Place this in the body cavity of the bird. Cut an orange and a lemon into quarters and add these, together with 3 or 4 bay leaves, 4 to 6 fresh sage sprigs, and 2 to 3 fresh thyme sprigs. Add 1 cinnamon stick or 1 blade of mace for a festive hint of warm spice.
Turkeys are super easy to roast, but require a little more attention than smaller birds. Check to make sure the oven shelves are in the correct position before heating the oven. Preheat the oven to 350 degrees. Place the prepared bird on a rack in a large-size roasting pan. Smear the turkey breast generously with butter, season with salt & pepper and place in the oven. Baste the turkey from time to time during cooking. When the breast has browned, cover with foil to protect it and continue cooking. Remove the covering foil for the final 20 minutes of cooking. To check if the meat is cooked, insert a skewer into the thickest part of the thigh. If the juices run clear and the meat is white, it is cooked. If the juices are pink and the meat is soft and pink, the turkey is not ready. Return it to the oven and check again after 20 minutes. Cooking times will differ depending on whether your bird was purchased fresh or frozen. Plan on 20 minutes per pound in a 350 degree oven for a defrosted turkey and 10 to 15 minutes per pound for fresh. Remember to add more time if you’re turkey is stuffed. You should have an instant-read thermometer in your kitchen drawer. Insert the thermometer into the breast (all the way to the bone) and if it reads 160 degrees you’re good to go. You may also measure the thigh by inserting the thermometer into the thickest part, but not touching the bone, and it should read 165 degrees.
Remove the turkey from the oven and cover it closely with foil. Leave it to rest for at least 30 minutes. This will even out the temperature and make it easier to carve. I know some chefs who let it rest for 2 hours, but I don’t think that one needs to wait that long. If you wish to make gravy in the roasting pan, transfer the bird to a carving plate.
When you’ve let your bird rest awhile remove the trussing string. Hold the bird steady in position with a carving fork. Cut off the legs, then cut these in half or carve the meat from the bones. Make a horizontal cut across the breast above the wing. Carve neat and even vertical slices off the breast. Repeat on the other side of the bird. Arrange slices on a warmed platter. Add the turkey legs or sliced meat to the platter or set them aside for serving separately. Scoop out the stuffing and serve with the meat.
“Work With What You Got!”
© Victoria Hart Glavin Tiny New York Kitchen © 2016 All Rights Reserved

The Secret Ingredient For Ridiculously Crispy Chicken
For years I experimented with ways to make chicken extra crispy until one day a chef friend and I were discussing this issue. He told me that the trick is to use baking powder on “skin-on” poultry. I was a bit surprised and put it to the test myself. Holy smokes it does work!
Apparently, baking powder raises the skin’s pH levels, which will allow proteins to break down, giving you a crispier and more evenly browned outcome. Combining with poultry’s natural juices, it forms carbon dioxide gas that creates a layer of small bubbles. These bubbles will increase the skin’s surface area, which allows it to develop a crunchy texture once cooked.
It’s so simple. All you need to do is mix together 1 part baking powder to 3 parts kosher salt (for example 1 tablespoon baking powder & 3 tablespoons kosher salt – of course it all depends on what size poultry you’re cooking). Evenly sprinkle over the skin’s surface and then place in the refrigerator, uncovered, between 12 to 24 hours. Without rinsing cook it any way you want to (roast, grill, fry). It’s really that easy. You just need a bit of planning, but it’s worth it.
You can use it on chicken, turkey, duck, game hens, or goose. Thanksgiving is coming up so you may want to give it a try on your Thanksgiving turkey.
“Work With What You Got!”
© Victoria Hart Glavin Tiny New York Kitchen © 2016 All Rights Reserved

Watermelon
Watermelon is the ultimate summer snack. As a kid growing up in Nebraska, my favorite way to eat watermelon was outside, with the juice running down my face and arms. Here is how I’m eating watermelon this summer.
Treat It Like A Steak
Cut watermelon into 2 inch slabs and drizzle with olive oil. Sprinkle with kosher salt and red pepper flakes. Eat with a steak knife.
Make A BLW
Forget the tomato and use a few thin slices of watermelon on your sandwich instead. Add some cheese for good measure.
Blitz It
Purée watermelon (seeds and all), strain, then add honey, and lime juice. Serve on ice with a mint sprig. Add rum or tequila if you want to be naughty.
“Work With What You Got!”
© Victoria Hart Glavin Tiny New York Kitchen © 2015 All Rights Reserved
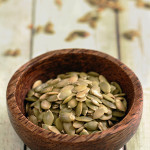
Don’t Forget The Seeds!
Just like pumpkins, the seeds of butternut and other hard winter squashes can be tossed with a splash of olive oil and a pinch of kosher salt, then toasted for a crunchy every occasion snack.
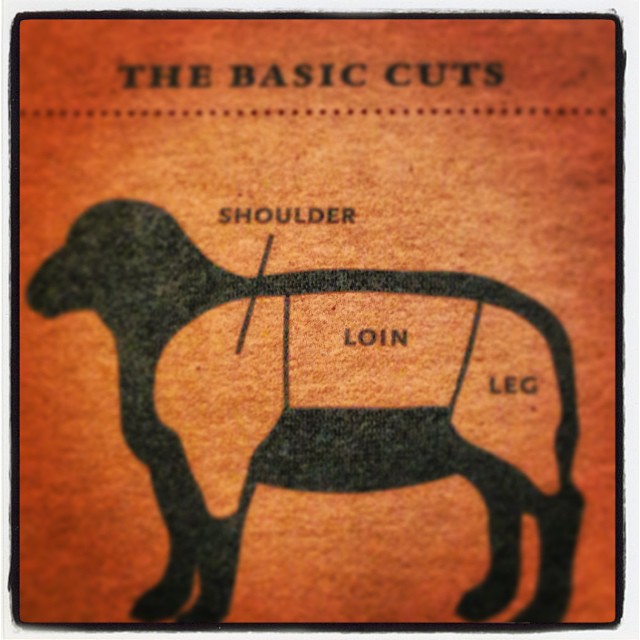
Lamb Cooked 3 Ways
Cooked low and slow, lamb shanks become rich with complex flavors. Lamb shoulder is also a great choice for slow cooking. Good value cuts are: Shoulder Chops, Stew Meat, Ground Lamb, and Leg Steak.
The USDA recommends cooking all whole muscle cuts of lamb to at least these temperatures to ensure that potentially harmful bacteria are destroyed. Some people may choose to cook their meat to lower temperatures, depending on preference. Ground lamb should be cooked to 160 degrees.
Desired Doneness:
Medium – Target Temperature 145 Degrees, Texture Warm/Firm, Center Color Pink
Medium Well – Target Temperature 155 Degrees, Texture Very Warm/Firm, Center Color Gray – Tinged With Pink
Well Done – Target Temperature 165 Degrees, Texture Hot/Dense/Hard, Center Color Gray
Best Cooking Methods For Lamb
Shoulder Blade Chops (Shoulder): Braise, Broil, Grill, Roast, Pan-Fry, And Stew
Rib Chops (Loin): Broil, Grill, Roast, Pan-Fry, And Sauté
Loin Chops (Loin): Broil, Grill, Roast, Pan-Fry, And Sauté
Whole Leg (Leg): Braise
Leg – Boned, Rolled, Tied (Leg): Grill, And Roast
Rack of Lamb (Loin): Broil, Grill, And Roast
Crown Roast (Loin): Roast
Top Round Roast (Leg): Braise, Roast, And Stew
Stew Meat (Various): Braise, And Stew
Sausages (Various): Braise, Grill, Roast, Pan-Fry, And Sauté
Shanks (Leg): Braise, And Stew
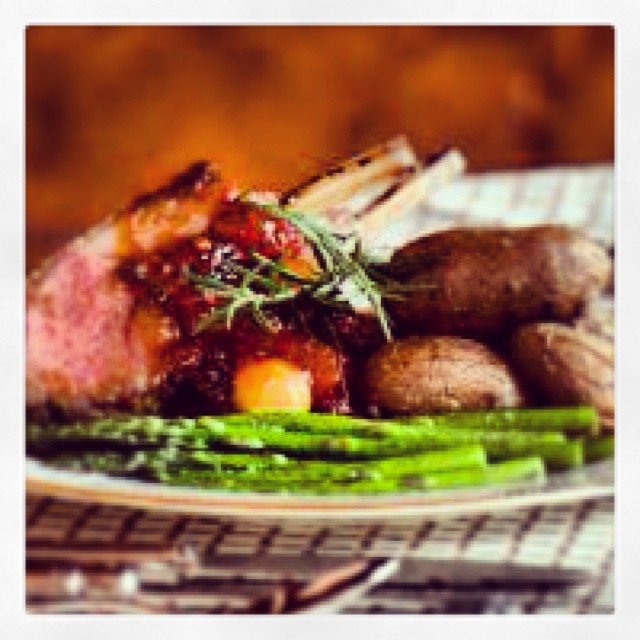
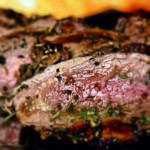
Lamb Chops 2 Ways
Classic Broiled: Preheat broiler. Arrange chops on broiler pan and season with kosher salt and pepper. Broil 4 to 5 minutes per side, or until target temperature. Remove pan from broiler, cover with foil and allow chops to rest 10 minutes before serving.
Rosemary Garlic: Puree 6 garlic cloves with 2 Tablespoons fresh rosemary. Add 1/2 cup olive oil, kosher salt and pepper. Marinate chops 30 minutes or overnight. Grill over medium-high heat, or broil according to above directions.
Roast Leg of Lamb With Mint Jelly: Preheat oven to 450 degrees. Combine 2 Tablespoons kosher salt, 1 Tablespoon black pepper, 1 Tablespoon finely chopped fresh rosemary and 1/3 cup olive oil. Rub mixture all over roast. Make a few dozen small slits in lamb and insert garlic slivers. Place lamb in roasting pan and roast 10 minutes, reduce temperature to 325 degrees and roast until target temperature, about 1 1/2 hours. Cover with foil and let rest 15 minutes. Serve with mint jelly.

Grilled Steak 3 Ways
Honestly, you don’t need a barbeque to make grilled steaks. Just go out and get yourself a grill pan and you will be wonder what took you so long in getting one. If you do want to throw your steaks on the barbeque then I certainly hope that you’re using a charcoal grill!
Classic
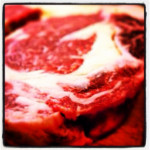
Rib Eye, Filet Mignon, Porterhouse, T-Bone or Strip Steaks
Olive Oil
Kosher Salt
Freshly Ground Pepper
Buy 1 steak per person. Bring steaks to room temperature. Preheat your grill or grill pan to a medium-high heat. Brush with olive oil, sprinkle with kosher salt, and pepper. Grill, turning 3 times (for crosshatch grill marks), until target temperature is reached – anywhere from about 5 to 15 minutes, depending on thickness. Remove from heat and allow to rest off heat for 10 to 15 minutes before serving.
Black Pepper Crusted
Rib Eye, Filet Mignon, Porterhouse, T-Bone or Strip Steaks
Olive Oil
Coarse Ground Black Peppercorns
Buy 1 steak per person. You will need about 2 tablespoons coarse ground black peppercorns per steak. Preheat your grill or grill pan to a medium-high heat. Brush steaks with olive oil and coat with peppercorns. Grill, turning 2 times (for crosshatch grill marks), until target temperature is reached –anywhere from about 5 to 15 minutes, depending on thickness. Remove from heat and allow to rest off heat for 10 to 15 minutes before serving.
Carne Asada Tacos
2 Pounds Flank or Skirt Steak
Marinade:
5 Cloves Minced Garlic
1 Diced Jalapeno Pepper
2 Teaspoons Cumin
1/2 Cup Chopped Cilantro
Juice of 2 Limes
1/3 Cup Canola Oil
1 Teaspoon Kosher Salt
Place the steaks in large ziplock bag. Pour in the marinade. Place in the fridge for 2 to 12 hours. Preheat grill or grill pan. Grill over a medium-high heat, 3 to 5 minutes per side to target temperature. Medium-rare is suggested. Remove from the heat and let rest 10 to 15 minutes. Slice thinly across the grain, serve with tortillas, salsa, and avocado.

Roast Beef Tenderloin 3 Ways
Here are three different ways to cook Beef Tenderloin. Remember to let your roast rest for a bit after removing from the oven because it will continue to cook.
Classic
1 Two to Six Pound Beef Tenderloin
4 Tablespoons Olive Oil
1 Tablespoon Minced Garlic
3 Tablespoons Rosemary
2 Tablespoons Thyme
2 Tablespoons Kosher Salt
2 Tablespoons Freshly Ground Pepper
Preheat your oven to 350° F. With 2 tablespoons olive oil lightly oil a roasting pan. Position the oven rack on center rack. In a small-size bowl combine 2 tablespoons of olive oil, garlic, rosemary, thyme, kosher salt, and pepper. Rub the spice mixture over the entire surface of tenderloin. Place into roasting pan and place into oven. Cook for about 35 to 55 minutes depending on target temperature. Remove from oven and let rest 15 minutes before serving. Serves 2 to 6 depending on size of tenderloin.
Smoked Paprika
1 Two to Six Pound Beef Tenderloin
5 Tablespoons Olive Oil
3 Tablespoons Smoked Paprika
1 Teaspoon Oregano
Zest of 1 Lemon
Juice of 1 Lemon
1 Teaspoon Kosher Salt
1 Teaspoon Freshly Ground Pepper
Preheat your oven to 350° F. With 2 tablespoons olive oil lightly oil a roasting pan. Position the oven rack on center rack. In a small-size bowl combine 3 tablespoons of olive oil, smoked paprika, oregano, zest & juice of lemon, kosher salt, and pepper. Rub the spice mixture over the entire surface of tenderloin. Place into roasting pan and place into oven. Cook for about 35 to 55 minutes depending on target temperature. Remove from oven and let rest 15 minutes before serving. Serves 2 to 6 depending on size of tenderloin.
Cajun Style
1 Two to Six Pound Beef Tenderloin
2 Tablespoons Olive Oil
3 Tablespoons Cajun Seasoning
1/2 Teaspoon Cayenne Pepper
1 Teaspoon Kosher Salt
1 Teaspoon Freshly Ground Pepper
Preheat your oven to 350° F. With 2 tablespoons olive oil lightly oil a roasting pan. Position the oven rack on center rack. In a small-size bowl combine Cajun seasoning, cayenne pepper, kosher salt, and pepper. Rub the spice mixture over the entire surface of tenderloin. Place into roasting pan and place into oven. Cook for about 35 to 55 minutes depending on target temperature. Remove from oven and let rest 15 minutes before serving. Serves 2 to 6 depending on size of tenderloin.


