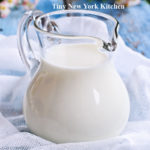
Buttermilk is a fermented dairy drink that was traditionally the liquid left behind after churning butter out of cultured cream. Today, most modern buttermilk is cultured. Cultured buttermilk was first commercially introduced in the US in the 1920s. Commercially produced buttermilk is milk that has been pasteurized, homogenized, and then inoculated with a culture of Lactococcus lactis to simulate the naturally occurring bacteria in the old-fashioned buttermilk. The tartness of cultured buttermilk is primarily due to lactic acid produced by lactic acid bacteria while fermenting lactose, the primary sugar in milk.
Condensed buttermilk and dried buttermilk are very important in the food industry. Liquid buttermilk is used primarily in the commercial preparation of baked goods and cheese. Buttermilk solids are used in ice cream manufacturing as well as being added to pancake mixes to make buttermilk pancakes.
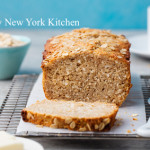
Buttermilk reacts with the baking soda and powder to give quick breads their rise and tender crumb. The reaction is best at the beginning, you’ll want to get the loaf in the oven right after mixing the wet and dry ingredients. Buttermilk can also be used in marinating meats, especially chicken and pork, because the lactic acid helps to tenderize, retain moisture, and allows added flavors to permeate the meats.
©Tiny New York Kitchen © 2021 All Rights Reserved
These freezer essentials will help you with your weekly meal prep as well as last minute meals that you need to get on the table fast.
Bagged frozen vegetables, like mixed peppers, broccoli, and spinach.
Bagged frozen fruit, like blueberries, mangos, bananas, and strawberries.
Bagged frozen pastas, like tortellini and ravioli.
Frozen waffles and pancakes.
Frozen potatoes, like tots, fries, and breakfast potatoes.
Rice and prepared side dishes.
Pre-made dough, pie crusts, and breads.
Frozen foods are not limited to frozen dinners. You can stock your freezer with healthier ingredients to make putting dinner together easy. There are endless possibilities with what you can make with frozen ingredients. As always, be creative and “work with what you got!”
“Work With What You Got!”
©Tiny New York Kitchen © 2020 All Rights Reserved
Turn out amazing treats with these easy tips and tricks to help you bake your best every time.
Measure Flour Accurately
Using a measuring cup to scoop directly from the bag can pack in too much flour, leading to dry, dense baked goods. Use the “spoon and sweep” method by gently stirring the flour in the bag with a spoon. Spoon the flour into your measuring cup. With the back of a knife, level off the cup and sweep the excess back into the bag.
Warm Eggs To Room Temperature
Room temperature eggs blend more easily in batter and dough, and whites whip up with bigger volume. Take eggs out of the refrigerator a couple hours before baking or add cold eggs to a large-size bowl. Cover with warm, not hot, tap water. Rest for 5 to 7 minutes while you measure other ingredients.
Test Your Baking Soda And Baking Powder
These leaveners help baked goods rise. If they aren’t active, quick breads and pancakes will be flat instead of fluffy. Spoon baking powder and baking soda into separate small bowls. Pour boiling water into baking powder. Pour distilled white vinegar into baking soda. If the ingredients fizz, they’re still active.
Measure Liquid And Dry Ingredients Separately
Too much or too little liquid can change the texture and taste of the finished recipe. Liquid measuring cups give you room to pour right up to the fill line without spilling. Use clear measuring cups with pour spouts for liquids. Use flat-bottomed measuring cups for dry ingredients and use the “spoon and sweep method.”
Prevent Overbaking
Know your oven’s quirks. All ovens run slightly differently, and some spots are hotter than others. Keep an eye on how your baked goods are browning, the temperature, and the time to make the best estimate. Use an oven thermometer to see if your oven runs hot or cold (a few degrees above or below what the dial says), and adjust accordingly. Set a kitchen timer, and check for doneness a few minutes early. Rotate your pan halfway through for even baking.
“Work With What You Got!”
©Tiny New York Kitchen © 2019 All Rights Reserved
Prior to 2014, U.S. states and Canadian provinces each had separate systems for grading their maple syrup. The objective was to quantify the syrup’s distinct range of colors and flavors as the sugaring season progressed. Early in the season, sap tends to yield a lighter, more delicate syrup with vanilla flavor notes. As the weeks go by, darker syrup with stronger, deeper flavor is produced. Whatever the color and flavor, all pure maple syrup has a maple sugar content of 66.9%.
Where there used to be three grades (A through C), all pure maple syrup is now considered Grade A, and consumers must shift their attention to the descriptive language found after the letter grade. Those adjectives have also changed to give more detail.
Golden Color & Delicate Taste: The lightest and most delicate syrup, best enjoyed in poured-over form; formerly known as “Fancy.”
Amber Color & Rich Flavor: Amid-season syrup, darker and more robust. Good for glazes, baking, and stirring into cocktails or over hot cereal; formerly known as Dark Amber or Grade B.
Very Dark & Strong Flavor: The darkest and most intense of all the grades, it’s suited to use in recipes that call for molasses. Until recently, this syrup wasn’t sold to consumers: it went to candy and commercial food producers for maple-flavored products. Formerly known as Grade C.
“Work With What You Got!”
©Tiny New York Kitchen © 2018 All Rights Reserved
Chefs love cast iron’s durability and its ability to evenly retain heat. What’s old is new again. Cast iron comes in all sizes from pans that hold a single fried egg to 20-inch giants that weigh 25 pounds and take up two burners. You can pick up a cast iron pan for $25 to $300. I like 10-inch skillets for everyday cooking, which are between four to six pounds and can comfortably accommodate a pack of chicken thighs. Remember that a bigger pan is a heavier pan, which limits how easily you can maneuver it as you cook.
Make sure to season your cast iron pan. Use a paper towel to rub your pan all over with a very light coat of neutral oil like grapeseed or vegetable oil and then place in a 500-degree oven for an hour. You want your pan to have a matte dark finish. Remove from the oven and let cool. Rub another very light coat of oil all over before storing. The very best thing that you can do to maintain that new seasoning is to get cooking. Each time you cook a steak or chicken thighs, the fat adds another coat to the pan’s surface, which will create a glassy finish over time. Re-season when your pan starts to look dry and dull or if you can’t remember the last time you cooked in it. Always rub you pan down with a thin coat of neutral oil before storing.
Just because you can cook it in cast iron doesn’t mean that you should! There are some foods that you definitely should not cook in your cast iron. Fish is not something that I would cook in cast iron unless I want to infuse next day’s pancakes with the essence of fish. Tomato sauce’s high acidity reacts with cast iron, which creates an unpleasant metallic flavor. I’d skip cooking scrambled eggs in cast iron unless I want to be on dish duty for an hour or two after breakfast.
Wash your pan! Yes, you do need to wash your pan. Each time you cook with cast iron a few burnt and crusty food bits inevitably seem to stick to the pan. If you don’t scrub it clean between uses, those bits will fossilize under subsequent layers of seasoning, which create an irregular surface that will never become truly nonstick (the opposite of what you want). Wash your pan with hot water and a drop of dish soap while it’s still warm. Take care not to let the pan soak in water. Wipe down the pan and then set it over a low flame for a few minutes to fully dry. Rub all over with a very light coat of neutral oil before storing (just like you would after seasoning it). These steps are crucial for keeping your pan in fighting form against Public Enemy Number One – RUST! If you ever do have spot rust just use and old toothbrush dipped in distilled vinegar to scrub it off, let it dry, and then rub in a drop of oil. If you make a regular habit of cleaning your cast iron you’ll have a faithful companion for life.
“Work With What You Got!”
©Tiny New York Kitchen © 2018 All Rights Reserved
Just a few fresh berries add color and nutrients to a salad, cocktail, or mocktail.
Stock up on fresh berries, wash and freeze them in a single layer on a sheet pan. Then transfer to a freezer bag for future smoothies and baked goods.
Add a handful of berries to a parfait, with yogurt for breakfast or ice cream for dessert.
Gently fold berries into muffin and pancake batter. Cook a big batch and freeze some for easy breakfasts later.
Make into a savory salsa and serve as a dip or over grilled chicken or wild-caught salmon.
“Work With What You Got!”
© Victoria Hart Glavin Tiny New York Kitchen © 2017 All Rights Reserved
I grew up in the Midwest where it was considered a mortal sin to waste food. The motto was “waste nothing and make the most of every ingredient.” Here are some ways for you and your family to make the most of ingredients that otherwise may make their way into the trash bin.
Stewed Fruit does double duty as a topping for pancakes, waffles and ice cream while giving you a serving of fruit. Get started with apples and dried fruits.
Super Stems. Don’t waste the nutrients in stems of greens like collards and kale, or vegetables like broccoli and cauliflower. Use them in longer cooking soups and stews.
Save The Soft. Baked desserts are a great way to use up slightly overripe fruit.
Use It, Don’t Lose It. When you by a special ingredient for a recipe, don’t waste what’s left. Get creative and add them to some of your favorite recipes.
Make Soup with leftovers. Vegetables, grains, and meats make wonderful soups. If you don’t have time to make soup right away, freeze the leftovers until you have a good cooking day. Don’t forget to label and date what you’re freezing for later.
“Work With What You Got!”
© Victoria Hart Glavin Tiny New York Kitchen © 2017 All Rights Reserved
French Toast Toppings
Ok, most of us love maple syrup on our pancakes and French toast, but sometimes it’s fun to change it up a bit. Here are some interesting alternatives that just may become your new favorites.
Apples & Thyme
Sauté 2 large Gala apples (cut into 1/2 inch thick pieces(, 1 tablespoon fresh thyme leaves and 1/4 teaspoon sugar in 2 tablespoons unsalted butter for 6 minutes until just tender.
Sweet & Spicy Bacon
Cook 1 pound bacon (cut into 1/2 inch pieces) in large-size skillet over a medium heat 10 minutes until nearly crisp. Using a slotted spoon transfer bacon to plate lined with paper towels. Wipe out skillet. Return bacon to skillet and cook 1 minute. Sprinkle with 1 tablespoon brown sugar and cook, tossing, until sugar melts. Drizzle with 2 tablespoons maple syrup and sprinkle with 1/8 teaspoon cayenne. Toss to coat.
Herbed Goat Cheese
In bowl combine 4 ounces goat cheese (at room temperature), 1 tablespoon chopped fresh tarragon and 1 tablespoon fresh parsley, 1 teaspoon lemon zest, and 1/4 teaspoon crushed red pepper flakes.
“Work With What You Got!”
© Victoria Hart Glavin Tiny New York Kitchen © 2016 All Rights Reserved

