 Chorizo
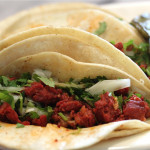
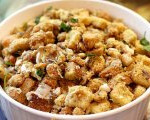
Did you know that you can make your own chorizo? Well I’ve got news for you! It’s easy to make and the payoff is big. Chorizo is simply Mexican sausage. It can be prepared and stored uncooked or cooked until you are ready to use it. Uncooked chorizo can be kept in the freezer until you are ready to use it. Tacos with chorizo filling are super tasty!
INGREDIENTS
1 Pound Ground Beef
1/2 Pound Ground Pork
2 Cloves Minced Garlic
1/2 Diced Onion
3 Tablespoons Vinegar
2 1/2 Tablespoons Chili Powder
1/2 Teaspoon Paprika
1 Teaspoon Ground Cumin
1/4 Teaspoon Freshly Ground Black Pepper
1/4 Teaspoon Ground Cloves
1 Teaspoon Kosher Salt
1 Teaspoon Oregano
2 Finely Crushed Chilitepins
In a large size bowl combine the ground beef and ground pork. Mix in the minced garlic, ground cloves and onions. In a small bowl combine the vinegar, chili powder, paprika, cumin, pepper, kosher salt, oregano and crushed chilitepins. Mix well and add to the meat mixture. Blend thoroughly. Form into a roll and place into an airtight ziplock bag. Place into the fridge until ready to use. To use simply cook the desired amount of the chorizo over a medium heat until the chorizo turns a rich brown color and the meat is fully cooked. Drain and use. Makes approximately 2 pounds of chorizo.
Chilitepins are tiny hot peppers which give the chorizo its zestiness. Use only two. They go a long way. When working with chilitepins make sure to wash your hands thoroughly and avoid touching your eyes.
 Easy Homemade Gifts
Many of us are running low on disposable money or we are tired of spending time at the mall getting gifts that your recipients are just going to re-gift anyway. Here are some “From The Kitchen” Easy Homemade Gift ideas.
Jar Gifts. It’s so easy and can be made to look pretty and from the heart. Stock up on glass jars and assemble multiple gifts at once. Not only are these gifts convenient and portable, they can be reused as storage containers later. When you are done filling the jars, seal and add a nice scrap of fabric on the top tied with ribbon or a nice string. Add a gift tag and instructions on how to use your gift.
Here are some ideas to get started.
Lentil Soup Mix
Bean Soup Mix
Granola Mix
Snack Mix
Potpourri
Chocolate Sauce
Salted Caramel Sauce
Jam
Salt Scrub For The Bath
Spiced Nuts
Cookie Mix
Quickbread Mix
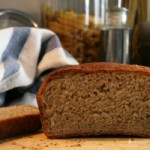
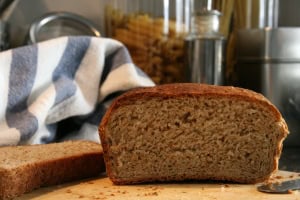
Banana Bread Mix
INGREDIENTS
2 Cups Unbleached Flour
1 Cup Sugar
1 Teaspoon Baking Soda
1 Teaspoon Ground Cinnamon
1/4 Teaspoon Kosher Salt
In a large size bowl combine the flour, sugar, baking soda, cinnamon and salt. Pour into gift jar.
For the instruction tag:
INGREDIENTS
1/2 Butter
2 Eggs
2 Ripe Bananas
1 Teaspoon Vanilla Extract
Preheat your oven to 350º F. In a large size bowl mash the bananas. Add the eggs and beat. Add the softened butter and vanilla extract. Mix well and set aside. In a separate large size bowl, pour the banana bread mix and stir with a wooden spoon to make sure that all of the ingredients are combined. Slowly add the mix to the wet ingredients and mix just until combined. Make sure not to overmix the batter. Grease a 9×5 inch loaf pan. Pour the batter into the loaf pan and place in the oven for 1 hour. You may want to place the loaf pan on a baking sheet just in case any spills over the sides. Bake for 1 hour. Remove from the oven and cool. Makes 1 delicious banana bread.
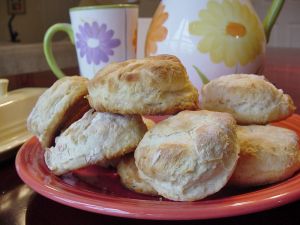 Homemade Biscuit Mix
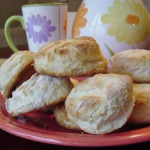
There is no need to buy premade store bought biscuit mix. Save money and make your own. Besides you’ll be able to pronounce all of the ingredients!
INGREDIENTS
10 Cups Unbleached Flour
1/3 Cup Baking Powder
1/4 Cup Sugar
4 Teaspoons Kosher Salt
2 Cups Shortening – I Like Using Olive Oil
In a large size mixing bowl stir together the flour, baking powder, sugar and salt. With a pastry blender cut in the shortening until the mixture resembles coarse crumbs. Store in a covered airtight container for up to 6 weeks at room temperature or you can keep it in the fridge. Makes 12 1/2cups.
Pancakes
To make pancakes from your homemade biscuit mix: 2 cups mix, 2 beaten eggs and 1 cup milk. Makes 10 pancakes.
Biscuits
To make biscuits from your homemade biscuit mix: Preheat oven to 450° F. 2 cups mix, 1/2 cup milk. Stir slightly on a lightly floured surface. Knead the dough 12 strokes. Roll to 1/2 inches thick. Cut dough with a biscuit cutter. Bake for 10 to 12 minutes. Makes 10 biscuits.
Muffins
To make muffins from you homemade biscuit mix: Preheat oven to 400° F. 3 cups mix, 3 tablespoons sugar, 1 beaten egg and 1 cup milk. Stir just to moist. Fill greased muffin pans. Bake for 20 to 25 minutes. Makes 12 muffins.
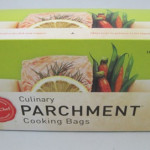
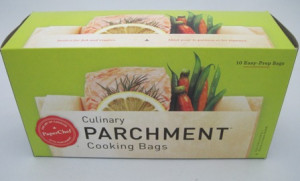 Cooking Parchment
I love cooking in parchment packets or “en papillote.” It gives big rewards without much effort. Cooking chicken or fish with vegetables in a sealed parchment paper packet may look fancy, but it’s actually a great no frills technique. Just place a few ingredients into the packets and let them do their work. You can prepare most ahead of time. They lock in flavor and moisture and are impressive looking. You can fold pretty much any way you want as long as you create a tight seal. Create your own recipes with protein, vegetables and herbs that you have on hand. Cook in the oven or on the grill.
Technique: Fold a 14×12” piece of parchment paper in half. Using kitchen shears cut the parchment into a heart shape. Arrange vegetables and herbs on one side of the paper. Top with fish or chicken. Add olive oil or butter and a splash of wine to keep the meat moist and create a sauce. Season with salt and pepper. Brush the edges of the paper with a beaten egg white for a tighter seal. Working from one end begin by tightly folding the open edge of the paper. Continue folding the paper’s open edge to form a seal. Transfer the packet to a rimmed baking sheet and bake or grill.

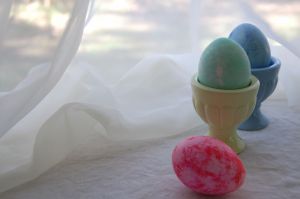
Natural Easter Egg Dyes
Coloring Easter eggs is a fun experience for children and adults, but it doesn’t need to be saturated in artificial dyes or chemicals. Here is a list of the best ingredients for making your own organic egg dyes.
Directions: Hard boil however many eggs you wish to decorate and add 1 to 2 tablespoons of white vinegar. Prepare the dyes on the stove top using a pan. Use at least 2 cups of water and 1 teaspoon of vinegar plus the organic dye ingredients. Use 3 to 4 teaspoons of the spice ingredients and 3 to 4 cups of the whole fruit or vegetable ingredients. Boil the dye for at least 5 minutes. Remember the longer you boil the deeper the hue of the dye. Crush the ingredients in the pan to release the pigments and strain. It is best to use the dyes when they are hot. The longer you soak the eggs in the dye the better the colors will turn out. The most important thing is to have fun!
1. Yellow – Use Yellow Onion Skins
2. Yellow – Use Turmeric
3. Blue – Use Chopped Red Cabbage
4. Blue – Use Blueberries
5. Green – Use Chopped or Canned Spinach
6. Green – Use Parsley
7. Red – Use Rose Hips Tea
8. Red – Use Pomegranate
9. Brown – Use Coffee Grounds
10. Brown – Use Black Tea
11. Pink – Use Beet Juice
12. Pink – Use Fresh or Frozen Raspberries
13. Orange – Use Paprika
14. Orange – Use Chili Powder
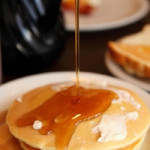
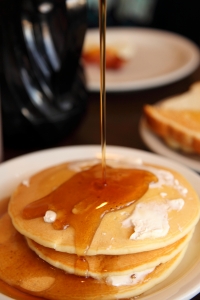
Homemade Pancake Mix
Why pay for pancake mix when you can make your own. Keep this Homemade Pancake Mix on hand for great weekend breakfast meals.
INGREDIENTS
4 Cups Unbleached Flour
2 Cups Whole Wheat Flour
2/3 Cup Sugar
2 Tablespoons Baking Powder
1 Tablespoon Baking Soda
In a large bowl combine all of the ingredients. Store in an airtight container. Store in a cool dry place for up to 6 months. Makes 6 batches of pancakes.
To prepare the pancakes: In a small bowl whisk 1 egg and ¾ cup whole milk. Whisk in 1 cup of pancake mix. Pour the batter by ¼ cupfuls onto a greased hot griddle. Flip when the pancakes start to bubble. Cook until the second side is golden brown. Makes 6 pancakes per batch.
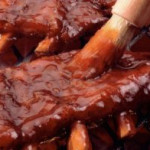
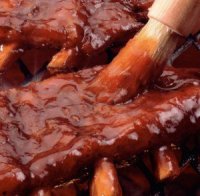
Homemade Barbecue Sauce
Why buy bottled barbecue sauce when it’s so easy to make your own?!
INGREDIENTS
2 Strips Chopped Bacon
3 Tablespoons Minced Green Bell Pepper
1 Minced Onion
1 Chopped Garlic Clove
1 Teaspoon Salt
1 Teaspoon Chili Powder
½ Cup Vinegar
½ Cup Packed Brown Sugar
1 Cup Tomato Juice
½ Cup Water
Brown the bacon in a medium saucepan over a medium heat. Add the green peppers, onions, garlic and water. Simmer for 10 minutes. Add the salt, chili powder, vinegar, brown sugar and tomato juice. Cook over a medium low heat for 40 minutes. Makes 1 ½ cups.

Stuffing A Turkey
Whole birds don’t have to be stuffed. You can place a quartered onion or lemon inside the cavity or spread fragrant herbs or peppery spices under the skin. However, a traditional stuffing, deliciously flavored with sautéed vegetables, sausage or other savory ingredients, will accent the flavor of the meat. Here are some rules for stuffing a turkey.
1. Before stuffing, rinse the bird inside and out and pat dry.
2. Cool any cooked stuffing (unless roasting immediately) before filling the bird.
3. Stuff the bird just before roasting. Never stuff in advance. It is fine to prepare a stuffing recipe ahead, but remember to refrigerate it separately and then add it just before roasting.
4. Lightly stuff the body and neck cavities. Do not pack tight.
5. Bake extra stuffing in a covered casserole with the bird for the last 30 minutes of roasting. Since this stuffing won’t be as moist you may want to drizzle the top with some broth or melted butter before heating.
6. Stand the bird, neck end up, in a bowl just big enough to hold it upright. Lightly spoon stuffing into the neck cavity.
7. Secure the neck flap over the opening with skewers. Tuck the wing tips under the back of the bird. Loosely stuff the body cavity. Fold the skin over the opening.
8. Tie the legs and tail together with string to enclose the stuffing.
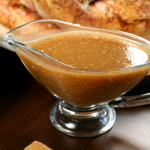
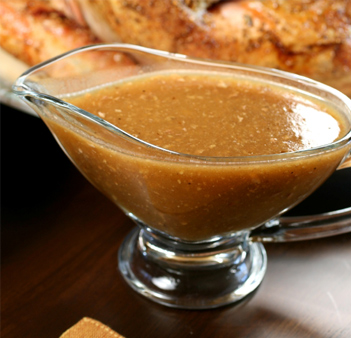
Turkey Giblet Gravy
Many people are afraid to make gravy, but it is actually pretty easy to make. Here are simple steps to make perfect Turkey Giblet Gravy!
INGREDIENTS
Turkey Giblets & Neck
Roast Turkey Pan Drippings
½ Teaspoon Salt
2 Tablespoons Unbleached Flour
In a 3 quart saucepan, heat the giblets, neck and water to boiling over a high heat. Reduce to a low heat, cover and simmer for 1 hour. Strain the broth into a large bowl. Pull the meat from the neck and throw away the bones. Coarsely chop the neck meat and giblets. Cover and refrigerate the meat and broth separately. Next, remove the rack from the roasting pan. Pour the drippings through a sieve into a 4 cup measuring cup. Add 1 cup of the broth to the roasting pan. Stir until the brown bits are loosened. Pour the drippings into a cup. Let the cup full of drippings stand until the fat separates from the meat juice. Spoon 2 tablespoons of frat from the pan drippings that were in the cup, into a 2 quart saucepan. Skim and throw away the remaining fat. In the saucepan, stir in the salt and flour. Stir constantly until golden. Add the remaining broth and enough water to the pan drippings, in the cup, to equal 3 ½ cups. Gradually stir into the saucepan. Cook and stir until the gravy thickens and boils. Stir in the reserved meat. Heat through. Makes about 4 cups.


A Proper Cup Of Tea
I love a cup of tea in the afternoon. It is a nice break in the day and a nice pick-me-up. There are many variations on how to make a proper cup of tea. Here is my version.
INGREDIENTS
Tea Bag or Tea Leaves
Fresh Cold Water
Teapot
Tea Kettle
Porcelain Cup
Milk (Not Cream)
Tea Strainer
Sugar (Not Honey)
Make sure to purchase a good quality tea. A proper English tea is made with black tea. The tea can be either loose or in bags. A real tea snob wouldn’t even think of using bags, but you make the call. Please avoid the cheap boxed bags that can be found at the grocery store (sorry Lipton). It is a good idea to go to your local tea shop and scan the shelves for a nice high quality tea that is to your liking.
Purchase a good tea pot. This is important. Tea needs to be able to move around in the pot to develop the best taste. You won’t get a fine flavor by making your tea in a lonely cup. I like to use a nice English porcelain pot. They are more expensive, but worth it.
Use cold fresh water. Please do not use the water that has already been sitting it the tea kettle because your tea will taste stale. Make sure to put fresh cold water into the kettle. It is a good idea to use filtered water to avoid any contaminant that might spoil the taste of the tea. Make sure to boil the water. Bring the water to a rolling boil to make certain to get the water at the right temperature. I prefer a stove top kettle, but some people like to use an electric kettle.
Heat your teapot while the kettle is boiling. Run some hot water into the teapot and let it sit for a few minutes. Warming the teapot helps to keep the boiling water at the right temperature to brew your tea. It will keep your brewed tea much hotter for much longer.
Get your tea ready. Just before the water comes to a boil, pour the hot water out of the teapot and add your tea. If you are using tea leaves, spoon in a teaspoon for every cup. I like to add a “plus one for the pot.” Kind of like a pinch to grow on. You may want to use a tea ball to hold the loose tea. If you do use a tea ball be aware that the tea may taste slightly different than if it was loose in the pot as it won’t have much room to move around. This is important to develop a full flavor. If you are using tea bags then add two or three to the pot. If you like your tea stronger then use three bags.
Add the boiling water to the tea. Make sure that you are adding water to the tea. Do not add tea to the water. Leave the tea to steep for about five minutes as it needs time to unfurl its leaves and develop its flavor. If you like your tea stronger than let it steep a bit longer. It is a good idea to cover your teapot with either a tea towel or a tea cozy in order to keep it warm.
Pour the tea into your porcelain cup. Some people like to temper their cup with hot water before pouring their cup of tea (pour hot water into their cup, let it sit for a few minutes and pour it out). If you have used loose tea, rest a tea strainer on your cup to catch any leaves. It is best to serve the full pot of tea right away. If you don’t plan on drinking the whole pot right way and then remove the tea bags or tea ball so that the tea doesn’t get too strong and bitter.
Add milk and sugar if you like. Add these extras only after you have poured your tea. English tea is commonly served with milk but never cream. The fat content in cream is too rich for tea’s delicate taste. Some like to add sugar to their tea as well. Honey is never served in traditional English tea. I prefer to drink my tea with a splash of milk, but not sugar. If you like to drink your tea black, you may want to add a slice of lemon.


