
Hungry for halibut or craving clams? There’s an easy way to prepare fish and seafood to perfections. Fish is ready when you can flake it easily with a fork. Shrimp and shellfish are done when they are opaque in color.
Bake: Best for fish fillets. Baking or roasting fish is an easy, hands-off method, especially good if you have a crowd to feed. As with any fish cooking technique, follow the recipe to avoid overcooking.
Wrap: Best for any fish fillet and shellfish. Cooking fish in foil is one of the most versatile ways to prepare fish, resulting in moist, flavor-packed dishes. And because you can load up on tasty ingredients, like herbs, citrus and spices, it’s a great way to cut back on fat and sodium without sacrificing flavor. Plus, cleanup is a breeze.
Poach: Best for any fish fillet and shellfish. Poaching simply means gently cooking the fish in liquid, such as water, broth, beer, or wine. It ads subtle flavor without drying out the fillets or adding any extra fat. To poach, simply cover the fish or seafood with liquid and bring to a simmer, just don’t let the liquid boil. You’ll only need a few minutes for your fish or seafood to be ready. You can also use the poaching liquid as a base for a sauce when you’re done.
Broil: Best for thick and meaty fish fillets, shrimp, and lobster tails. This method is especially good when you want to quickly bake fish and seafood. This is also a good method when you don’t have access to a grill or you’re adding a glaze. To make sure it doesn’t cook or brown too quickly, cook the fish at least 6 inches away from the broiler and watch carefully.
Steam: Best for clams and mussels. The traditional cooking method for clams and mussels, steaming is an easy way to add delicate flavor quickly without overcooking. Just add the seafood to a lidded saucepan with a little liquid like beer, wine, or broth, cover and bring to a simmer until the shells open up. Discard any that don’t open. You can also steam lobster, but it’s worth checking to see if your store’s fish department will steam lobsters for you.
Sear: Best for scallops, shrimp, and fish fillets. Use this cooking method for fish with a crisp, browned crust and a tender interior. Use a non-stick pan if possible and add a little oil before adding your fish, in batches if necessary, Don’t crowd the pan. Cook without stirring or turning for 2 to 3 minutes to brown the fish and crisp up any breading.
Grill: Best for any fish fillet or shellfish. Once grilling season rolls around don’t forget to add fish, shrimp, and even clams and mussels to your summer menus. Fish fillets take well to grilling and are easy to flip. Use a grilling basket for anything that might slip through the grate. Don’t forget skewers, which are the perfect way to grill shrimp.
“Work With What You Got!”
©Tiny New York Kitchen © 2020 All Rights Reserved
Looking to build healthier eating habits? Remember, you don’t have to change everything all at once. Start with small steps that you can feel good about.
The easiest way to cook healthy is to have the proper items on hand. Healthy pantry staples are key ingredients for making healthy meals. Fill your pantry with these shelf basics and then during the week shop for more perishable foods. Try and buy organic when possible.
Dried Beans & Dried Lentils
Canned Beans (No Salt Added)
Whole Grains
Whole Grain Pasta
Rolled Or Steel-Cut Oats
Canned Diced Tomatoes (No Salt Added)
Low Sodium Vegetable Broth
Unsweetened Plain Soy Milk
Unsweetened Plain Almond Milk
Mellow White Miso
Tahini
Peanut Or Almond Butter (No Salt Or Sugar Added)
Raw Nuts (Almonds, Cashews, Walnuts, Pumpkin Seeds, Sunflower Seeds)
Dried Apricots, Dates & Raisins (No Sugar Added)
Dijon Mustard
Cider Vinegar
Nutritional Yeast
Instead of thinking about what not to eat, think about healthy things that you can add to your diet. Strive to incorporate more greens and colorful vegetables into your meals.
Concentrate on whole foods in their natural forms such as fruits and vegetables.
Whole grains are key. Instead of reaching for regular pasta or white bread, look for varieties made with 100 % whole grain flour. Brown rice, quinoa and barley are good choices as well.
Try steaming your vegetables instead of frying in oil.
Think of beans, whole grains, and vegetables as the main event. Keep lean meat and fish at 3 ounces or less.
Remember, there are no quick fixes. Making healthy choices is a process that lasts a lifetime.
www.tinynewyorkkitchen.com
“Work With What You Got!”
© Victoria Hart Glavin Tiny New York Kitchen © 2016 All Rights Reserved
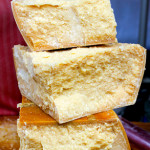
Parmesan Cheese Rinds
I tend to use a lot of good quality Parmesan cheese that I grate myself all the way down to the rind. I used to just toss the rinds until one day a chef friend told me all of the ways to use them. I think of them as the bay leaves of the cheese world. Add them when you’re cooking a dish and make sure to remove them at the end of cooking. Seriously, you’ll discover a while new world of flavor.
Throw into sauces, stews, and soups. Adding a Parmesan rind to sauces, stews, and soups will definitely add a nice rich flavor. Add to Italian dishes (both red and white pasta sauces).
Put them in a jar and pour olive oil over them. This makes Parmesan infused olive oil. You could add garlic cloves as well. This is excellent for dipping bread.
Grill them if your rinds are pure cheese with no waxy coating. They’ll become soft and chewy that is delicious on crusty bread.
Make Parmesan broth for cooking with. It’s so easy. Just add a few rinds with some herbs to a pot of water. Simmer for a couple of hours and after the broth has reduced some strain it and use to cook with.
Use them when you’re cooking vegetables.
Put a rind in the pot when you’re cooking rice or risotto.
The great news is that Parmesan rinds freeze well. You don’t need to use them right away and keep for a few months in the refrigerator. They keep for years in the freezer, however. If you don’t have any rinds on hand you may also purchase them from high-end grocers and cheese shops, where they’re super inexpensive.
www.tinynewyorkkitchen.com
“Work With What You Got!”
© Victoria Hart Glavin Tiny New York Kitchen © 2016 All Rights Reserved
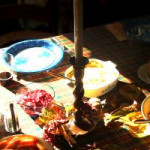
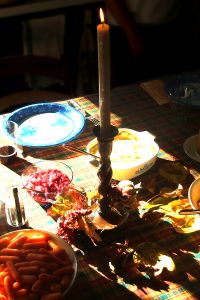
Thanksgiving Emergency Strategies
Help, help, I have extra guests coming! My gravy doesn’t look right! What to do? These are some holiday entertaining questions that I have been asked over the years. Whether this is the first time you’ve hosted Thanksgiving dinner or your 20th time there are always things that seem to come up that feel like emergencies. From lumpy gravy to unexpected guests the pressure can just be too great at times. Not to worry, these are some good strategies that have helped me cope and make everything run smoothly.
Dear Victoria: “My turkey is still a bit frozen and my dinner is in a few hours. What should I do?”
Put that bird into a large pot and run tepid water over it for at least an hour. You can butterfly the turkey so that it cooks faster which should take about an hour and a half at 400 degrees. You can then roast it or grill it. In the future you may want to consider purchasing a fresh turkey and not a frozen one.
Dear Victoria:” I called everyone to the table and started carving the turkey to find that parts of it are still raw or undercooked. How embarrassing! What should I do?”
This situation has happened to most of us at one time or another. Don’t skip a beat and just carry on carving off any parts that are cooked, serve those and put the remaining pieces back in the pan, cover with foil, and cook until done. Most likely the breast meat will be done. Your guests can get a bit of turkey along with your delicious sides while waiting for the rest of the turkey to come out of the oven. In the future you may want to consider carving the turkey first and then cooking it.
Dear Victoria: “I always seem to overcook the turkey. I just don’t know how I keep doing this. Please help!”
For the immediate remedy I suggest you have LOTS of gravy on the table to pour over those dried out pieces of turkey. In the future make sure to invest in a meat thermometer. Insert the thermometer into your cooked turkey through the thickest part of the breast until it hits the breastbone. Remove the turkey from the oven when it reads 160 degrees. Let your turkey rest for about 30 minutes before carving.
Dear Victoria: “I have a small kitchen and don’t have much room in my oven to cook everything. How am I going to get everything done?”
Tiny New York Kitchen knows this situation all too well! First of all there are plenty of things that you can get cooked in advance. Check your menu and see what you can prepare before needing to place your turkey in the oven. If you have an outdoor grill, then by all means grill your bird. Hey, you can play it off as the “hip thing to do.” Let your side dishes cook in the oven while your turkey is grilling out there in the fresh November air!
Dear Victoria: “I made stuffing and it is pretty soggy. How can I make it un-soggy?”
This is a super easy one. Scoop it out of the turkey and/or the baking dish and spread it out on a baking sheet. Place it in the oven and bake it at 350 degrees until it is how you want it. Scoop it back into the serving dish and serve. No one will be the wiser.
Dear Victoria: “Before I call my guests to the table the food starts to get cold. How can I avoid this?”
Cover serving dishes with lids or foil to keep them warm. If a dish actually gets really cold, that is supposed to be hot, then just put it back in the oven for a little bit. Don’t be too concerned, however, as most Thanksgiving dishes are perfectly fine at room temperature.
Dear Victoria: “My side dishes aren’t browned on top? They just don’t look that appetizing. What should I do?”
If a dish is fully cooked, but doesn’t have that delicious looking brown surface (Potatoes, Vegetables, Stuffing, etc.) then simply put them under a hot broiler at least 4 inches away from the heating element. You may want to turn them as needed until browned on top. MAKE SURE that you watch them carefully. You really don’t want them to go from pasty to burned up! Always put the food too far from the broiler rather than too close. If you follow these instructions then you will get a nice browned crust on top of your dishes.
Dear Victoria: “My gravy looks way too lumpy. I can’t serve lumpy gravy! How do I fix it?”
Not to worry. You will just need to put some hard work into it with a good whisk. Whisk those lumps out. It may take a bit of time, but it can be done. If you have really stubborn lumps add just a bit of hot liquid to coax them out while you whisk. If you STILL can’t get them out take a medium weave strainer and set it over a bowl. Pour the grave in and stir. Smooth gravy will flow through the strainer and the lumps will stay behind. For the future make sure you whisk the flour or cornstarch constantly while you are adding the broth or turkey juices to keep lumps from forming.
Dear Victoria: “Help, my gravy is just way to thick. It looks like brown jelly. How do I thin it out?”
This one is super easy. Drizzle in a bit of hot broth or hot water while whisking and then heat up your gravy until it’s piping hot.
Dear Victoria: “My gravy is too thin. It looks watery. I’m horrified. Is there a good solution to this hot mess?”
This problem is just a bit trickier. Brown 1 tablespoon for every cup of gravy by stirring it in a dry frying pan over a medium heat until it turns a nice deep golden brown. Have your gravy in a wide pan on the stove over a medium high heat. Whisk the browned flour into your gravy and cook. Make sure to whisk constantly until your gravy thickens. This should do the trick.
Dear Victoria: “The top of my pumpkin pie is all cracked and looks horrible. What happened? How can I serve a cracked pumpkin pie?”
Your pumpkin pie was over baked which is why it is cracked on top. Not a soul needs to know, however, if you dollop on whipped cream and carry it to the table like the prize pie it is! Sometimes cooking is like acting. If you flub a line you just carry on like that is how it is supposed to be.
Dear Victoria: “My sister called and asked if she could bring extra guests. My goodness, what am I going to do? Dinner is in an hour!”
I’ve certainly encountered this situation plenty throughout my dinner party throwing life. I’ve always kept an open door policy because I figure that not everyone has a place to go on the holidays, which can be very sad and lonely. The good news is that most of us make way too much food for Thanksgiving. Having unexpected guests can impact a meal however. First of all, forget any leftovers that you were counting on. Make more mashed potatoes, rice or pasta. These items take 30 minutes or less to make. Slice the turkey thin. Make a quick soup by combining chicken broth, pureed cooked vegetable(s), fresh herbs, salt and pepper. As soon as you get the call immediately put bowls of nuts and snacks out before dinner.
Dear Victoria: “I have quite a large group coming for dinner and I don’t have enough room at the table. What do I do?”
You can set up dinner buffet style or you can set up multiple tables as auxiliary eating areas. Living room coffee tables and game and/or card tables work. You can let everyone sit where they want or you can seat people by age or alphabetically or however you decide to seat people. Thanksgiving is about spending time with friends and family. People will have fun no matter where they are sitting. Relax and enjoy yourself.

 Constitution Week – Foods of Our Forefathers Part III
The abundance of meat in America was a major change in the diet of the early settlers. Rabbits and squirrels were available year-round nearly everywhere, plus deer and other large game in many regions. As settlers moved west, buffalo gained importance in the diet. Fish, shellfish and wild fowl became common food, and they were all essentially “free.” The existence of these various forms of game was a literal life saver in times of uncertain crops and unbroken land. The game gradually diminished, of course, as the population expanded and settlers pushed west, but it provided a large share of the diet in early and frontier days.
Ham, of course, appeared on almost every settler’s table, rich or poor. It might be the only meat served at a meal or it might appear in company with more exotic roasts and fowl, but it was always there – breakfast, dinner and supper.
Corn was also a staple of the colonists, either fresh in summer, or as hominy or corn meal all year. Corn was also put to another use by an early Virginian, Captain George Thorpe, who may have been the first food technologist in America as he invented Bourbon whiskey shortly before he was massacred by the Indians in 1622.
Meal patterns for working people in rural early America were very different from those common today. Breakfast was usually early and light which consisted of bread, hominy grits, and sometimes fruit in season. Coffee, which was a new beverage at the time, was popular that is if it was available. A drink made from caramelized grain was sometimes substituted. Chicory was popular in the South, either alone or used to stretch the coffee. Tea was often made from local leaves such as sage, raspberry or dittany. Alcohol in some form was often served.
Breakfast in more elegant homes or large plantations might be later in the morning, and include thinly sliced roast and ham.
Dinner was served somewhere between midday and midafternoon, depending on the family’s circumstances, and was the big meal of the day. There was almost always ham, as well as greens (called sallat), cabbage and other vegetables. In the proper season, special dainties would appear – fresh fruits and berries, or fresh meat at appropriate butchering times.
Desserts could be simple such as a scooped out pumpkin, baked until done and then filled with milk, to be eaten right out of the shell. Or dessert could be more complex such as ice cream or other fruit flavored frozen pudding or a blanc mange. Blanc mange was prepared from milk and loaf sugar, flavored with a tablespoon or two of rosewater, thickened with a solution of isinglass (derived from fish bladder, soaked overnight in boiling water). This mixture was boiled for 15 to 20 minutes, then poured into molds to set.
If isinglass was not available (most was imported from England), homemade calves foot jelly could be substituted, but eh dessert was not as fine.
Various alcoholic beverages, including wines, applejack, “perry” (hard cider made from pears), or beer were commonly consumed.
In winter, peaches and other fruit disappeared from the dinner table, to be replaced by dishes made from stored apples and dried fruit of various sorts. Soups or broths also took their place. Milk grew scarce as cows “dried up” in the short days. Vegetables gradually decreased in variety as stored crops wilted.
Apples quickly became a staple in early America. Orchards were easy to start, required a minimum of care, and apples stored well. Housewives devised a multitude of “receipts,” including sauces and butters for off-season, as well as many using dried apples.
Supper was late and a light bread and butter, some of the left-over roast from dinner, fruit (fresh if in season, pickled and spiced otherwise), and coffee or tea.
To Be Continued…


