
 Blueberry Basics
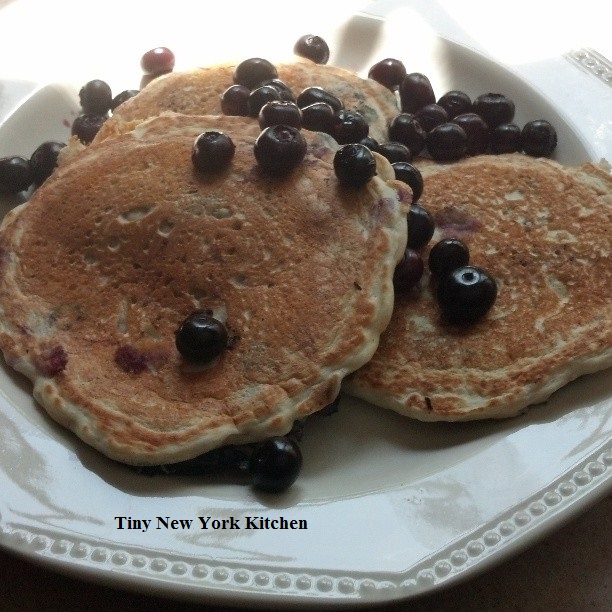
Select blueberries that are plump and juicy. You will want to make sure that they have NO trace of mold or discoloration. Look for firm and uniformly sized blueberries that are deep in color.
Store your blueberries in the refrigerator in a moisture-proof container for up to 3 days. If you will be eating your blueberries within 24 hours of picking then store them at room temperature. If you would like to use them at a later date then just pop them in the freezer. Make sure NOT to wash them before freezing.
Prepare your berries by washing just before using them.
Uses for blueberries are virtually endless. They can be eaten out of hand, in pies, pancakes, salads, salsa, jams, jellies and cakes. Be creative and create your own blueberry dishes!

 Know Your Chiles
To keep your Mexican dishes authentically delicious, here are some pointers about chiles. If you were asked to identify one characteristic that would singularly describe Mexican dishes, the “chile” would be the answer, namely chile peppers. Whether ground, whole, sliced, diced, pickled, fresh, canned or dried, chile peppers are an inherent part of Mexican dishes.
There are many varieties of chiles, ranging from mild to very hot! Chefs use whatever chiles are available to them. Some varieties are available canned when they aren’t available fresh. Here is a list of some common peppers.
Green Peppers: Also called bell peppers. They are very mild peppers and are used in salads as a garnish and they are used to flavor & color dishes.
Anaheim: Also called California peppers. They are mild, long green chiles. They can be eaten raw and are used in salads.
Jalapenos: They are smaller sized and dark green chiles. They are typically very hot.
Serranos: They are smaller and slimmer than jalapenos, but be warned they are hotter too!
Ancho: These chiles are plump and dark green chiles that range from mild to medium. Ancho means “wide,” that’s why these are usually the best choice for chile rellanos.
Yellow Hots: They are longer than jalapenos and moderately hot. These chiles are used in hot mixes, along with other chiles and are used in salsas. They are also used as a garnish to color dishes.
Wax Chiles: These chiles are small, slender, yellow chiles and are used in pickled mixes, in salsas and as a garnish.
Chilitepins: These chiles are tiny and seedy red peppers. They are used for seasoning in salsas in combination with other chiles. They are also used in pickling. Warning…they are VERY hot!
You can roast chiles over the top burner of your stove. Make sure to turn frequently to keep the chiles from burning. You can cook three to four chiles at a time. When the skins turn dark brown and look blistered then remove them from the heat. Wrap the chiles in a damp kitchen towel or paper towel to make the skins easier to remove.
Chiles can be roasted in an oven as well. Place the chiles onto a parchment paper lined baking sheet. Bake at 350º F. until the skins are brown and blistered. After roasting, wrap the chiles in a damp kitchen towel for a few minutes. Then remove the skins.
You can also dry chiles. To dry chiles, make a chile “garland.” Sting chiles up by their stems to make a cluster. Let them hang to dry by placing them in a very dry place until they become dry. Fresh green chiles turn from green to red when left to dry out. Dried chiles are ready to use when they are crackly-dry.
Chile garlands can also be used for decorations in your kitchen, living room or patio. These sartas or ristras are a characteristic sight in the Southwest.
To use dried chiles, just soak them in a hot water bath until they are softened. Open the chiles up and remove the stem and seeds. Puree them in a food processor or blender. Add small amounts of water to process. If the chiles are hot then add a water and vinegar mixture to help tame the chiles. When a chili paste is made then make sure to pass through a sieve to make a smooth paste. Season the paste as you desire to make salsas or for cooking.

 Pre-Baked Pie Crust: Five Steps For A Perfect Pie Crust
A pre-baked pie crust (sometimes called a blind baked pastry case) is one that has been partially baked without a filling so it can still cook and crisp thoroughly if the filling needs a shorter time to bake than the pastry. Pre-baking a pie crust also stops the pastry from getting soggy by a moist filling.
- Prick the base of the pie crust all over with a fork to stop the pastry from bubbling up and getting out of shape.
- Chill the pie crust in the refrigerator for at least 15 minutes before baking. This will stop it from shrinking during baking. Preheat your oven to 350º F.
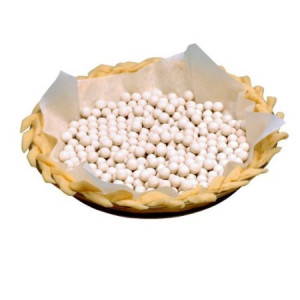
- Place a large piece of parchment paper inside the pie crust, then fill with baking beans or uncooked rice. Ceramic beans or pie weights are available from most cooking stores or Amazon. Make sure that the paper is touching the pastry, eve at the edges.
- Bake for 10 to 15 minutes for a large pie crust or 8 to 10 minutes for a small one until the pastry is cooked and opaque.
- Carefully remove the parchment paper and the beans/rice/weights and then return the empty pie crust back in the oven for 10 minutes for a large pie crust or 4 to 5 minutes for a small one. When it is ready the base will be a sandy color, dry and crisp. The top edges of the pie crust should be golden. Leave in the pie tin or pie plate and continue with your chosen recipe.
Here Is An Interesting Way On How To Separate An Egg Yolk From The Egg White
http://bbs.wenxuecity.com/cooking/1160651.html

 A Word About Baking Powder
Baking powder is a leavening agent that reacts to liquid and heat and creates carbon dioxide gas, which expands the bubbles created by the creaming process, causing the cake to rise. Baking powder loses its effectiveness after six months to a year. Be sure to check the date on the can when you buy it or mark it yourself.

 Fish & Shellfish Serving Sizes
Use these amounts as a guideline for how much fish or shellfish to purchase per person.
Whole Fish 12 Ounces to 1 Pound
Drawn or Dressed Fish 8 Ounces
Steaks or Fillets 4 to 5 Ounces
Shelled Shrimp 3 to 4 Ounces
Live Crabs 1 Pound
Whole Lobster 1 to 1 1/2 Pounds
Lobster Tail 8 Ounces
Cooked Lobster Meat 4 to 5 Ounces

 Why I Like Kosher Salt
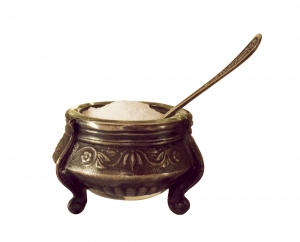
I nearly always cook with kosher salt (coarse salt) for its ease and its pure mild flavor. It’s coarser in texture than standard table salt, but the crystals are actually fine flecks that cling to food and dissolve quickly. The large irregular flakes also make it easier to sprinkle evenly and discriminately, especially when seasoning food to taste with a pinch of the fingers. If you are substituting table salt for kosher salt in a recipe, begin with half the amount listed.
 A Note About Grilled Steaks
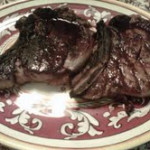
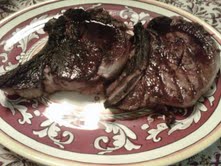
Steak is perfect for the grill. A well marbled, cut thin and flat steak is made for searing over a bed of hot coals. A grilled steak is mouthwatering if it is brown and crisp on the outside and pink & juicy on the inside. There really isn’t an easier and less complicated dinner than a grilled steak with a green salad on the side. Plus, the cleanup is practically effortless. Most any cut of steak is great for grilling. The classics are rib eye, New York, filet, tenderloin and porterhouse. The lesser cuts are cheaper and usually every bit as tasty if they are marinated. A flatiron, chuck, skirt steak, hangar steak, top sirloin or tri-tip are lesser cuts of steak that I tend to marinate overnight. Steaks can be grilled as a single portion or larger steaks can be grilled whole and sliced for more than one. A steak is best cut 1 to 2 inches thick. If a steak is thinner, then the inside will be overdone before the outside is properly seared. If a steak is thicker then the outside, it will start to char before the inside is ready. Trim off all but a fourth of an inch layer of fat. The less dripping fat means fewer flare-ups.
Seasoning a steak is simple. All you really need is kosher salt and freshly ground black pepper. Some people like an herb crust. Chopping fresh herbs together in any combination is great. You can combine thyme, rosemary, oregano and/or oregano; however, you should always use rosemary. Mix the fresh herbs with kosher salt and freshly ground pepper. Rub onto the steak with some olive oil an hour or so before grilling. You should take the steaks out of the refrigerator about 1 hour before grilling to allow the steaks to come to room temperature.
Clean your grill with a wire brush and then prepare a hot fire. Oil the grill and put on the steaks. Your grill should be so hot that you shouldn’t be able to tolerate the heat for more than a couple seconds. Cook for 5 to 6 minutes. Turn the steaks over and cook for another 5 to 6 minutes. If your steak has a border of fat then turn this onto the grill by holding the steak up with your tongs. Sear the fat for 1 to 2 minutes. After you flip your steaks you should start checking for doneness after about 2 minutes. Press the back of your tongs into the steak. If it is rare it will be soft. If it springs a bit then it is medium rare. If it is resilient then it is well done. Keep testing by using the “back of the tong” method. You can check by cutting into the steaks, but I really think that it is better not to cut into the steaks. Keep working on the “back of the tong” method and you will become a good judge pretty quickly. I think that it is a good idea to take the steaks off of the grill when they are a little less done than you want them to be. They will continue to cook while they rest. A 1 inch steak will be grilled rare in about 8 minutes and for medium it should take about 12 minutes. Check your fire while the steaks are cooking. Move the coals as needed to make the fire hotter or cooler. If your fire flares up then move the steaks out of the flames right away or the fire will burn up your steak. This will form a black and acrid crust. When you remove your steaks from the grill let them take a little rest for a few minutes before serving. Resting stabilizes the internal juices so that they don’t run out excessively when you cut into the steaks. If you are not going to serve right away, make sure to cover loosely with aluminum foil to help keep warm. Don’t seal tightly or they will continue to cook.
Happy Grilling!

 How To Peel A Tomato
Score the blossom end of the tomato (the bottom – opposite the stem) and drop into a pot of boiling water for 30 seconds. 15 to 20 seconds if the tomato is very ripe. Transfer to a bowl of cold water. The skin will wrinkle immediately and peel off easily.
 17 Things To Do With Homemade Ricotta
Now that you’ve made your Homemade Ricotta what are you going to do with it? Here are 17 things to do with that delicious Homemade Ricotta.
- Make a Cheesecake
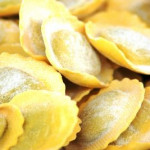
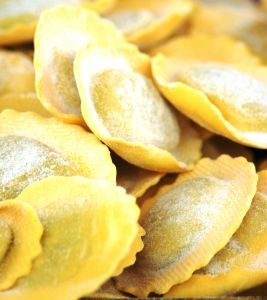
- Fill Ravioli
- Eat Warm Drizzled With Good Quality Olive Oil
- Make A Tart
- Toss With Penne Pasta And Quickly Cooked Tomatoes
- Savory Bruschetta – Toast Or Grill SlicesOf Italian Bread. Top With Sun Dried Tomatoes, Ricotta, Fresh Basil Leaves, Salt & Pepper
- Eat For Breakfast With Milk, Honey And Nuts
- Enrich Egg Dishes
- Make A Fruit Dip By Blending Cocoa Powder, Ground Cinnamon And Sugar
- Layer In Gratins And Lasagna
- Top A Dish Of Cavatelli
- Stuff Pasta Shells
- Bake In Pancakes
- Enrich Sauces
- Sweet Bruschetta – Spread On Thick Slices Of Italian Bread And Top With Jam Or Fruit For Breakfast Or A Snack
- Use In Italian Meatballs
- Use With Fresh Berries


