 Constitution Week – Foods of Our Forefathers Part III
The abundance of meat in America was a major change in the diet of the early settlers. Rabbits and squirrels were available year-round nearly everywhere, plus deer and other large game in many regions. As settlers moved west, buffalo gained importance in the diet. Fish, shellfish and wild fowl became common food, and they were all essentially “free.” The existence of these various forms of game was a literal life saver in times of uncertain crops and unbroken land. The game gradually diminished, of course, as the population expanded and settlers pushed west, but it provided a large share of the diet in early and frontier days.
Ham, of course, appeared on almost every settler’s table, rich or poor. It might be the only meat served at a meal or it might appear in company with more exotic roasts and fowl, but it was always there – breakfast, dinner and supper.
Corn was also a staple of the colonists, either fresh in summer, or as hominy or corn meal all year. Corn was also put to another use by an early Virginian, Captain George Thorpe, who may have been the first food technologist in America as he invented Bourbon whiskey shortly before he was massacred by the Indians in 1622.
Meal patterns for working people in rural early America were very different from those common today. Breakfast was usually early and light which consisted of bread, hominy grits, and sometimes fruit in season. Coffee, which was a new beverage at the time, was popular that is if it was available. A drink made from caramelized grain was sometimes substituted. Chicory was popular in the South, either alone or used to stretch the coffee. Tea was often made from local leaves such as sage, raspberry or dittany. Alcohol in some form was often served.
Breakfast in more elegant homes or large plantations might be later in the morning, and include thinly sliced roast and ham.
Dinner was served somewhere between midday and midafternoon, depending on the family’s circumstances, and was the big meal of the day. There was almost always ham, as well as greens (called sallat), cabbage and other vegetables. In the proper season, special dainties would appear – fresh fruits and berries, or fresh meat at appropriate butchering times.
Desserts could be simple such as a scooped out pumpkin, baked until done and then filled with milk, to be eaten right out of the shell. Or dessert could be more complex such as ice cream or other fruit flavored frozen pudding or a blanc mange. Blanc mange was prepared from milk and loaf sugar, flavored with a tablespoon or two of rosewater, thickened with a solution of isinglass (derived from fish bladder, soaked overnight in boiling water). This mixture was boiled for 15 to 20 minutes, then poured into molds to set.
If isinglass was not available (most was imported from England), homemade calves foot jelly could be substituted, but eh dessert was not as fine.
Various alcoholic beverages, including wines, applejack, “perry” (hard cider made from pears), or beer were commonly consumed.
In winter, peaches and other fruit disappeared from the dinner table, to be replaced by dishes made from stored apples and dried fruit of various sorts. Soups or broths also took their place. Milk grew scarce as cows “dried up” in the short days. Vegetables gradually decreased in variety as stored crops wilted.
Apples quickly became a staple in early America. Orchards were easy to start, required a minimum of care, and apples stored well. Housewives devised a multitude of “receipts,” including sauces and butters for off-season, as well as many using dried apples.
Supper was late and a light bread and butter, some of the left-over roast from dinner, fruit (fresh if in season, pickled and spiced otherwise), and coffee or tea.
To Be Continued…
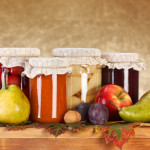
It’s that time again! Time to can jams, jellies, fruits, tomato sauces, pickles, vegetables and whatever else you can think up. The good news is that canning is making a comeback as new generations discover the joys of serving and sharing home preserved foods. Here are some basic guidelines to follow for safe and delicious results.
Equipment
Boiling Water Canner
I like to use a Boiling Water Canner and not a pressure canner. A boiling water canner (or water bath) is used for fruits, jams, jellies, pickled vegetables, pickles, relishes and tomatoes. It is a large pot that has a lid and a rack designed to hold canning jars. Any large cooking pot can be used if it has a rack, a tight fitting lid and enough depth for briskly boiling water to cover the jars by 1 inch. A pressure canner must be used for vegetables and other low acid foods. It is a large heavy pot that has a rack and a tight fitting lid with a vent, a dial or weighted pressure gauge and a safety fuse. It sometimes has a gasket. Pressure canners allow foods to be heated to 240° F and held at the temperature as long as necessary. When using a pressure canner, always refer to the manufacturer’s instructions before beginning.
Jars
Canning jars come in many sizes, from 4 ounces to 1 quart; those with wide mouths are perfect for pickles. Use the size and style called for in each recipe.
Use only standard canning jars. These are tempered to withstand the heat inside a canner, and their mouths are specially threaded to seal with canning lids. Inspect all jars before using them, discard any that are cracked or have chipped rims.
Lids
Use screw bands and flat metal lids that have a built-in sealing compound. Prepare them according to the manufacturer’s directions. The flat lids are designed for one-time use only. Screw bands can be reused if they are not bent or rusty.
Other Essentials
Special kits can be purchased that include all the canning essentials in one box. Kits typically contain the following: A jar lifter for removing hot jars from the boiling water; a magnetic lid want for retrieving sterilized lids from the hot water; a nonmetallic spatula which often has measuring increments for judging headspace (You certainly could use a ruler instead); and a funnel for directing hot liquids into jars. You may also want to have a food scale, food mill or sieve and a colander. Make sure to wash any utensils that will directly touch the food with soap and warm water before beginning.
General Canning Steps
For a boiling water canner, pack food into the canning jars by the raw pack (cold pack) or hot pack method. In raw packing, uncooked food is packed into the canning jar and covered with boiling water, juice or syrup. In hot packing, food is partially cooked, packed into jars and covered with cooking liquid. The following applies to both methods.
*Wash empty canning jars in hot, soapy water. Make sure to rinse thoroughly. Place the jars in the boiling water canner. Cover the jars with hot water and then bring to a simmer over a medium heat. For food processed under 10 minutes, boil the jars 10 minutes and keep warm in simmering water until needed. Set screw bands aside; place the lids in a separate saucepan. Cover with water; bring to a simmer over medium heat (do not boil).
*If you are using a separate pot for sterilizing the jars, fill the boiling water canner half full; bring to boiling. Heat additional water in another large pot (to top off water in the canner); keep it hot but not boiling.
*Prepare only as much food as needed to fill the maximum number of jars your canner will hold at one time. Keep your work area clean.
*Remove sterilized jars from the hot water; place the hot jars on cloth towels to prevent them from slipping during packing.
*Pack food into jars using a wide mouth funnel, allowing for adequate headspace. Ladle boiling liquid over the food, leaving adequate headspace.
*Check the headspace. The space between the top of the food and the container rim is the headspace, leaving the correct amount is essential. Headspace allows a vacuum to form and the jar to seal. Use a ruler to make sure that you have the amount specified in each recipe.
*Release trapped air bubbles by gently working a sterilized nonmetal utensil (such as one provided in a canning kit) down the jar’s sides. Add liquid, if needed, to maintain necessary headspace.
*Wipe jar rims with a clean, damp cloth, food on the rims prevents a perfect seal. Place the prepared lids on the jars, add the screw bands, and tighten according to the manufacturer’s directions.
*Set each jar into the rack in the canner as it is filled and sealed. Jars should not touch each other. Replace the canner cover each time you add a jar.
*When all jars have been added, ladle hot water from the extra pot into the canner to cover the jars by 1 inch.
*Cover, heat to a full rolling boil. Begin processing time, following recipe procedures and times exactly. If necessary adjust for altitude. Keep the water boiling gently during the processing, adding additional boiling water if the water level drops. If the water stops boiling when you add more, stop timing, turn up the heat, and wait for a full boil before resuming counting.
*At the end of processing, remove the jars; place them on a rack or on towels in a draft-free area to cool. Leave at least 1 inch of space between jars to allow air to circulate.
*After the jars are completely cooled (12 to 24 hours), press the center of each lid to check the seal. If the dip in the lid holds, the jar is sealed. If the lid bounces up and down, the jar isn’t sealed. Check unsealed jars for flaws. Contents can be refrigerated and used within 2 to 3 days, frozen, or reprocessed within 24 hours. To reprocess, use a clean, sterilized jar and a new lid; process for full length of time specified. Mark the label so you can use any recanned jars first. If the jars have lost liquid but are still sealed, the contents are safe. However, any food not covered by liquid will discolor, so use these jars first.
*Wipe jars and lids. Remove, wash, and dry screw bands; store for future use. Label jars with contents and date; include batch number if you can more than a load a day. If a jar spoils, you can identify others from the same batch. Store jars in a cool (50° to 70° F), dry, dark place. Use within 1 year.
Have you ever come home from the market after purchasing fruit to find that you spent money for nothing? I have plenty of times and it ticks me off every time. Here are some Fruit Essentials that may help you have more fruit shopping success.
Did you know that many plants that are botanically fruits are not sweet? We think of them as vegetables or non-fruits. Avocados, beans, coconuts, corn, cucumbers, eggplants, green peppers, okra, peas, pumpkins, sugar peas, string beans and tomatoes all fall in the fruit category. Some cookbooks make a distinction between fruit, vegetables and fruit vegetables. Fruit vegetables are foods that are botanically fruits, but are most often prepared and served like vegetables. These fruits are considered fruit vegetables: Aubergine, autumn squash, avocado, bitter melon, cantaloupe, chayote, chile, courgette, cucumber, eggplant, gherkin, green bean, green sweet pepper, hot pepper, marrow, muskmelon, okra, olive, pumpkin, red sweet pepper, seedless cucumber, squash, sweet pepper, tomatillo, tomato, watermelon, wax gourd, yellow sweet pepper and zucchini.
Pectin is a substance contained in some fruit which is used for making jams and jellies thicker. High pectin fruits are apples, cranberries, currants, lemons, oranges, plums and quinces. Low pectin fruits are bananas, cherries, grapes, mangos, peaches, pineapples and strawberries.
Low pectin fruits seem to discolor quicker than high pectin fruits ( bananas and eggplants). Lemon juice or vinegar slows the discoloring process. Other fruits and vegetables that discolor quickly are avocados, cauliflower, celery, cherries, figs, Jerusalem artichokes, mushrooms, nectarines, parsnips, peaches, pears, potatoes, rutabaga and yams.
Bruising: When a fruit is bruised the cell walls break down and discoloration begins. The process can be slowed down by refrigeration.
Cleaning: It is important to clean our fruit and vegetables. Rinse fruit in cold running water and scrub as needed before cooking or eating. Soaking fruit in water for more than a few minutes can leach out water soluble vitamins.
Peeling: The fruit skin usually contains a lot of important nutrients, but if you need to peel a thick-skinned fruit cut a small amount of the peel from the top and bottom. Then on a cutting board cut off the peel in strips from top to bottom. A good way to peel thin skinned fruit is to place the fruit in a bowl with boiling water and let stand for about 1 minute. Remove and cool in an ice water bath. You could also spear the fruit with a fork and hold over a gas flame until the skin cracks OR quarter the fruit and peel with a sharp paring knife or potato peeler.
Wax: Oh those beautiful waxed apples that wink at us at the market. They are beautiful because they are waxed. I don’t know about you, but I would rather not eat wax. Wax can be removed from the surface of fruits by washing them with a mild dishwashing soap and then thoroughly rinsing them. This will remove most of the wax, but probably not all of it.
Purchasing Ripe: Purchase these fruits fully ripe: Berries, cherries, citrus, grapes and watermelon. All of the fruits in this list, except berries, can be refrigerated without losing flavor.
Purchasing Not-So-Ripe: Apricots, figs, melons, nectarines, peaches and plums develop more complex flavors after picking. Store these fruits at room temperature until they are as ripe as you would like them.
Refrigeration: You can refrigerate apples,ripe mangos and ripe pears as soon as you get them. Do not refrigerat bananas.
Seasonal Fruit: Winter is the season for citrus. Fall is the season for apples and pears. Late spring is the season for strawberries and pineapples. Summer is perfect for blueberries, melons, peaches and plums.
Washing: Dry fruit with paper towels or kitchen towels and then use a blow dryer on the cool setting to completely dry fruit.
Squeezing: A microwave can be used to get more juice from citrus fruits. Microwave citrus fruits for about 20 seconds before squeezing the fruit for juice.
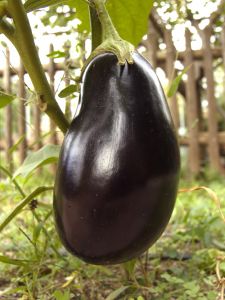
Eggplant (also known as Aubergine or Melongene) is an egg-shaped vegetable with a typically dark purple, shiny skin, though some are yellow or white. Eggplant was so named because the delicate white varieties that resemble eggs. Eggplant grows on a plant (Solanum Esculentum) in the nightshade family and is actually a fruit and not a vegetable. It is actually technically a berry. Eggplants have not always been popular. They were once known as “mad apples,” because it was thought that they caused insanity or death. They have been used in China since 600 BC. Thomas Jefferson first brought the eggplant to America from France in the eighteenth century. Male eggplants are rounder and smoother at the blossom end. They have fewer seeds which are bitter. Female eggplants are more oval and the blossom end is usually deeply indented. They tend to have more bitter seeds.
Eggplants are at their best from July through September. Select smooth, firm, glossy-skinned eggplants with green caps and stems. Smaller eggplants are sweeter than large ones. The fewer the seeds in an eggplant, the sweeter the eggplant. The more seeds in an eggplant, the older the eggplant.
Store eggplants in perforated plastic bags in the vegetable crisper of the refrigerator for four to five days.
Eggplants should be cooked immediately after peeling or cutting because the exposed flesh discolors rapidly due to oxidation. To prevent this start cooking as soon as you have cut it. If there is an unavoidable delay, promptly coat the surface with lemon juice or submerge with pieces in acidulated water.
Salt the flesh of a large cut-up eggplant to draw out any bitterness. For frying, it is always good to salt the eggplant or otherwise remove excess moisture. Only eggplants with tough, thick skins need to be peeled.
Eggplants should be cooked in only the minimum amount of fat or oil or without any at all because they have inner air pockets. Eggplants can absorb several times their weight in oil, even when breaded. Cooking with too much oil or fat breaks down the eggplant’s texture.
Slicing eggplants is so much easier when using a serrated knife.
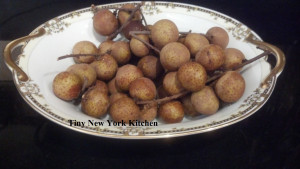
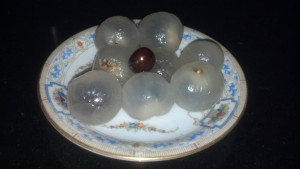
Every week my awesome Chinese massage therapist gives me a different Asian fruit to try. I get all sorts of different fruit that I have never seen before. My massage therapist, Su, is very proud of her culture and is so happy when I try foods from her culture. Last week Su gave me something called, Longan, which is also called “Dragon’s Eye.” Apparently, it is called “Dragon’s Eye” because it resembles an dragon’s eyeball when the fruit is peeled. There is a black seed inside that shows through the translucent flesh. Like a pupil. The seed is fairly small, round and hard. When Longan is ripe it is easy to peel. It tastes sort of like a grape and sort of like a lychee. Most of the Longan fruit is grown in China, but these were grown in Florida. I am totally a fan of this fruit and am grateful to Su for teaching me about foods from the Chinese culture.
Select blueberries that are plump and juicy. You will want to make sure that they have NO trace of mold or discoloration. Look for firm and uniformly sized blueberries that are deep in color.
Store your blueberries in the refrigerator in a moisture-proof container for up to 3 days. If you will be eating your blueberries within 24 hours of picking then store them at room temperature. If you would like to use them at a later date then just pop them in the freezer. Make sure NOT to wash them before freezing.
Prepare your berries by washing just before using them.
Uses for blueberries are virtually endless. They can be eaten out of hand, in pies, pancakes, salads, salsa, jams, jellies and cakes. Be creative and create your own blueberry dishes!
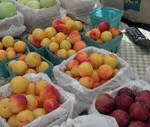
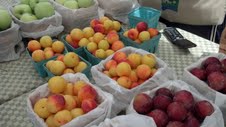
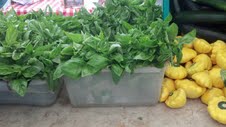
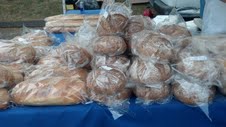
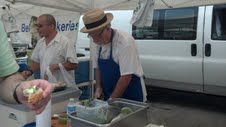
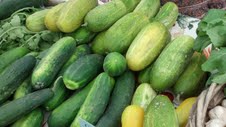
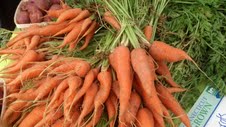
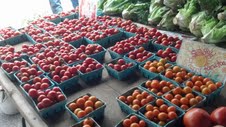
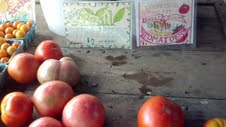
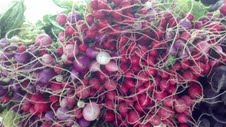
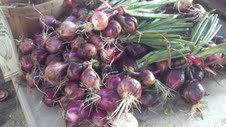
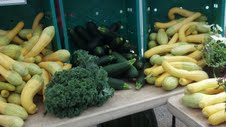
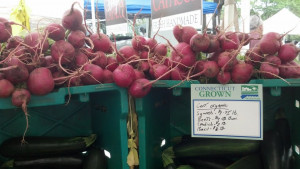
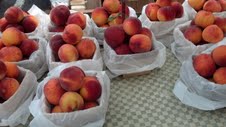
I love going to farmers' markets, especially good ones. It's the closest to "farm to table" that I can get without growing my own fruits and vegetables. Yesterday was my first visit to the New Canaan farmer’s market. It’s a good one! I picked up beets, radishes, tomatoes, cucumbers, onions, peaches and plums. Everything looked great and even though the vendors were busy they were very friendly and seemed happy to be there.
New Canaan Farmers’ Market
Saturday 10am to 2pm
May 12th Through October
Old Center School Parking Lot
South Avenue & Maple Street
www.newcanaanfarmersmarket.net
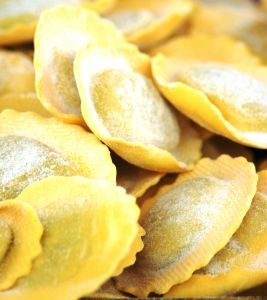 17 Things To Do With Homemade Ricotta
Now that you’ve made your Homemade Ricotta what are you going to do with it? Here are 17 things to do with that delicious Homemade Ricotta.
- Make a Cheesecake
- Fill Ravioli
- Eat Warm Drizzled With Good Quality Olive Oil
- Make A Tart
- Toss With Penne Pasta And Quickly Cooked Tomatoes
- Savory Bruschetta – Toast Or Grill SlicesOf Italian Bread. Top With Sun Dried Tomatoes, Ricotta, Fresh Basil Leaves, Salt & Pepper
- Eat For Breakfast With Milk, Honey And Nuts
- Enrich Egg Dishes
- Make A Fruit Dip By Blending Cocoa Powder, Ground Cinnamon And Sugar
- Layer In Gratins And Lasagna
- Top A Dish Of Cavatelli
- Stuff Pasta Shells
- Bake In Pancakes
- Enrich Sauces
- Sweet Bruschetta – Spread On Thick Slices Of Italian Bread And Top With Jam Or Fruit For Breakfast Or A Snack
- Use In Italian Meatballs
- Use With Fresh Berries


