
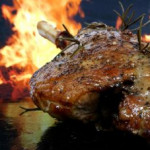
Grilled Steak 3 Ways
Honestly, you don’t need a barbeque to make grilled steaks. Just go out and get yourself a grill pan and you will be wonder what took you so long in getting one. If you do want to throw your steaks on the barbeque then I certainly hope that you’re using a charcoal grill!
Classic
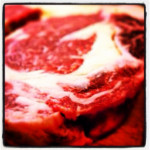
Rib Eye, Filet Mignon, Porterhouse, T-Bone or Strip Steaks
Olive Oil
Kosher Salt
Freshly Ground Pepper
Buy 1 steak per person. Bring steaks to room temperature. Preheat your grill or grill pan to a medium-high heat. Brush with olive oil, sprinkle with kosher salt, and pepper. Grill, turning 3 times (for crosshatch grill marks), until target temperature is reached – anywhere from about 5 to 15 minutes, depending on thickness. Remove from heat and allow to rest off heat for 10 to 15 minutes before serving.
Black Pepper Crusted
Rib Eye, Filet Mignon, Porterhouse, T-Bone or Strip Steaks
Olive Oil
Coarse Ground Black Peppercorns
Buy 1 steak per person. You will need about 2 tablespoons coarse ground black peppercorns per steak. Preheat your grill or grill pan to a medium-high heat. Brush steaks with olive oil and coat with peppercorns. Grill, turning 2 times (for crosshatch grill marks), until target temperature is reached –anywhere from about 5 to 15 minutes, depending on thickness. Remove from heat and allow to rest off heat for 10 to 15 minutes before serving.
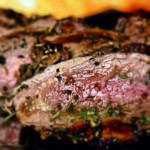
Carne Asada Tacos
2 Pounds Flank or Skirt Steak
Marinade:
5 Cloves Minced Garlic
1 Diced Jalapeno Pepper
2 Teaspoons Cumin
1/2 Cup Chopped Cilantro
Juice of 2 Limes
1/3 Cup Canola Oil
1 Teaspoon Kosher Salt
Place the steaks in large ziplock bag. Pour in the marinade. Place in the fridge for 2 to 12 hours. Preheat grill or grill pan. Grill over a medium-high heat, 3 to 5 minutes per side to target temperature. Medium-rare is suggested. Remove from the heat and let rest 10 to 15 minutes. Slice thinly across the grain, serve with tortillas, salsa, and avocado.

Roast Beef Tenderloin 3 Ways
Here are three different ways to cook Beef Tenderloin. Remember to let your roast rest for a bit after removing from the oven because it will continue to cook.
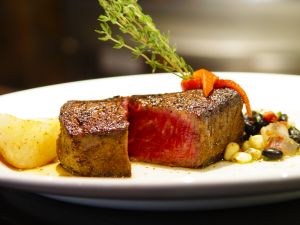
Classic
1 Two to Six Pound Beef Tenderloin
4 Tablespoons Olive Oil
1 Tablespoon Minced Garlic
3 Tablespoons Rosemary
2 Tablespoons Thyme
2 Tablespoons Kosher Salt
2 Tablespoons Freshly Ground Pepper
Preheat your oven to 350° F. With 2 tablespoons olive oil lightly oil a roasting pan. Position the oven rack on center rack. In a small-size bowl combine 2 tablespoons of olive oil, garlic, rosemary, thyme, kosher salt, and pepper. Rub the spice mixture over the entire surface of tenderloin. Place into roasting pan and place into oven. Cook for about 35 to 55 minutes depending on target temperature. Remove from oven and let rest 15 minutes before serving. Serves 2 to 6 depending on size of tenderloin.
Smoked Paprika
1 Two to Six Pound Beef Tenderloin
5 Tablespoons Olive Oil
3 Tablespoons Smoked Paprika
1 Teaspoon Oregano
Zest of 1 Lemon
Juice of 1 Lemon
1 Teaspoon Kosher Salt
1 Teaspoon Freshly Ground Pepper
Preheat your oven to 350° F. With 2 tablespoons olive oil lightly oil a roasting pan. Position the oven rack on center rack. In a small-size bowl combine 3 tablespoons of olive oil, smoked paprika, oregano, zest & juice of lemon, kosher salt, and pepper. Rub the spice mixture over the entire surface of tenderloin. Place into roasting pan and place into oven. Cook for about 35 to 55 minutes depending on target temperature. Remove from oven and let rest 15 minutes before serving. Serves 2 to 6 depending on size of tenderloin.
Cajun Style
1 Two to Six Pound Beef Tenderloin
2 Tablespoons Olive Oil
3 Tablespoons Cajun Seasoning
1/2 Teaspoon Cayenne Pepper
1 Teaspoon Kosher Salt
1 Teaspoon Freshly Ground Pepper
Preheat your oven to 350° F. With 2 tablespoons olive oil lightly oil a roasting pan. Position the oven rack on center rack. In a small-size bowl combine Cajun seasoning, cayenne pepper, kosher salt, and pepper. Rub the spice mixture over the entire surface of tenderloin. Place into roasting pan and place into oven. Cook for about 35 to 55 minutes depending on target temperature. Remove from oven and let rest 15 minutes before serving. Serves 2 to 6 depending on size of tenderloin.

Beef
Just what is dry-aged beef? Dry-aged beef has been stored for 14 to 21 days in a humidity and temperature-controlled environment. Dry aging allows moisture to evaporate and enzymes to break down some of the meat’s fibers. Dry aging intensifies the flavor and creates a tender texture that some describe as buttery or velvety. Only the most valued cuts are used to produce this special product. Dry-aged steaks may cook a little faster than the same non-dry aged-cut but the target doneness temperatures are the same.
Ground meat requires special handling. Whether it is beef, poultry, pork, lamb or veal, ground meat carries the greatest potential risk of food-bourne illness. It should be thoroughly cooked before eating because the grinding process introduces potentially harmful bacteria throughout the meat. The USDA recommends cooking ground meats to a internal temperature of at least 165° F for poultry and 160° F for meat.
One reason that beef raised without artificially stimulating growth hormones costs more is because it takes longer to raise. It takes approximately 20 to 24 months vs. about 16 months, which incurs more feed expense. You should look for grass-fed beef that has been raised on a vegetarian diet (not corn), not confined, pastured raised and no antibiotics or hormones added ever.
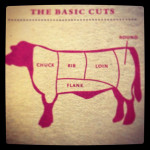
The best value beef cuts are: Ground Beef, Skirt Steak, Chuck Roast, Chuck Steak, Top Sirloin, Cube Steak, and Stew Meat.
Cooking Time Estimate For Roasting: Depending on the cut, should be about 20 minutes per pound at 350° F for medium.
Best Cooking Methods For Steak:
Rib Steak (Rib) Grill & Pan-Fry
Filet Mignon (Loin) Broil, Grill, Pan-Fry, Sauté
Porterhouse (Loin) Broil, Grill, Pan-Fry
T-Bone (Loin) Broil, Grill, Pan-Fry, Sauté
Strip Steak (Loin) Broil, Grill, Pan-Fry, Sauté
Top Sirloin (Loin) Braise, Broil, Roast, Pan-Fry
Hanger (Flank) Braise, Broil, Grill, Pan-Fry
Flank (Flank) Braise, Grill
Skirt (Flank) Braise, Grill
Chuck Eye Steak (Chuck) Braise, Broil, Grill, Sauté, Stew
Flat Iron Steak (Chuck) Broil, Grill, Pan-Fry, Sauté
Bottom Round Steak (Round) Braise
Eye Round Steak (Round) Braise, Sauté
Beef Round Cube Steak (Round) Braise, Grill, Sauté
Top Round Steak (Round) Braise, Broil
London Broil (Varies) Braise, Broil, Grill, Roast
Best Cooking Methods For Beef Roasts & Smaller Cuts:
Rib Roast Bone-In (Rib) Roast
Rib Eye Roast (Rib) Grill, Roast
Tenderloin (Loin) Broil, Grill, Roast
Top Sirloin Roast (Loin) Roast
Tri-Tip Roast (Loin) Broil, Grill, Roast
Fresh Brisket (Plate) Braise, Stew
Flat Cut Corned Brisket (Plate) Braise
Shoulder Roast (Chuck) Braise, Stew
Chuck Roast (Chuck) Braise, Stew
Bottom Round Roast (Round) Braise, Roast, Stew
Eye Round Roast (Round) Braise, Roast, Stew
Sirloin Tip Roast (Round) Broil, Grill, Pan-Fry, Sauté
Short Ribs (Flank) Braise, Stew
Beef Kabobs (Variety) Broil, Grill, Sauté
Extra Lean Round Cubes (Round) Grill, Stew
Shank Bone-In (Round) Braise, Stew
Beef Liver Slices (Variety) Sauté
Target Temperatures:
The USDA recommends cooking all whole muscle cuts of beef to at least these internal temperatures to ensure that potentially harmful bacteria are destroyed. Some people may choose to cook their meat to lower temperatures, depending on preference. Ground beef should be cooked to 160° F.
Desired Doneness: Medium Target Temp: 145° F
Texture: Warm/Firm Center Color: Light Pink
Desired Doneness: Medium Well Target Temp: 155° F
Texture: Very Warm/Firm Center Color: Gray, Tinged With Pink
Desired Doneness: Well Done Target Temp: 165° F
Texture: Hot/Dense/Hard Center Color: Grayish Tan
Residual Heat: Residual heat continues to cook meat after you’ve taken it off the grill or out of the oven or pan. It’s important to factor this rise in temperature into your timing and remove the meat from the heat before hitting the target temperatures above – an average of 5° for steaks up to 15° for large roasts.
Basics of Meat & Poultry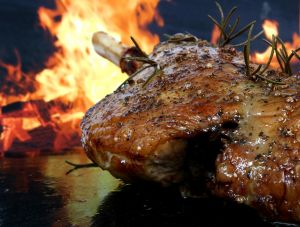
Many people ask me how long they can keep fresh meat and poultry. You can refrigerate whole meat cuts for 2 to 3 days and raw ground meats for 1 to 2 days. Raw poultry for 1 to 2 days. If you’re not cooking your meat or poultry within these time frames, freeze it. We never want to risk getting food poisoning.
How do you know when your particular meat is done cooking? The safest way is to use a meat thermometer, inserting into the thickest part of the meat, but never touching bone.
Meat Cooking Terms
Braise: Moist cooking in a pot with a lid and a small amount of liquid. This method works well either on the stove top or in the oven, rendering tougher cuts moist and extremely tender by melting the tough collagen between fibers, but allowing the fibers themselves to retain moisture. Examples: Pot Roast, Boeuf Bourguignon, Cacciatore, Most Curries.
Brine: Similar to marinating, meat or poultry is soaked in a salt-water mixture prior to cooking to enhance flavor, moisture and tenderness. Examples: Brined Turkey, Chicken or Pork.
Broil: Dry cooking under intense direct heat, sort of like grilling from the top down. Great for tender steaks and chops, boneless chicken, kabobs. Example: London Broil.
Deep Fry: Cooking pieces of meat, often coated with batter or crumbs, submerged in very hot oil. Example: Southern Fried Chicken.
Grill: Cooking over direct heat, usually outdoors. Grill pans and electric grills don’t require much additional oil, and create nice looking char marks, but lack the crust and smoky flavor of outdoor grilling. Grilling can be fast or slow. Examples: Grilled Steaks, Barbecued Chicken, You Name It!
Pan-Roast or Pan-Fry: A technique that begins on the stove top and often ends under the broiler or in the oven. Combination cooking creates a flavorful browned exterior and allows for finer control of doneness. Great for thick chops and steaks or larger pieces of poultry. Examples: Filet Mignon, Pork Tenderloin, Pan-Roasted Veal Chops.
Poach: Simmer at a point less than boiling to produce just a slight movement in the liquid. Examples: Poached Chicken Breasts.
Roast: Dry cooking in ambient oven heat. Creates a flavorful, browned outside and a tender, juicy interior. Ideal for larger tender roasts, whole poultry, most stuffed roasts. Examples: Roast Beef, Thanksgiving Turkey, Crown Roast.
Sauté: Quick stove-top cooking in a skim of oil in a heavy, low-sided skillet, frying pan or sauté pan. Great for tender steakhouse cuts and chops, chicken or duck breast, boneless cutlets. Examples: Sandwich Steaks, Wiener Schnitzel, Chicken Cutlets.
Smoke: Food is cooked or flavored before cooking by exposure to smoldering wood, herbs or tea. Examples: Tea-Smoked Chicken, Mesquite-Smoked Pork Chops.
Stir Fry: An Asian technique of cooking small pieces of food over very high heat, usually with oil, using constant stirring and tossing motion to prevent burning. Examples: A Profusion of Meat, Seafood and Poultry Dishes From China, Thailand and Vietnam.
Simmer: See Braise & Also See Stew
Stew: Slow cooking, Submerged in flavorful liquid, usually after browning on the surface. Stewing is similar to braising except that stews usually have more liquid, which is an important part of the finished dish. Best for cubes coming from tougher cuts. Examples: Beef Stew, Chili, Gumbo.
Sous-vide: A method of cooking food sealed in airtight plastic bags in a water bath for longer than normal cooking times (72 hours in some cases). The temperature is regulated and much lower than normally used for cooking, typically around 55° F to 60° F for meats. The intention is to cook the item evenly, and not to overcook the outside while still keeping the inside at the same doneness, keeping the food juicier. Examples: Beef Brisket and Short Ribs.
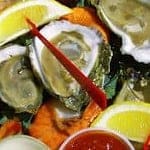
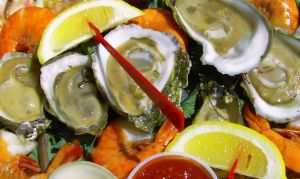
Oysters
Oysters are a type of marine mollusk with a rough, irregular shell, found on the seabed of temperate coastal waters. Oysters have been cultivated as food for more than two thousand years; they are shucked and eaten raw, cooked, or smoked. The top of an oyster tends to be flatter; the bottom is more bowl shaped. On-the-half-shell oysters are left in the bottom half.
The flavor of an oyster is determined by the species and by its home waters. Oysters are classified by their point of origin: Pacific or Japanese, Atlantic or Eastern, and Olympia. Specific names usually indicate their exact point of harvesting. In general, Pacific oysters, such as Hama Hama, Hog Island, Quilcene, Tomales Bay, Wescott Bay and Kumamoto, are known for their creamy texture and slightly mineral flavor. Atlantic oysters, such as Cape Cod, Chesapeake, Kent Island, Long Island, Malpeque, Wellfleet, and Blue Point, have a saline, oceanic taste and crisp texture. The relatively small Olympia (originally from Puget Sound) has been overharvested in the past, but is making a comeback.
Fresh live oysters have a sweet, mild smell. The shells should be tightly closed and feel heavy. If an oyster stays open when touched, do not buy it. If you are eating them raw, the oysters should be fresh and shucked within a few hours before serving. Only buy shucked-for-you oysters that are plump with totally clear liquid.
Put live oysters out on a large tray and cover with a damp cloth. You can keep them in the refrigerator for one to two days, but make sure the cloth stays damp. Refrigerate shucked oysters in their liquor in an airtight container for up to two days. Frozen oysters can be kept for three to four months.
If you don’t have a Chesapeake stabber (an oyster-shucking knife), open the bivalves with an old-fashioned can opener, the kind some people call a church key. Scrub the oysters well with a stiff brush under cold running water. Rinse well before opening. Reserve the liquor. If you soak oysters in club soda for about 5 minutes, the oysters will usually be easier to remove from the shells. Hold an oyster, curved side down, in one hand on a folded kitchen towel. Locate the spot where the top shell meets the bottom shell at the pointed tip of the oyster. Holding the can opener, pointed end up, in your other hand, wedge the tip of it into the crack separating the shells, about 1/4 inch below the pointed tip of the shell. Push the end of the can opener downward, and the shell should pop open from the leverage. Run the can opener around the inside of the shell to open it completely. To loosen the oyster meat from the shell, run a dinner knife under the meat.

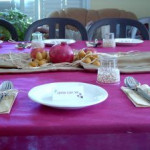
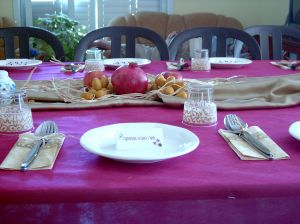
Rosh Hashanah Menu Ideas
Rosh Hashanah celebrates both the New Year and a birthday – humankind’s. The holiday is at once solemn and festive: joy comes not only from trust in God’s compassion but also the anticipation of renewal and fresh starts. The table is transformed into an altar to supplicate God, partaking of symbolic foods. Honeyed and sugared treats for a sweet year; round foods for a fulfilled year, unbroken by tragedy; foods that grow in profusion at this season and those eaten in abundance, like rice, signifying hopes for fecundity, prosperity, and a wealth of merits.
Here are some menu ideas to help you set your Rosh Hashanah table.
Starters
Round Challah Bread
Chicken Vegetable Soup
Chicken With Matzo Ball Soup
Matzo Balls
Gefilte Fish
Salmon Gefilte Fish
Chopped Liver
Entrees
Slow-Roasted Beef Brisket With Wine-Braised Vegetables
Short Ribs With Red Wine And Shallots
Herb-Roasted Turkey Breast With Marsala Mushroom Sauce
Cornish Hens With Citrus And Herbs
Poached Chicken Breast With Dried Fruit And Root Vegetables
Sides
Classic Potato Kugel
Sweet Potato Souffle
Noodle Kugel With Cranberries
Spinach Souffle
Kasha Varnishkes
Mushroom Barley
Wild Rice With Cranberries And Mandarin Oranges
Rosemary Roasted Potatoes
Potato Latkes With Apple Sauce
Green Beans Amandine
Sugar Snap Peas With Roasted Shallots
Roasted Vegetables
Vegetable Tzimmes
Desserts (Parve)
Honey Cake (Traditional, Cranberry Or Apple Sauce)
Babka (Chocolate Or Cinnamon)
Chocolate Cake
Mini Pastries And Tartlets
Tiramisu
Rugelach
Rainbow Cookies
Black & White Cookies
Fresh Fruit Platter


Knives
Whenever you have finished using a knife, you should hone, or sharpen, it briefly with a honing steel before you put it away. The steel, which is a long, metal rod, actually shaves off the tiniest bit of metal to improve the edge. Every 6 months or so, most knives should be sharpened either by a professional or with an at-home mechanical or manual sharpener (such as a sharpening stone).
Knife Set Essentials
Beyond the essentials, build your collection of knives based on the kind of cooking you like to do. If you roast meat a lot, then a carving knife may be more necessary than a thin-bladed vegetable cleaver.
Start With
8 Inch Chef’s Knife
3 1/2 Inch Paring Knife
9 Inch Serrated Bread Knife
Add
10 Inch Chef’s Knife
5 1/2 Inch Santoku (Metal or Ceramic)
Kitchen Shears
Nice To Have
Boning Knife
9 Inch Carving Knife
Thin-Bladed Vegetable Cleaver
Serrated Tomato Knife
4 Inch Paring Knife
The edge of a knife is made at a 20-degree angle. So, to properly hone a knife, hold the knife at a 20-degree angle to the steel and run each side of the cutting edge across and along the steel three or four times.
If you don’t have a honing steel handy, you can use a ceramic plate or mug. Turn the plate over and draw the knife along the edge of the unglazed bottom ring, holding the blade at a steady 20-degree angle. The ring of the plate will turn gray, but it will clean up with the wipe of a moist sponge.
When knives are stored in a wooden knife block, the blades are hidden, which can make it difficult to identify knives that have similar handles. To help distinguish one knife from another, use red or white nail polish to mark the heel of each knife with an initial, i.e., C for carving, S for serrated, or U for utility.

 Tiny New York Kitchen Wishes Everyone A Happy Labor Day!

 Labor Day Weekend Picnic
Labor Day Weekend is the perfect weekend for a picnic. To celebrate the end of summer I’ve organized a feast of some of America’s favorites – from fried chicken to chocolate cake, cheeseburgers to homemade strawberry ice cream.
Parsley Potato Salad
Mushroom Artichoke Salad
Chile-Spiced Bean Salad
Crusty Parmesan Chicken Breasts
Deviled Eggs
Pickled Beets
Barbecued Cheeseburgers
Tomatoes
Radishes
Lettuce
Red Onions
Pickles
Olives
Chocolate Buttercream Cake
Strawberry Ice Cream
Strawberries
Beer
Lemonade
Coffee
Packing the picnic: The salads can be prepared a day in advance. It’s probably not necessary to double the recipes unless you have a large crowd to feed. Be sure to include a serving spoon for each salad. The Crusty Parmesan Chicken Breasts can be served either cold or warm. Either bake it a day ahead, refrigerate it, and carry it in a cooler; or pop it in the oven about an hour before you leave and transport it hot. The deviled eggs can be made from your favorite recipes or one from Tiny New York Kitchen. They will need several hours to chill and must be packed in a cooler, along with the assortment of vegetables (each in a plastic container). Take along a basket or platter for the chicken, a tray for the eggs, and serving forks.
All of the barbecue equipment can travel in a sturdy cardboard box, if there’s room, lay the buns and cheese on top so they don’t get squished. The hamburgers and condiments should be packed in a cooler.
You can bake the cake and prepare the frosting well in advance; both can be stored in the freezer. After thawing, the frosting should be beaten for a few minutes with an electric mixer. A round plastic serving plate with a high, tight-fitting cover is ideal for transporting the cake; remember to carry along a knife and a cake server.
In a cooler, pack the ice cream custard, berry mixture, and ice, each in its own container. Take a hammer and large, heavy dishtowel for crushing the ice cubes, and rock salt for the ice cream freezer (which would be a non-electric one). Pack the fragile ice cream cones and berries for garnish last.
Keep the beer in the cooler. For the lemonade and coffee, you will need a couple of thermoses. Preheat the one for the coffee; don’t forget to take cream (kept cold) and sugar. Pre-chill the other thermos and fill it with cold lemonade.
At the site: Assemble the ice cream freezer and begin hand-cranking, taking turns so that everyone can participate. If the ice cream is ready before it’s time for dessert, remove the dasher, cover the container, and let it stay in the freezer to ripen; don’t forget to dump out the salty water and pack the freezer with fresh ice.
Fire up the barbecue about 30 minutes before you want to begin cooking. Grill the cheeseburgers when the coals are gray. Arrange the chicken in a basket, set out the rest of the food, and dig in.
 Picnic Savvy
I love going on picnics, which take on many different forms for me. When I am in Europe on holiday I always find a local cheese shop and fill a basket with crusty bread, cheese, fruit, an assortment of sweets and sparkling water. I’ve been known to pull over while driving the English countryside and have a little picnic right there on the side of the road. However and wherever you decide to have a picnic it’s important to be Picnic Savvy.
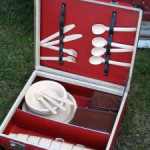
Picnic Paraphernalia: Picnic equipment can be as simple as paper plates in a brown bag, or as elegant as a wicker hamper specially fitted with flatware and china. Picnic enthusiasts tend to accumulate equipment over a period of time, and to collect the supplies that suit the kind of picnicking they do most often. Let’s consider the paraphernalia you can use to transport, insulate, cook, and eat your picnic feast – whether it’s a backpacker’s basic lunch for two or a feast for eight.
For Transporting Food: If you’re not traveling far and your provisions aren’t perishable, you can carry your picnic in a brown grocery bag – that’s part of the casual spirit of picnicking. Buy why rough it, if that’s not your style? Other options offer you more packing space, easier carrying, better insulation, or simply more charm than any paper bag ever could.
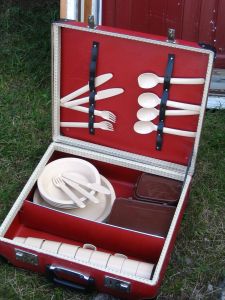
Baskets: Import stores, gourmet shops, hardware stores, and gift emporiums carry baskets of straw, wicker, bamboo, woven rope, and even vinyl-covered steel wire. These baskets may be open or have hinged lids, and they may be lined with gingham or other brightly colored fabric. They may come empty or be outfitted with removable trays and/or picnic gear such as plastic plates, cups, flatware, and cloth napkins. The ultimate is an English picnic hamper – a large, costly wicker chest, its inside surfaces fitted with straps that hold a complete table service for several people.
When you’re shopping for a picnic basket, look for a sturdy, roomy one. If it has handles, they should be strong and durable, especially on larger models. Whether or not the basket should have a lid is a matter of personal preference. A lid can provide a handy cutting or serving surface, but food can be covered just as well in an open basket if you line the basket with a pretty tablecloth and then fold it over the contents when the basket is full. Try this technique, too, with a brightly colored plastic laundry basket and a tablecloth in harmonizing colors.
Coolers: For perishable picnic foods, a cooler (ice chest) is a better choice than a basket. Foods that spoil quickly, such as meats, fish, mayonnaise, and most dairy products, must be kept cool to prevent bacterial growth and the possibility of food poisoning. Even inexpensive Styrofoam coolers can keep foods fresh and cool for hours, though they’re less durable than insulated metal or heavy-duty plastic models.
When purchasing a cooler, look for sturdiness; strong, easy-to-hold handles; and tight lids that lock in place. Many coolers have lids that are hinged so they don’t blow away or get lost, or that they are indented to hold glasses. Some contain trays that keep food away from melting ice. Another useful feature is a leak-proof drain.
Besides the large chest style coolers, you’ll find newer, lighter models that are carried by one handle at the top, and smaller versions that you can carry with a strap.
Bags: Designed especially for carrying foods and beverages and keeping them cool, “refrigerator bags” are usually insulated with fiberglass, covered and lined with vinyl, and fitted with wraparound handles and a zipper that allows the flat top to be opened on three sides. I’ve also seen refrigerator bags with canvas exteriors rather than plastic.
You can use refrigerator bags for hot foods, too as they will maintain a given temperature for several hours. If hot food is in a very hot container – particularly glass or metal – you would be wise to protect the vinyl bag from heat by wrapping the container in newspaper first.
Nylon or canvas duffle bags used for sailing and for carrying athletic equipment also make good picnic carryalls. They are roomy and strong, with sturdy straps and reinforced bottoms. Fishing tackle bags are useful too.
You might also think about using old luggage for picnic toting. Anything from a small carry-on airplane bag to a large, lightweight suitcase may do beautifully. Backpacks are convenient carriers, too. A light day-pack works well for small meals, a larger frame pack for more ambitions picnic projects.
Any kind of cloth, straw, or woven bag may also fill your needs. Or you can simply wrap your picnic in a tablecloth or other ground cover, bring the corners together, and knot them, like a Japanese furoshiki. http://www.youtube.com/watch?v=b2suAPvcm6I. You can also use this technique with oversize cloth napkins for individual picnic meals.


