
 Beach Barbecue Picnic
Salt, spray, sea air, and warm sand underfoot are all the pleasant sensations of a day at the beach which stir cravings for good and hearty food. A perfect refreshment is a traditional beach-blanket banquet, complete with charcoal-grilled corn on the cob. You can prepare this picnic to feed a crowd or simply the family on any summertime trip to the beach. For a small group, you may want to take only half of the salad and leave the rest at home for a midweek supper.
Menu
Potato Chips
Crunchy Egg Dip
Barbecued Hamburgers
French Rolls
Red Onion Slices
Tomato Slices
Lettuce
Barbecued Corn on the Cob
Mixed Bean & Artichoke Salad
Honey Applesauce Cupcakes
Beverages of Your Choice
Bake the cupcakes on the day of the picnic or bake them ahead of time and then freeze them. If they are frozen then let them thaw to room temperature on the morning of the outing. Frost them after they have thawed (if you are frosting them). Prepare the bean salad a day ahead and refrigerate it so the vegetables have time to marinate. Hard-cook the eggs for the salad garnish and the egg dip at the same time. On the morning of departure, slice the onions and tomatoes, and prepare the lettuce leaves; seal them in individual plastic bags or in small containers. Then prepare the egg dip and get the corn ready. Refrigerate the food that needs to be kept cold before packing it in the cooler. Have ready one or more large bags of potato chips and enough hamburger patties and French rolls for your picnicking party. You’ll also need a portable barbecue; potholders, a spatula, and tongs; and charcoal, charcoal starter, and fireplace matches.
Packing Your Picnic: Place the chilled beverages in the bottom of a roomy cooler. On top, pack the ears of corn and the egg dip. Tuck in the parcels containing the hamburger patties, garnishes for the salad, hamburger condiments, and butter for the corn. Carry all of the barbecue equipment in a sturdy box. In a roomy basket, pack the unbreakable items first, including serving spoons for the salad, a bottle opener, salt and pepper, and a knife for the rolls (unless they’re presliced). Fit in the cupcakes and the salad. Place the rolls and potato chips on top. For a sandy picnic, it’s always wise to carry extra paper plates, napkins, and pre-moistened towelettes.
At the Site: Start the charcoal about half an hour before you want to begin cooking; wait until the coals turn gray before grilling the meat and corn. Meanwhile, spread the blanket and let people nibble on potato chips and dip. If your site is very sandy or some of your guests are quite young, you may prefer to wait until the hamburgers and corn are almost ready before you unpack the rest of the food. Before serving the salad, stir it well; then garnish it with the egg slices, if desired, and artichokes.
 Picnic Time
Labor Day is approaching which is the “official” end of summer. Kids go back to school and everyone gets back into their routine. I love closing out the summer with a grand picnic, but truth be told I have my picnic basket ready to pack beyond the end of August.
Strictly speaking a picnic is an outdoor meal, but to anyone who has ever indulged in one, a picnic is more than that. It’s a special event, a festive occasion, even if it’s a simple snack of bread and cheese in your own back yard. Dedicated picnickers insist that there’s a certain magic about sharing good food in the sunshine and fresh air. Perhaps it has to do with a more relaxed atmosphere outdoors; imaginative menu themes are easier to pull off when you’re not sitting formally in a dining room. Or perhaps it’s because picnicking is such a versatile art. It is a perfect vehicle for entertaining, for family outings, or for romantic, just-the-two-of-you getaways.
This week Tiny New York Kitchen will offer readers a collection of picnic menus that include detailed instructions for preparing, transporting, and setting up the food. Picnicking can be whatever you want it to be: informal or decorous, close to home or far away, holiday-inspired or for no reason at all, except that it’s a beautiful day!

 Corn Basics
Fresh sweet corn is one of life’s pleasures indeed. While corn is available all year-round here in America its true peak season is July through September. This is when corn is at its best.
Buying Tips: Buy ears that are firm and well-shaped under fresh-looking husks with shiny, moist milk. Unshucked corn stays fresh longer. Pick ears that look plump, with kernels running to the tops of the ears. Tiny kernels indicate immaturity, but very large deep yellow kernels can be chewy. The fresher the corn, the sweeter the kernels. With age, the sugar in corn converts to starch. Frozen and canned corn kernels are good substitutes for fresh. Canned baby corn is used in Asian stir-fries. One medium ear of corn yields about 1/2 cup of corn kernels.
Storing: Cook and eat corn as soon as possible after picking. If you must, refrigerate in the crisper drawer up to one or two days.
Preparing: Shuck the corn and remove the silk just before cooking. An exception is corn grilled with the husks intact. To remove the kernels, trim the tips so you can stand the ear on end, then slice down to cut off the kernels, cutting close to the cob.
Cooking: Corn is one of the most versatile vegetables. Sauté the kernels alone or with other vegetables; stir into puddings, fritters, or other batters; or roast, microwave, or boil on the cob. To boil, in a large saucepot, heat 3 inches of water to boiling over a high heat; add the shucked corn and heat to boiling. Do not add salt as it toughens the corn. Reduce the heat to low. Cover and simmer for 5 minutes. Drain.

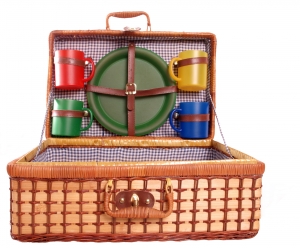
 Fish Sauce
Fish sauce is an integral flavoring in Southeast Asian cooking. It is made from fermented fish. It is also known as nam pla (Thai) and nuoc nam (Vietnam); the Philippine version, pastis, has a much milder flavor. Store at a cool room temperature in a dark place. It will keep for about 1 year. Do yourself a favor and don’t smell it!

 Balsamic Vinegar
In Italy, true balsamic vinegar is not considered an acidic ingredient for salad dressings, but rather a condiment to sprinkle on grilled meats or the best strawberries of the season. There are three very different kinds available: aceto balsamico tradizionale, commercial, and condiment.
Aceto balsamico tradizionale, or “traditional balsamic vinegar,” is made in small quantities under rigorously controlled conditions in and around the towns of Modena and Reggio Emilia in Emilia-Romagna. This artisanal product is protected by Italian law and by the European Union’s designation of original standards. Created from the boiled-down juice of sweet white grapes (traditionally Trebbiano), it has an underlying sweetness and takes on additional complex flavors from sequential aging in chestnut, oak, and other wood barrels. The long aging further evaporates the liquid, giving it a slightly viscous body. The name comes from balsanum, Latin for an aromatic resin that soothes and relaxes (the English balm is from the same word), indicating that the condiment was originally considered healthful and even used as medicine. Tradizionale must age for 12 year, so it is always expensive, but worth every penny.
Mass-market commercial balsamic vinegar, which is made from artificially flavored red wine and is not aged, is sometimes labeled “balsamic vinegar of Modena.” To improve its flavor and body, add a large pinch of brown sugar for every cup of vinegar.
Condimento balsamic vinegar is often good, and can be a fine alternative to commercial balsamic of questionable quality and the excellent but expensive tradizionale. It is usually made in Modena or Reggio Emilia, and often follows many of the same traditional manufacturing methods as its pricey relative. But unlike aceto balsamico tradizionale, condiment is not protected by a determined set of standards, so big differences can exist among brands. When you find one you like, stick with it.
Many chefs use a drizzle of boiled-down balsamic vinegar to decorate plates and act as an additional flavoring element. To make this useful garnish, boil 1 cup commercial balsamic vinegar in a nonreactive saucepan over a high heat until it has reduced by about three-fourths and is thickened and syrupy. It will keep indefinitely stored in a tightly closed jar at room temperature.

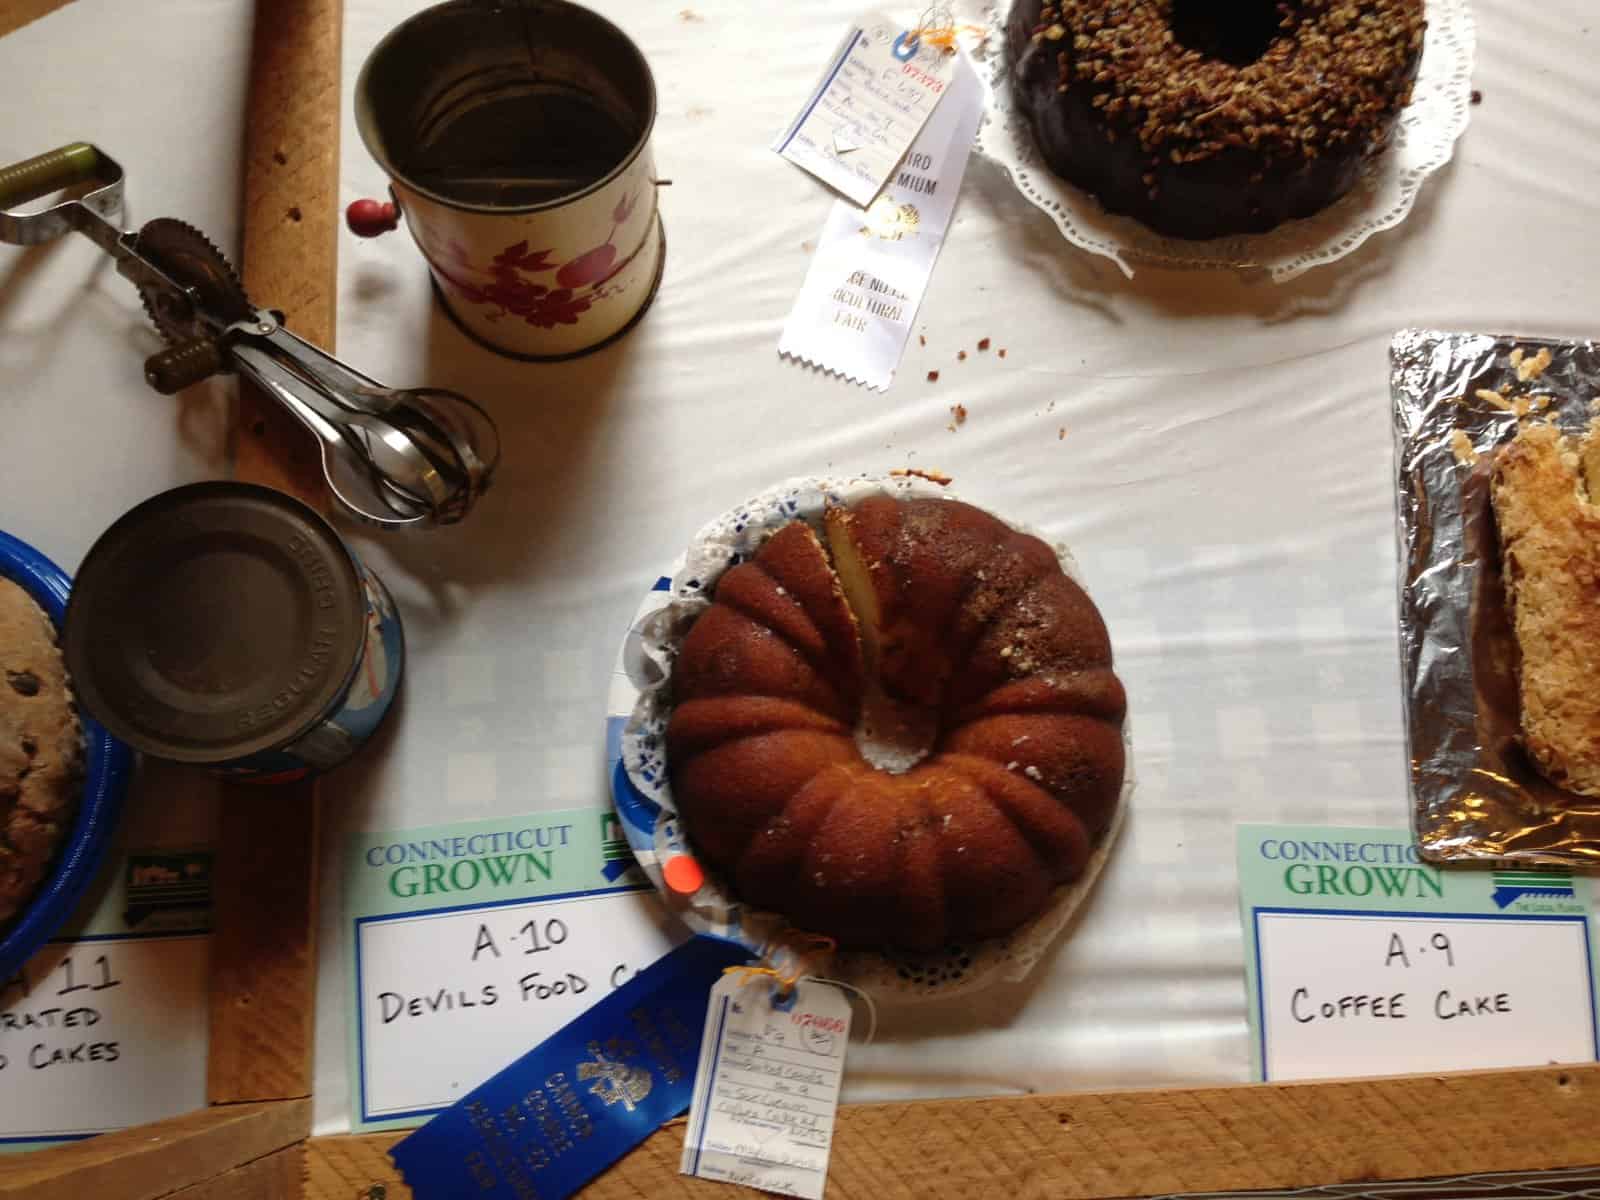

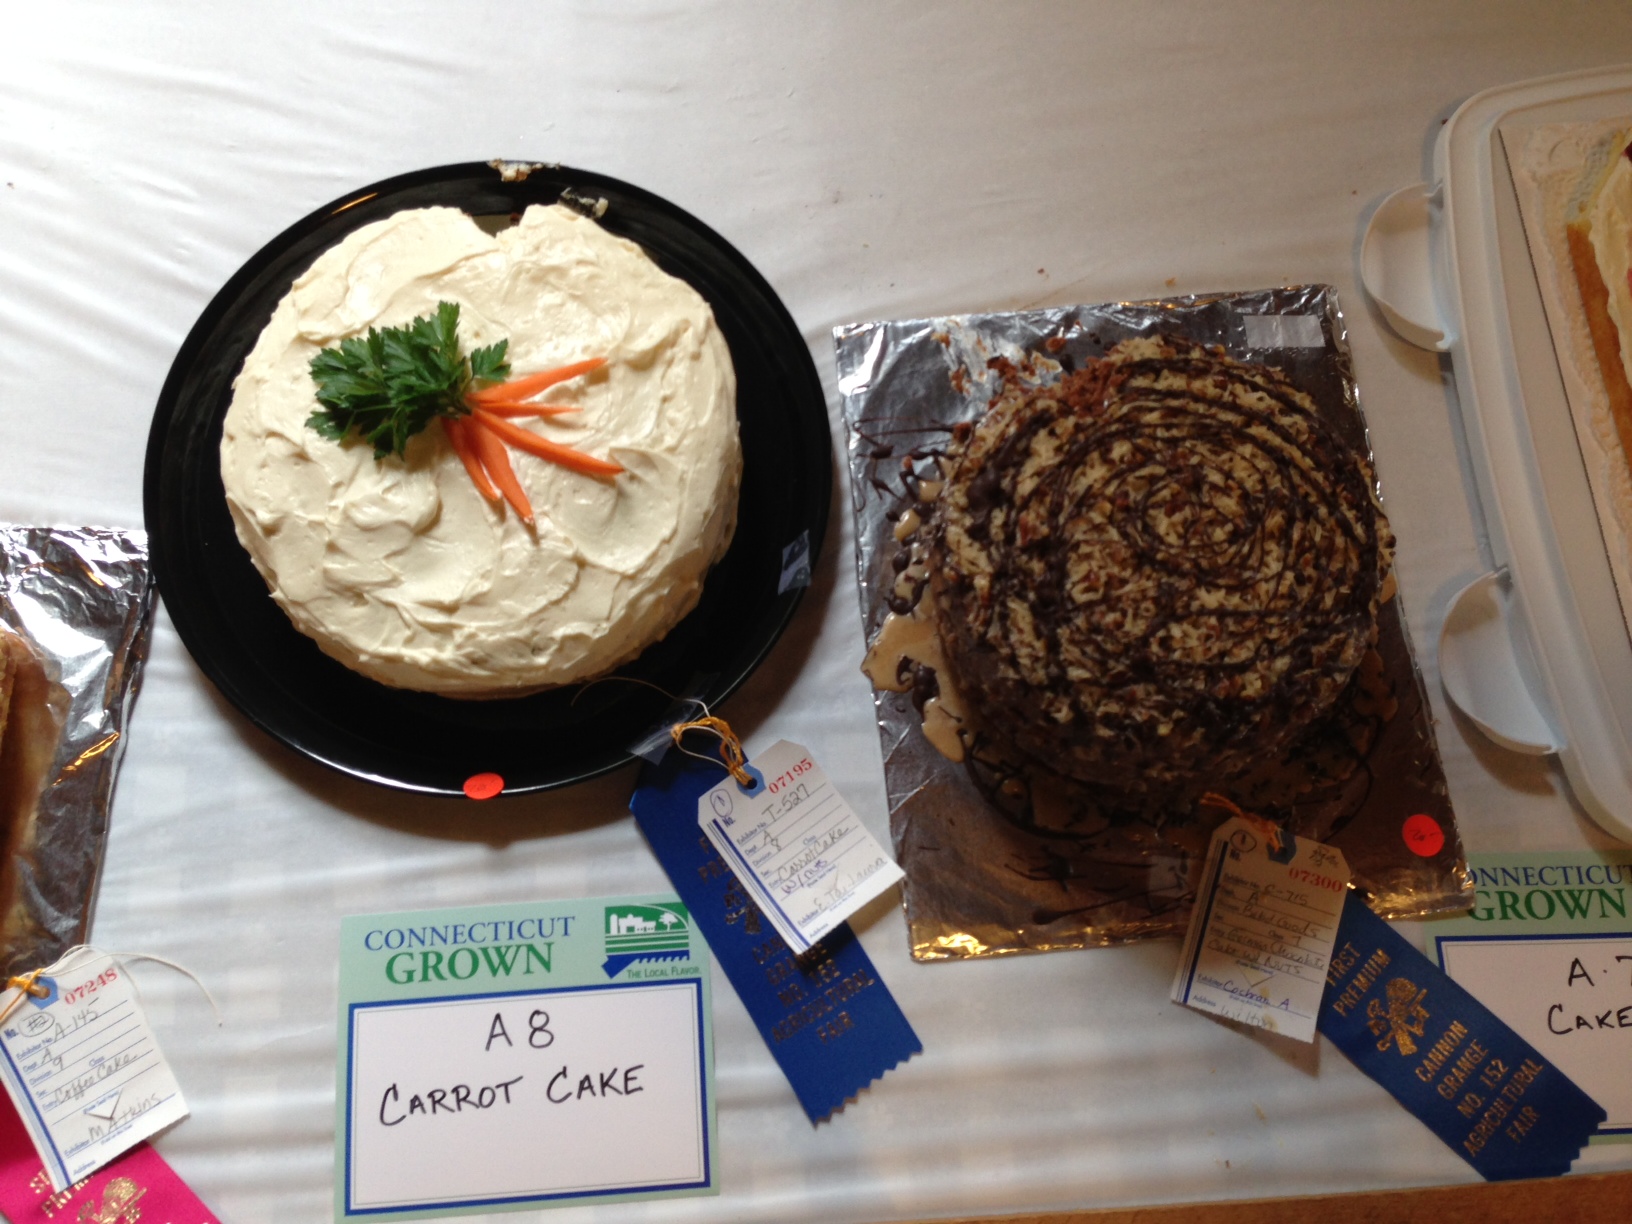
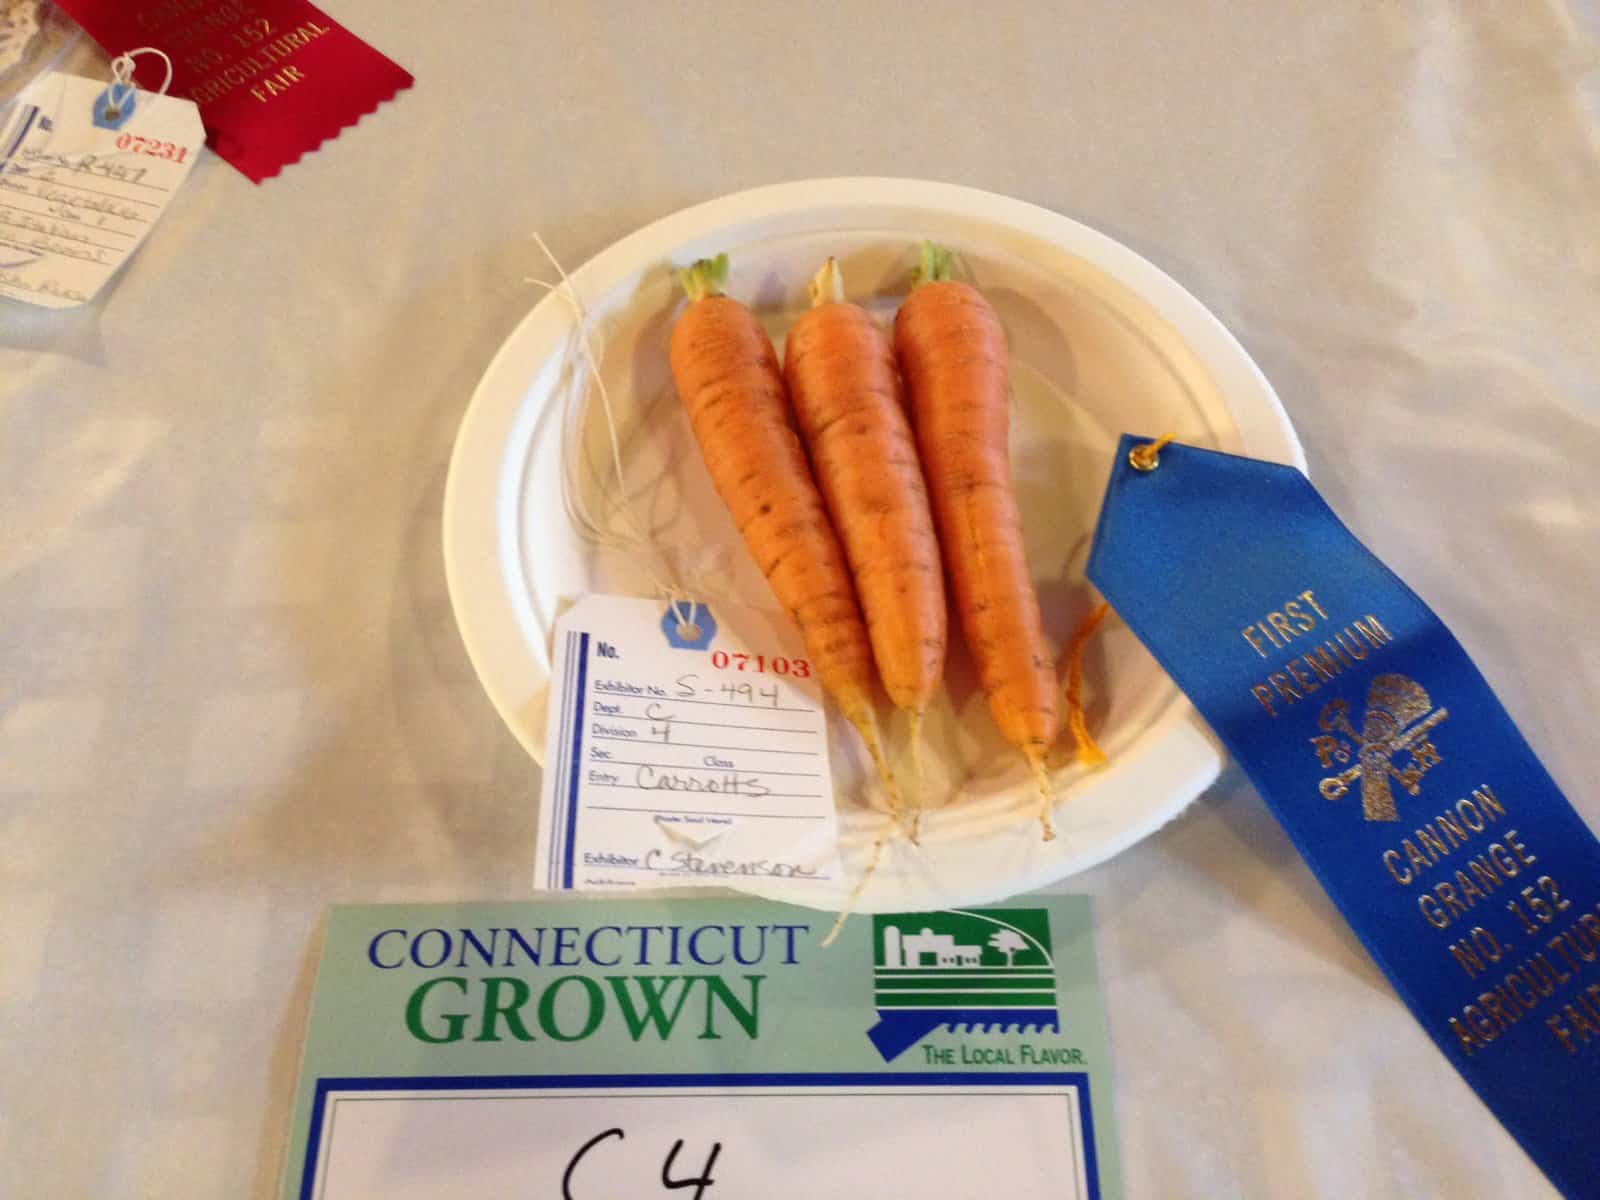


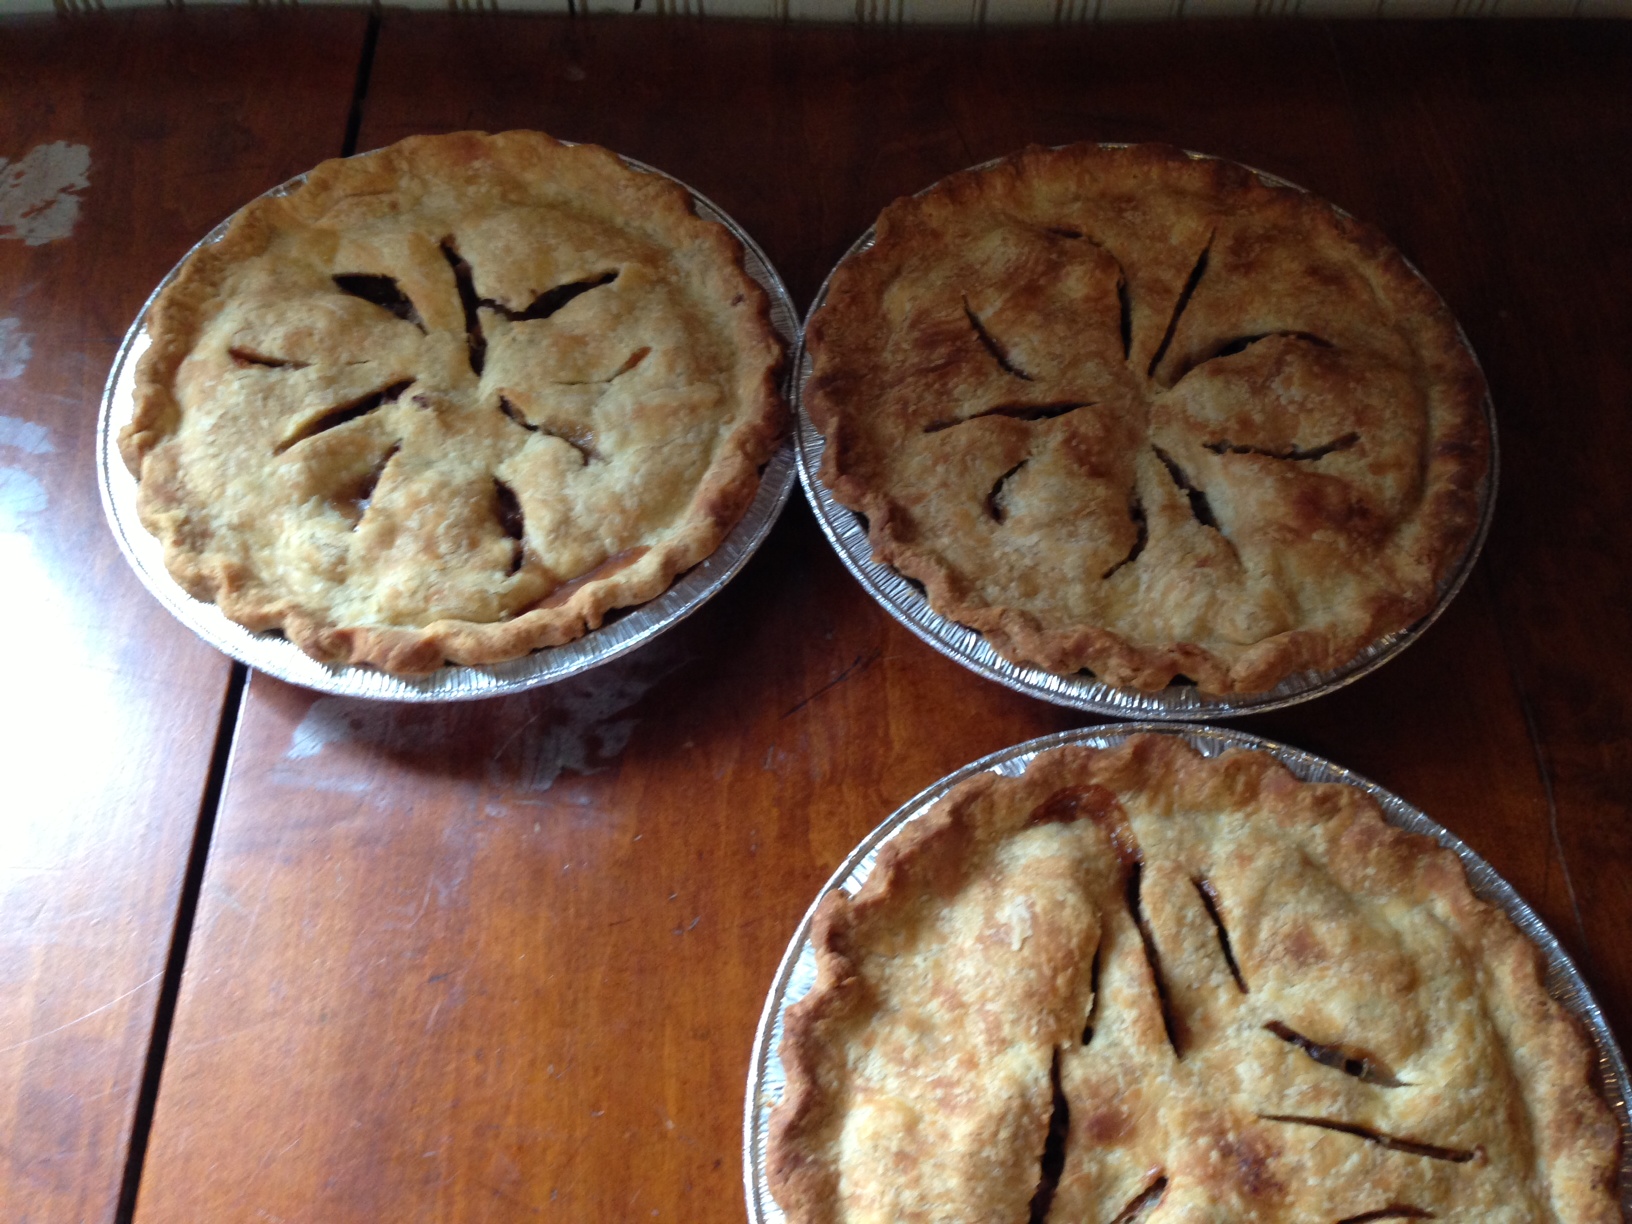
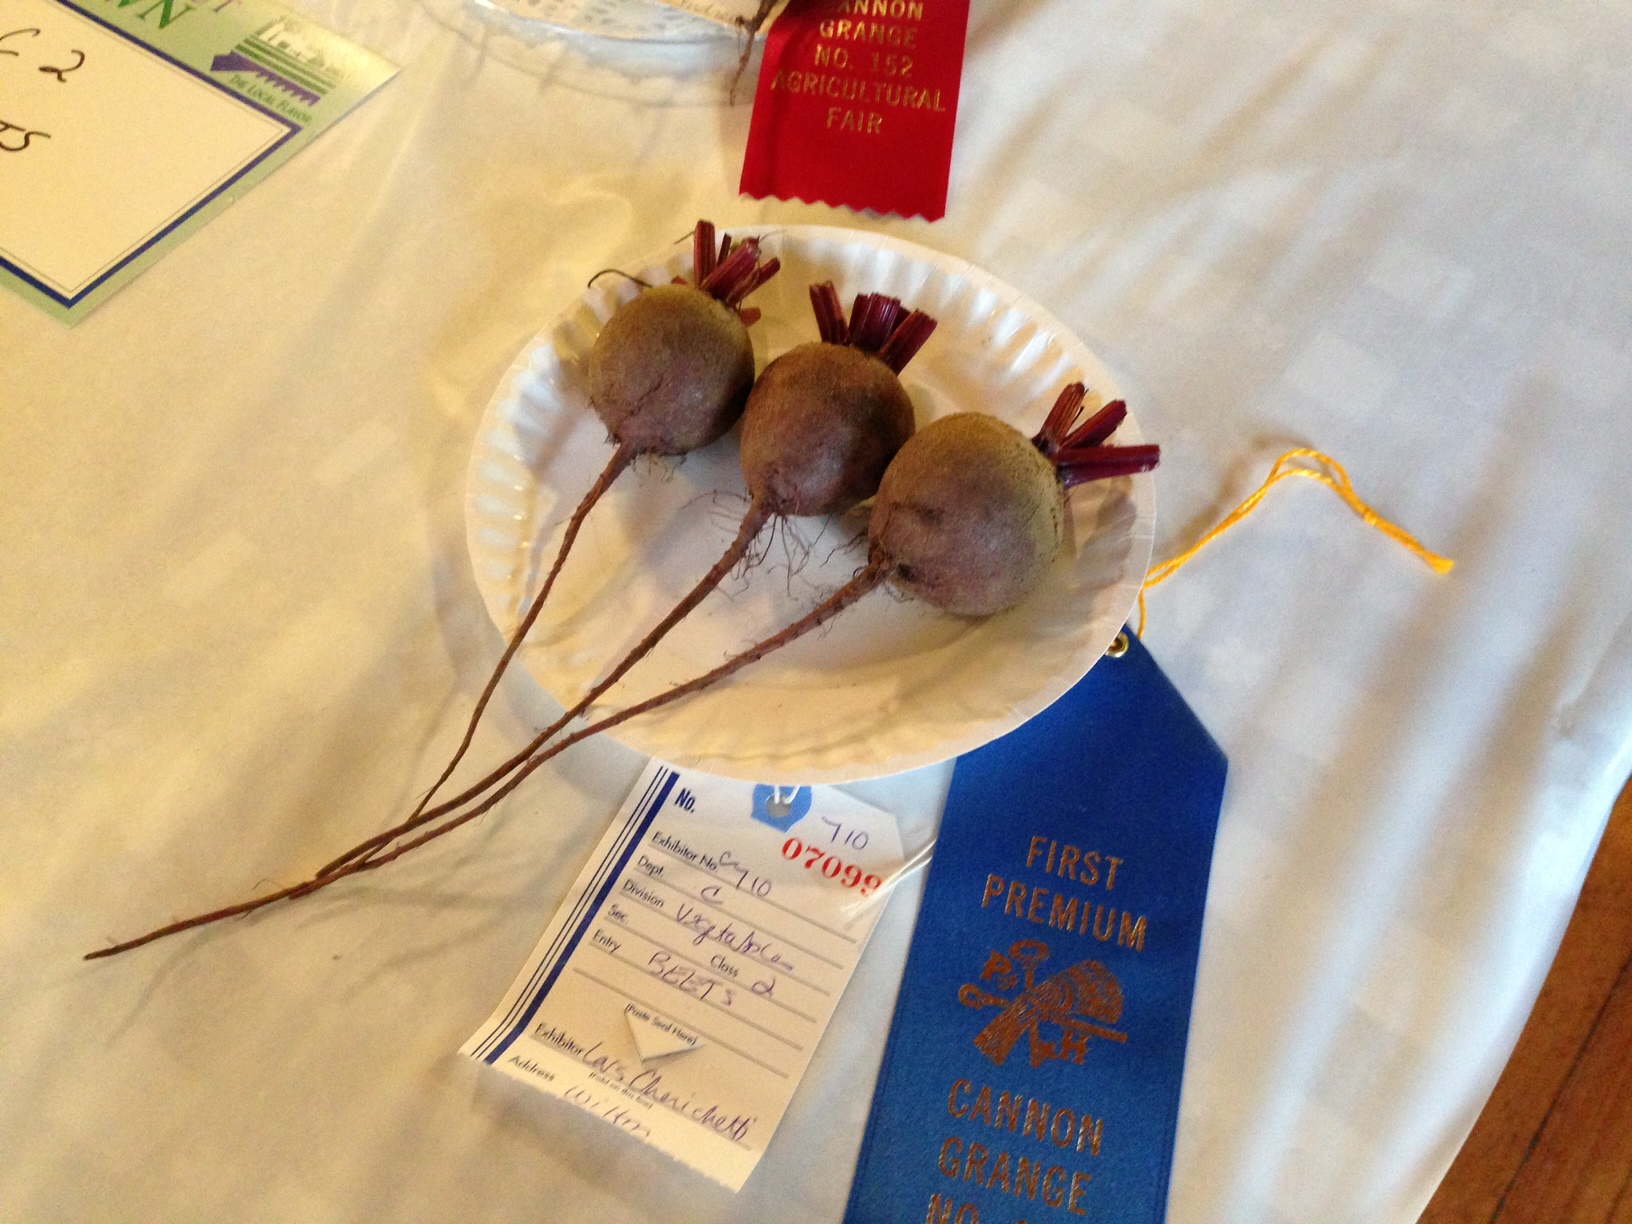

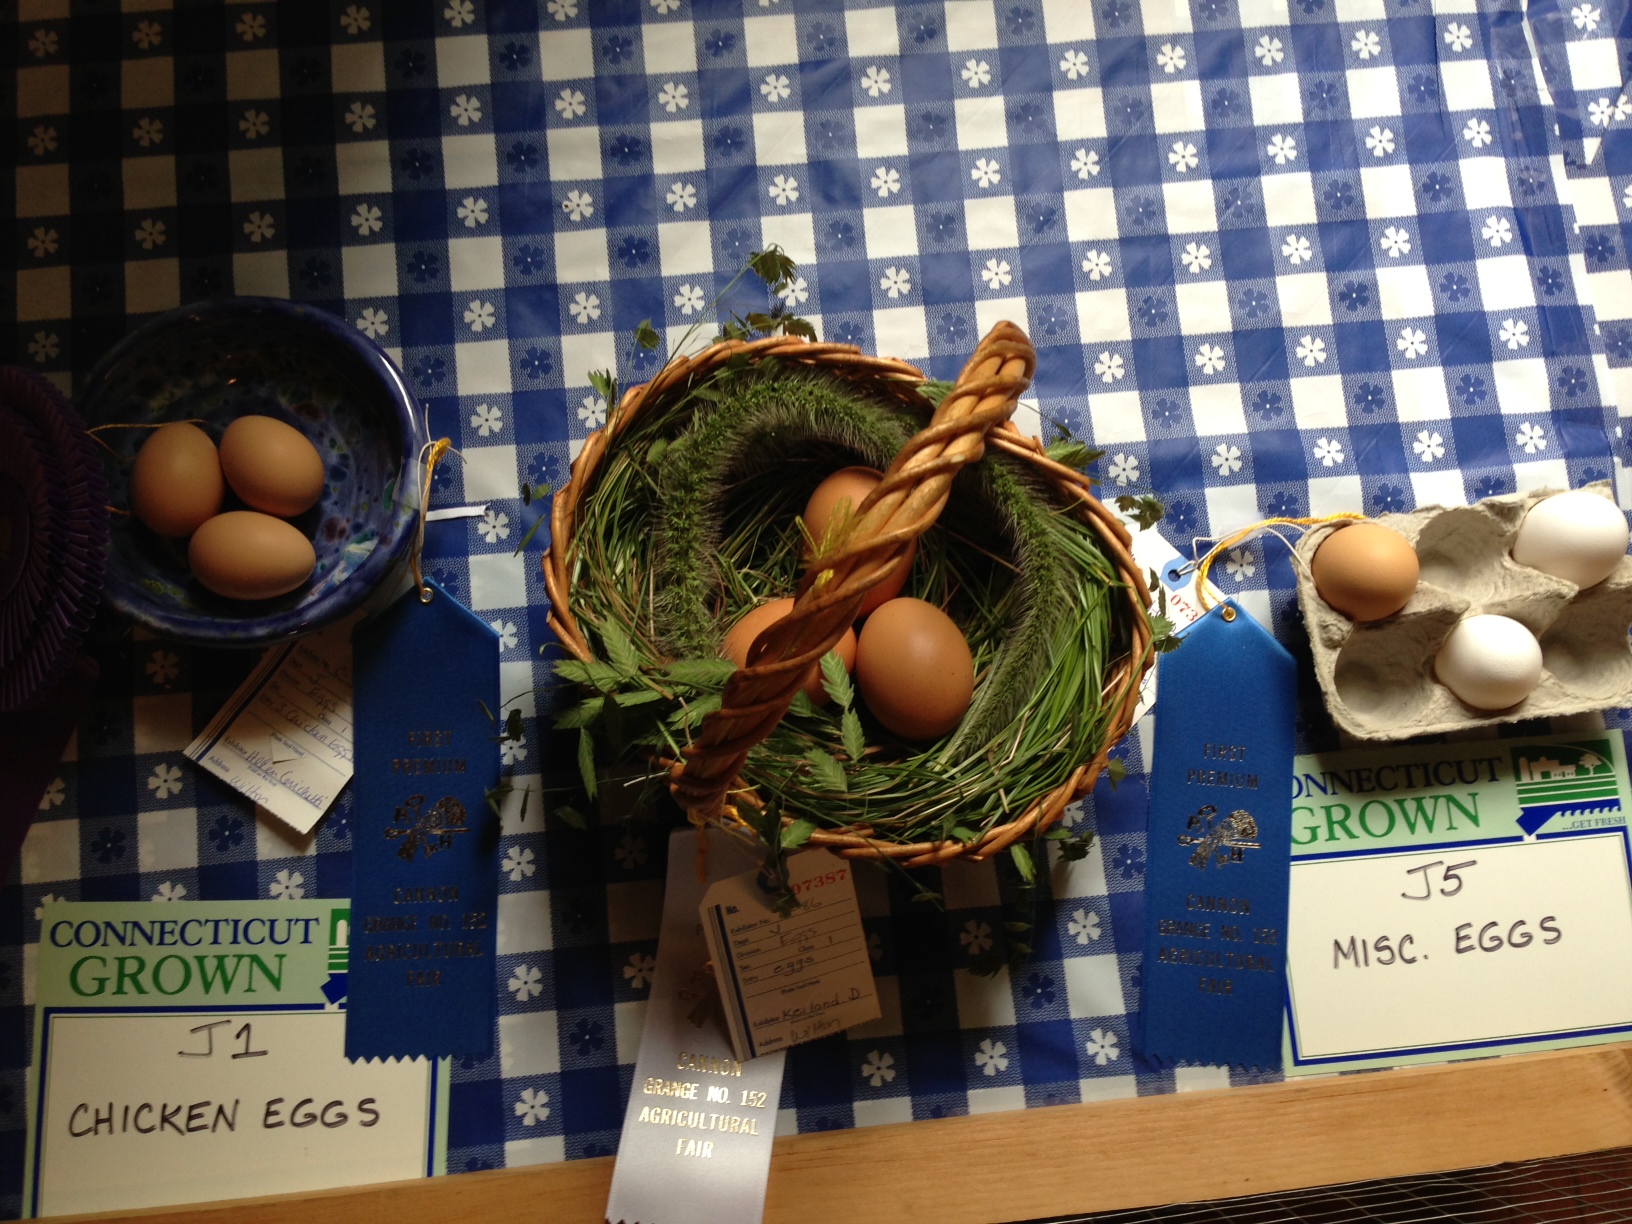
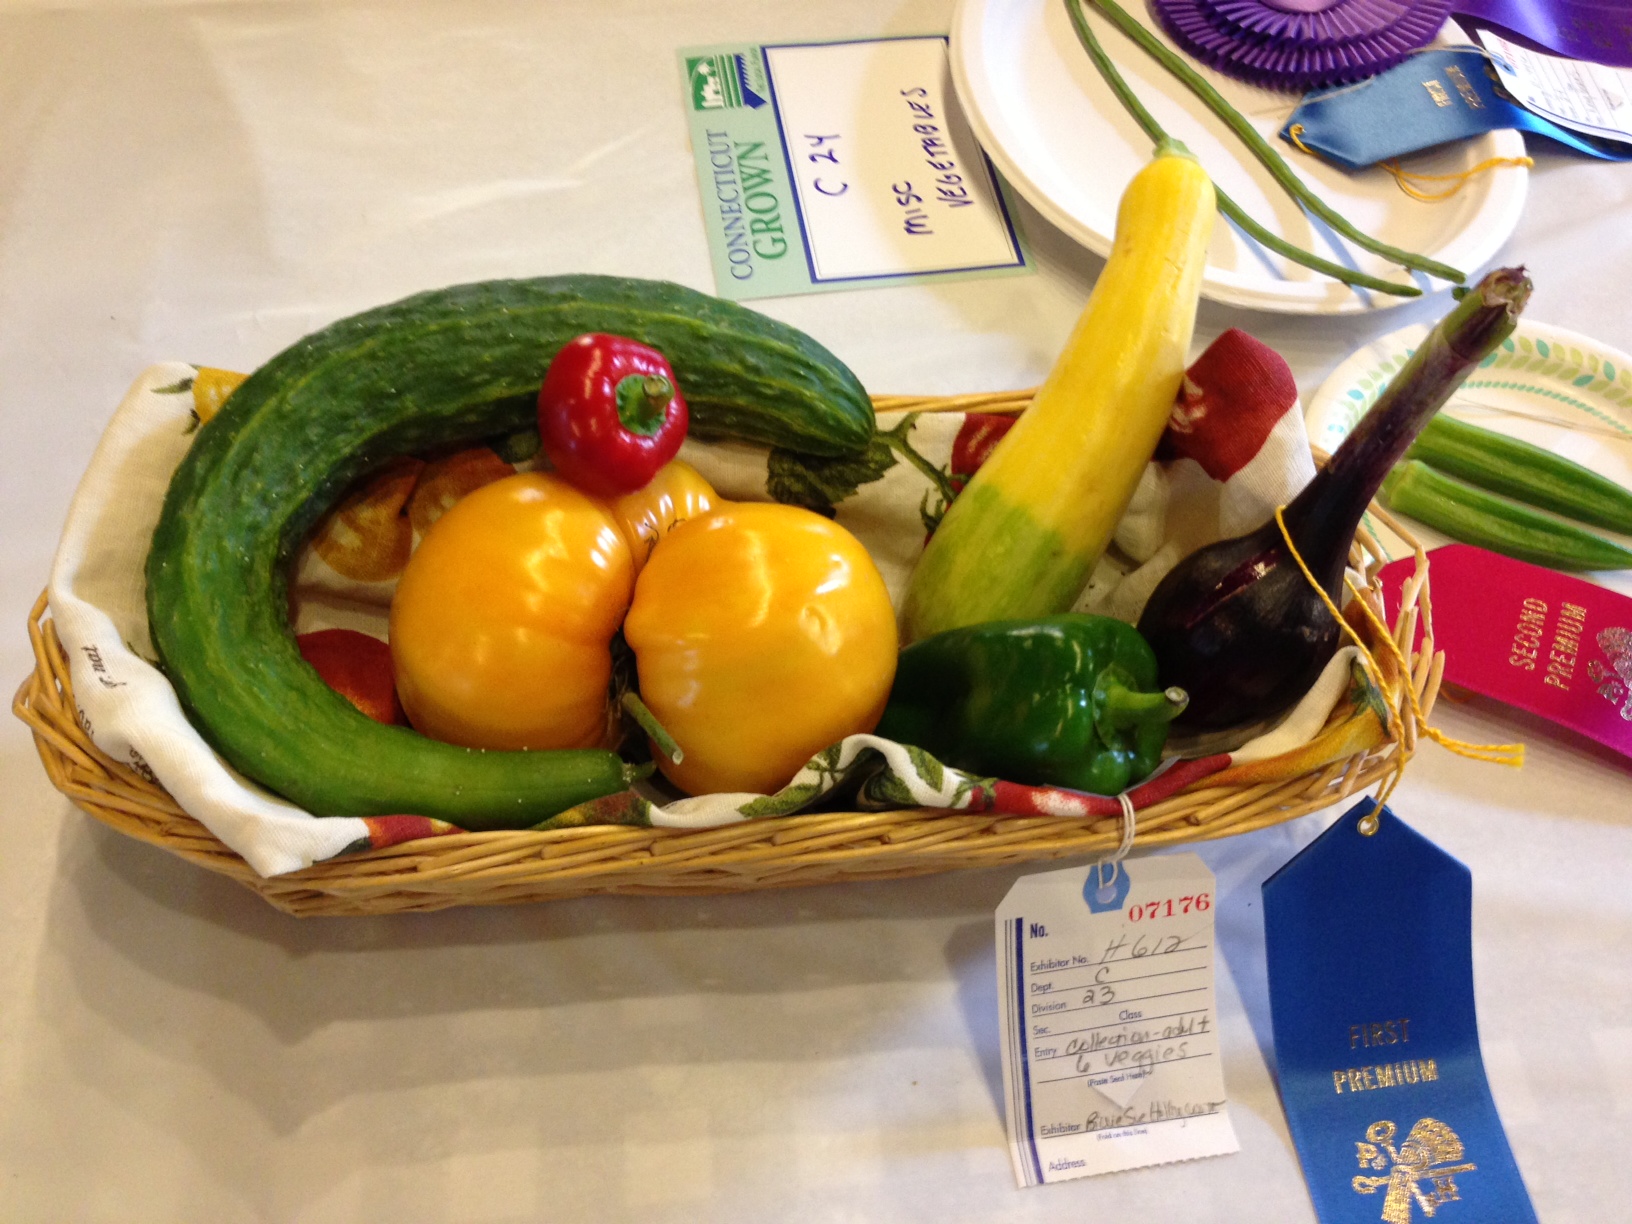
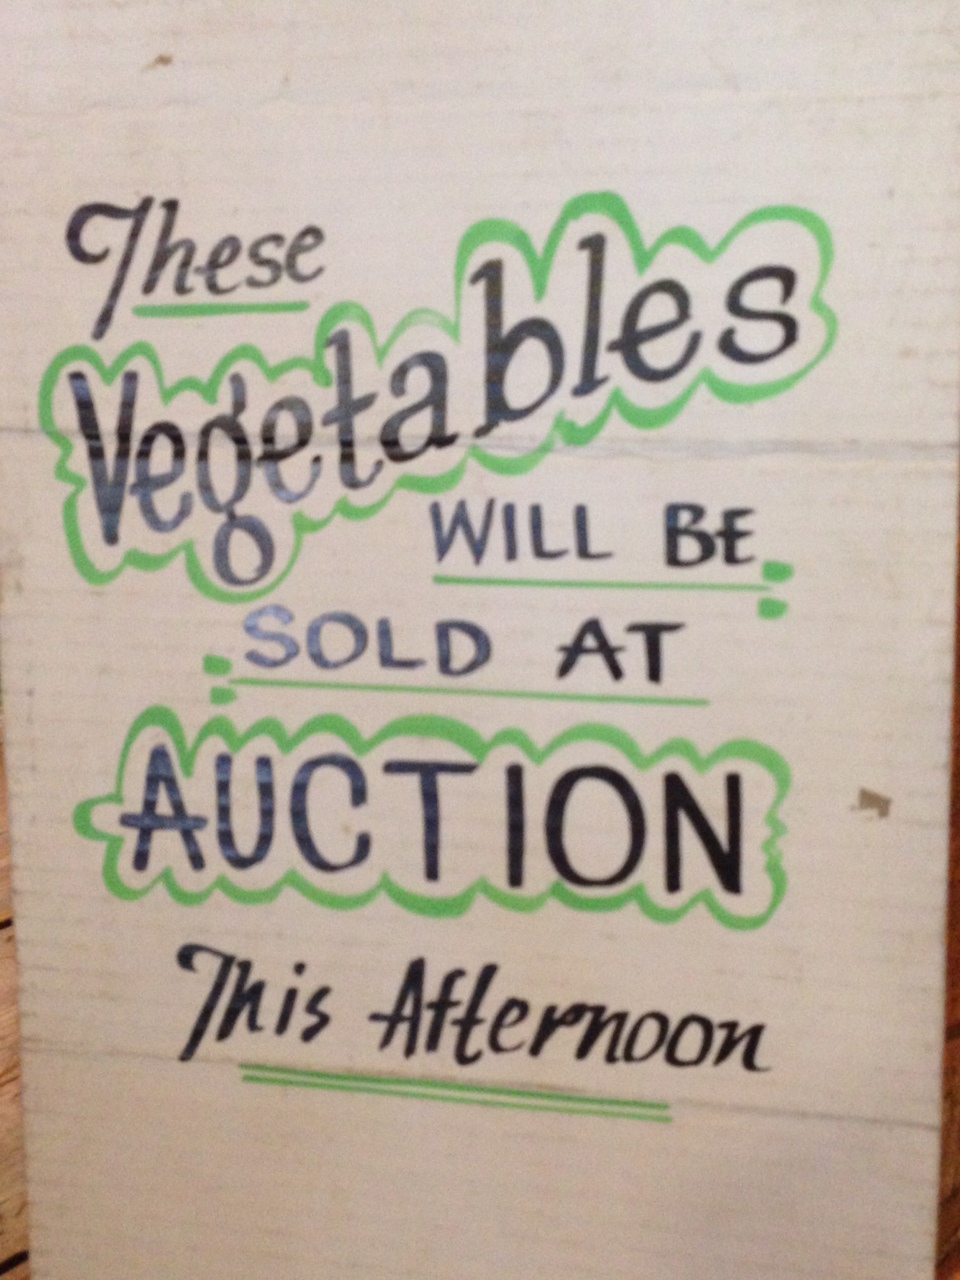

 Cannon Grange Fair In Wilton, Connecticut
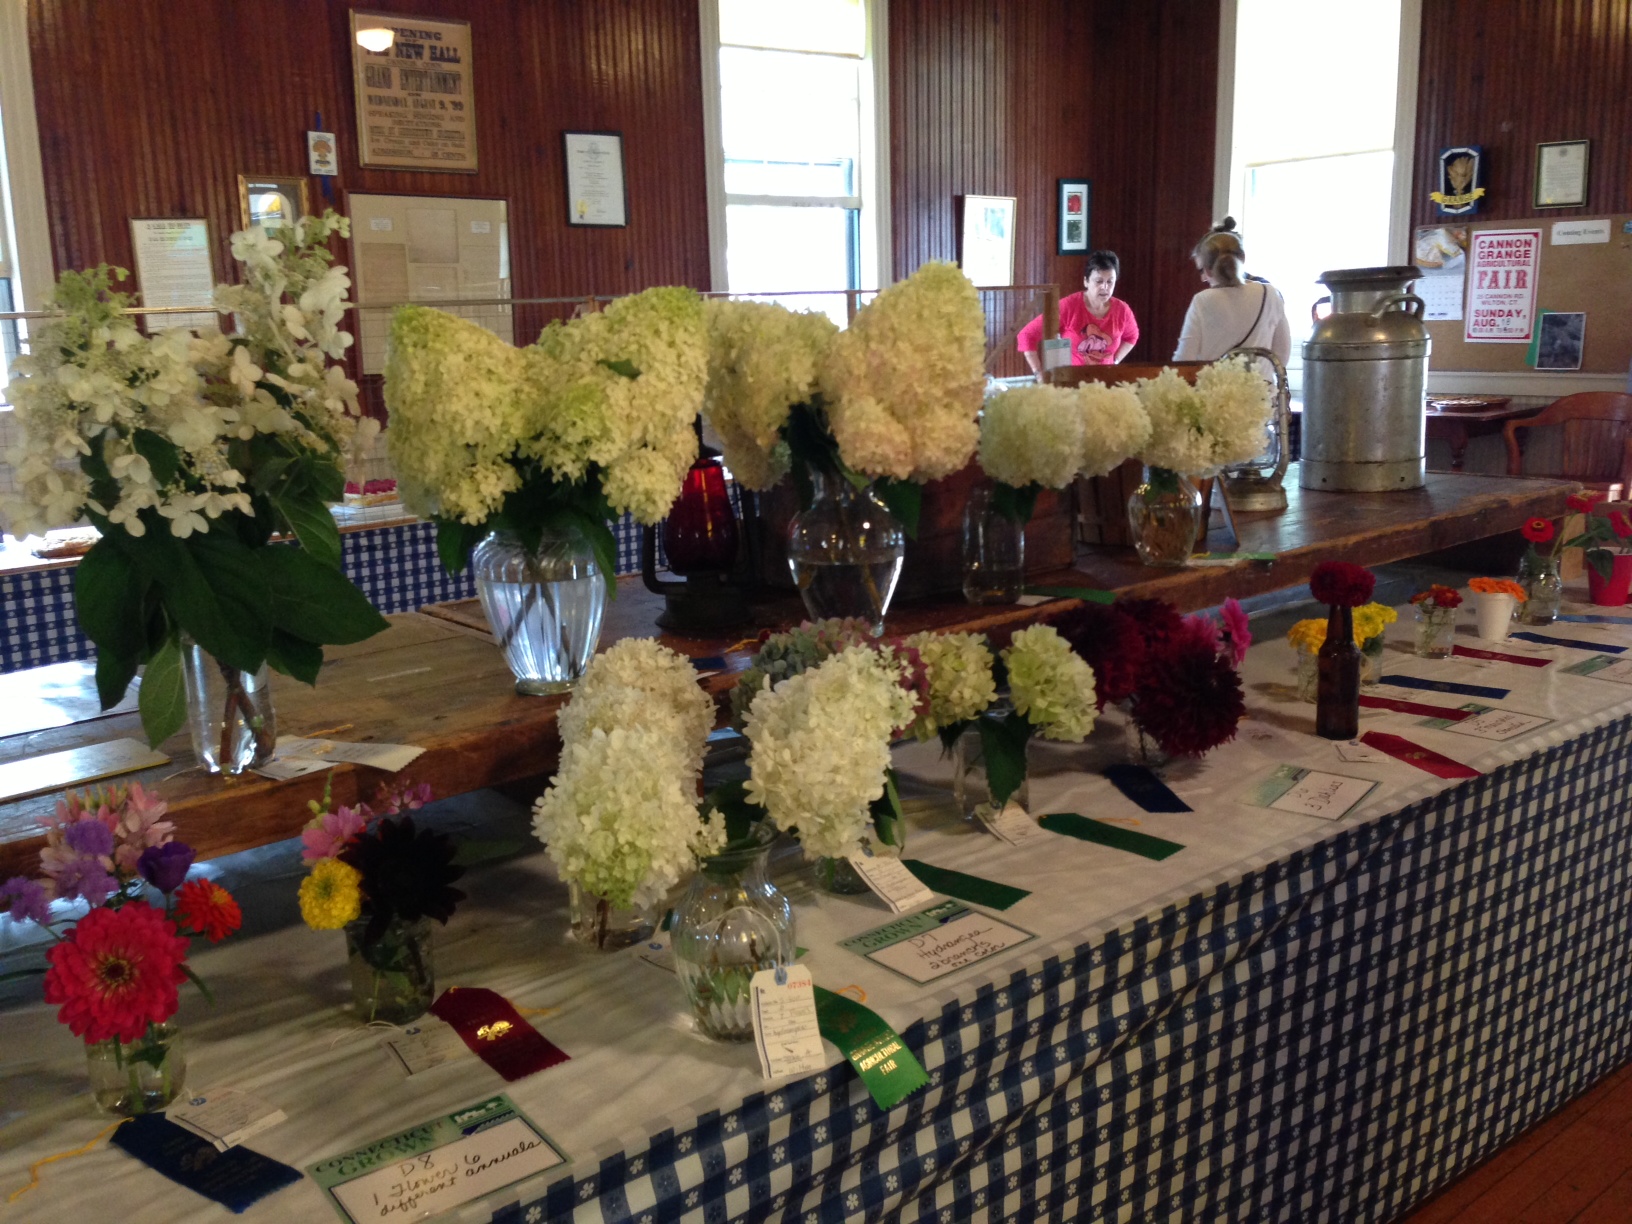
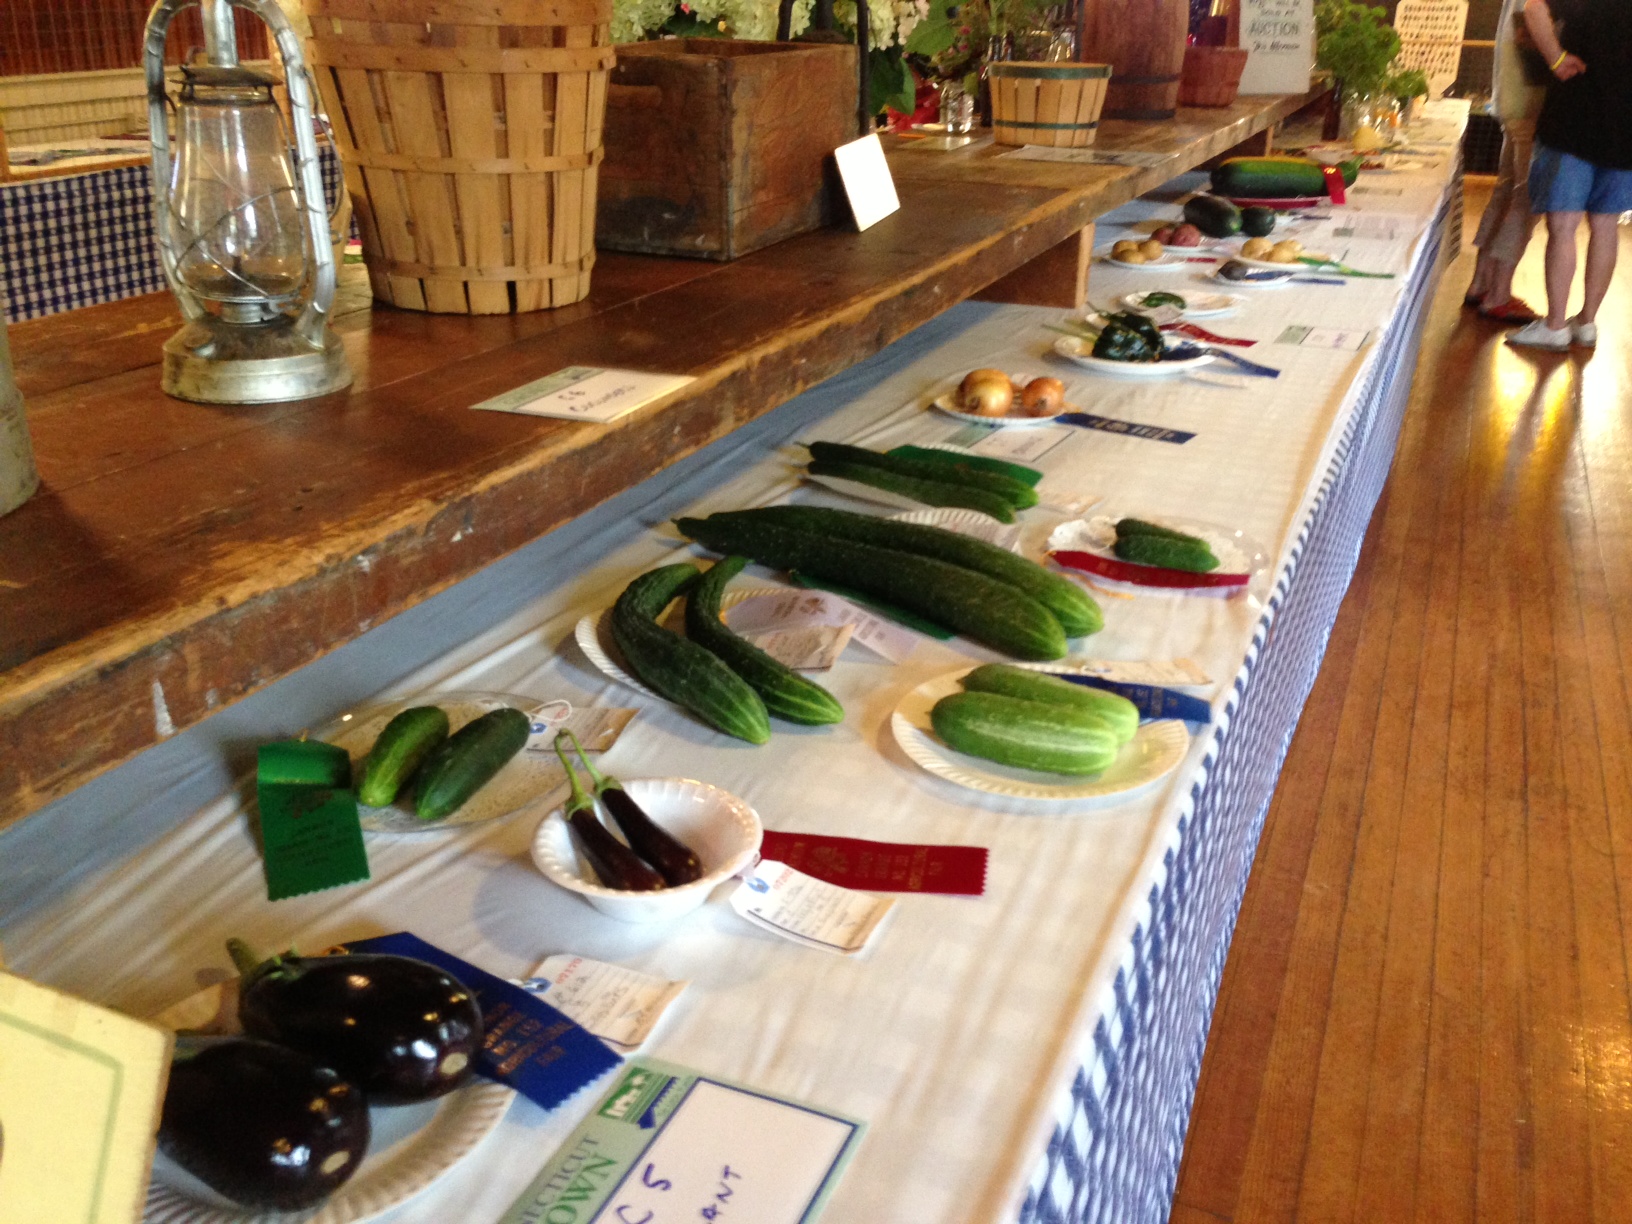
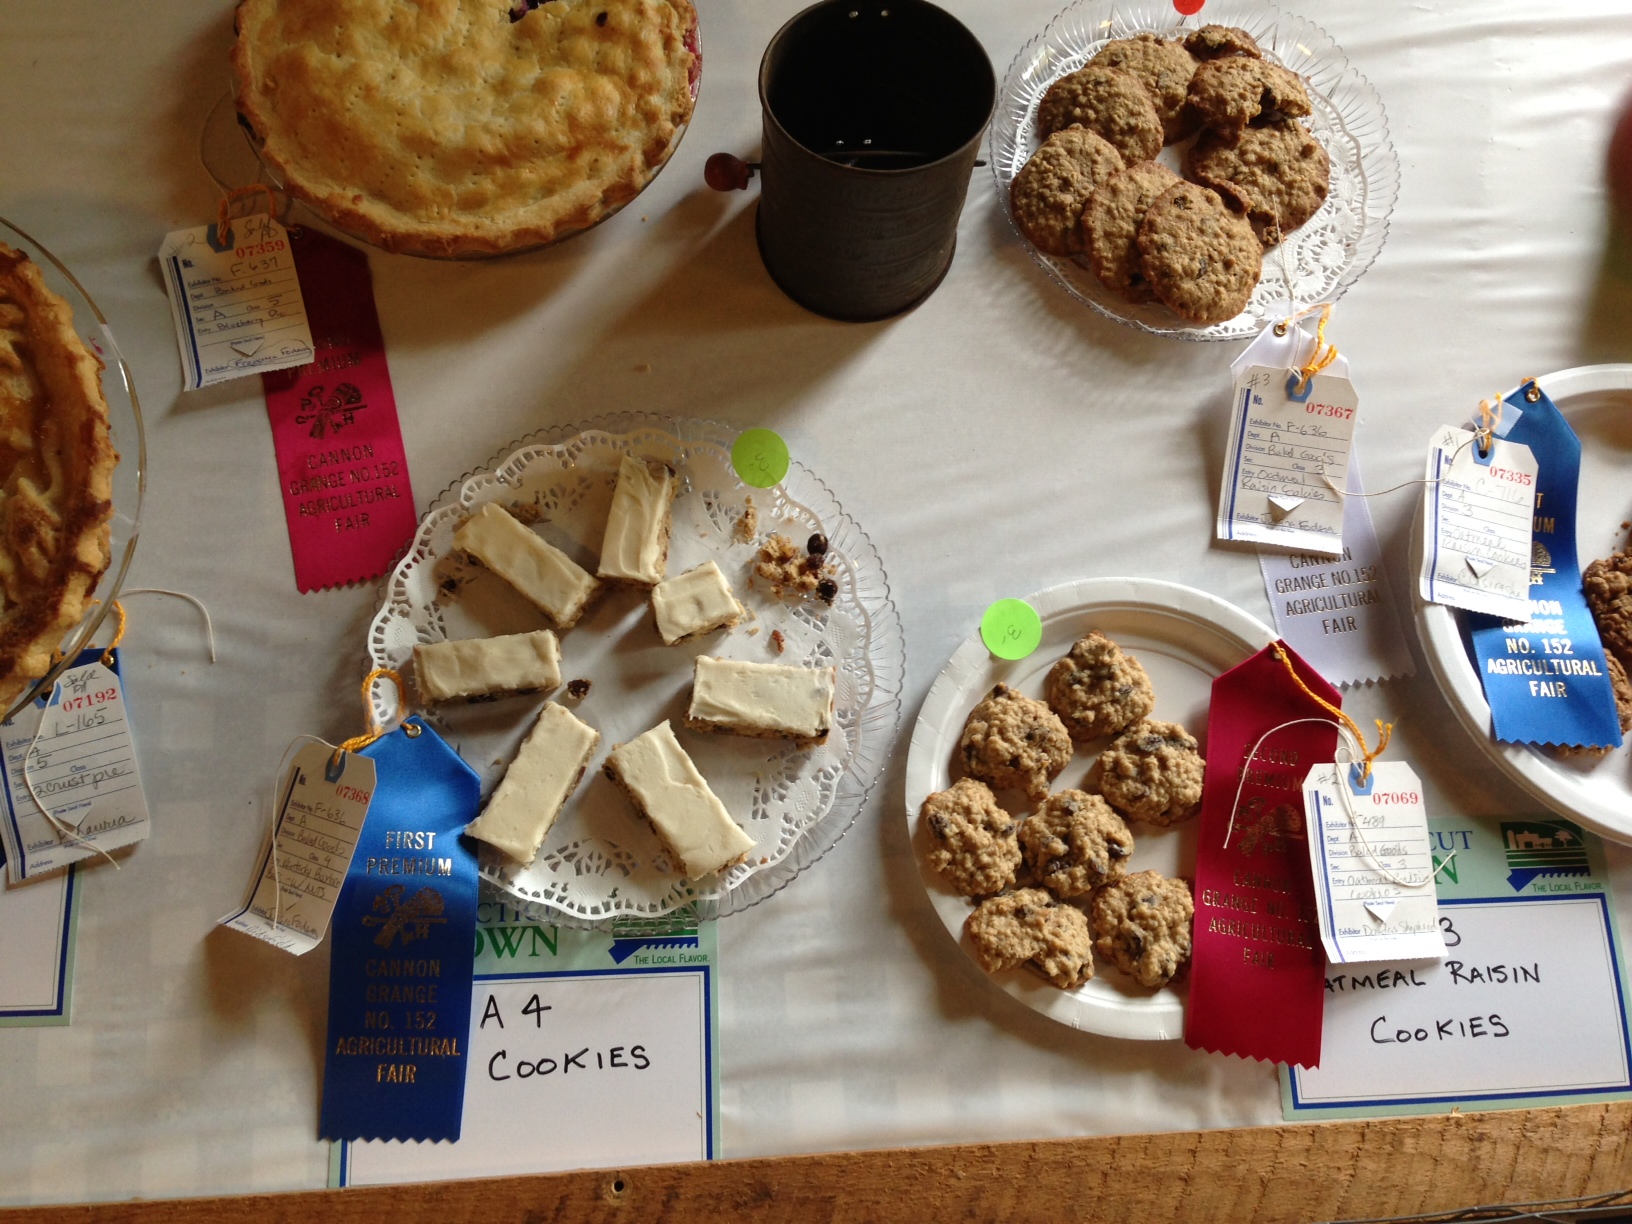
Tiny New York Kitchen went to the Cannon Grange Agricultural Fair today. We had so much fun today looking at all of the winning pies, baked goods, eggs, vegetables, flowers and bunnies. There was a great turnout and everyone seemed to be having a great time.


 Canning Basics
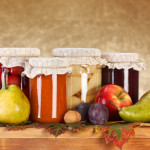
It’s that time again! Time to can jams, jellies, fruits, tomato sauces, pickles, vegetables and whatever else you can think up. The good news is that canning is making a comeback as new generations discover the joys of serving and sharing home preserved foods. Here are some basic guidelines to follow for safe and delicious results.
Equipment
Boiling Water Canner
I like to use a Boiling Water Canner and not a pressure canner. A boiling water canner (or water bath) is used for fruits, jams, jellies, pickled vegetables, pickles, relishes and tomatoes. It is a large pot that has a lid and a rack designed to hold canning jars. Any large cooking pot can be used if it has a rack, a tight fitting lid and enough depth for briskly boiling water to cover the jars by 1 inch. A pressure canner must be used for vegetables and other low acid foods. It is a large heavy pot that has a rack and a tight fitting lid with a vent, a dial or weighted pressure gauge and a safety fuse. It sometimes has a gasket. Pressure canners allow foods to be heated to 240° F and held at the temperature as long as necessary. When using a pressure canner, always refer to the manufacturer’s instructions before beginning.
Jars
Canning jars come in many sizes, from 4 ounces to 1 quart; those with wide mouths are perfect for pickles. Use the size and style called for in each recipe.
Use only standard canning jars. These are tempered to withstand the heat inside a canner, and their mouths are specially threaded to seal with canning lids. Inspect all jars before using them, discard any that are cracked or have chipped rims.
Lids
Use screw bands and flat metal lids that have a built-in sealing compound. Prepare them according to the manufacturer’s directions. The flat lids are designed for one-time use only. Screw bands can be reused if they are not bent or rusty.
Other Essentials
Special kits can be purchased that include all the canning essentials in one box. Kits typically contain the following: A jar lifter for removing hot jars from the boiling water; a magnetic lid want for retrieving sterilized lids from the hot water; a nonmetallic spatula which often has measuring increments for judging headspace (You certainly could use a ruler instead); and a funnel for directing hot liquids into jars. You may also want to have a food scale, food mill or sieve and a colander. Make sure to wash any utensils that will directly touch the food with soap and warm water before beginning.
General Canning Steps
For a boiling water canner, pack food into the canning jars by the raw pack (cold pack) or hot pack method. In raw packing, uncooked food is packed into the canning jar and covered with boiling water, juice or syrup. In hot packing, food is partially cooked, packed into jars and covered with cooking liquid. The following applies to both methods.
*Wash empty canning jars in hot, soapy water. Make sure to rinse thoroughly. Place the jars in the boiling water canner. Cover the jars with hot water and then bring to a simmer over a medium heat. For food processed under 10 minutes, boil the jars 10 minutes and keep warm in simmering water until needed. Set screw bands aside; place the lids in a separate saucepan. Cover with water; bring to a simmer over medium heat (do not boil).
*If you are using a separate pot for sterilizing the jars, fill the boiling water canner half full; bring to boiling. Heat additional water in another large pot (to top off water in the canner); keep it hot but not boiling.
*Prepare only as much food as needed to fill the maximum number of jars your canner will hold at one time. Keep your work area clean.
*Remove sterilized jars from the hot water; place the hot jars on cloth towels to prevent them from slipping during packing.
*Pack food into jars using a wide mouth funnel, allowing for adequate headspace. Ladle boiling liquid over the food, leaving adequate headspace.
*Check the headspace. The space between the top of the food and the container rim is the headspace, leaving the correct amount is essential. Headspace allows a vacuum to form and the jar to seal. Use a ruler to make sure that you have the amount specified in each recipe.
*Release trapped air bubbles by gently working a sterilized nonmetal utensil (such as one provided in a canning kit) down the jar’s sides. Add liquid, if needed, to maintain necessary headspace.
*Wipe jar rims with a clean, damp cloth, food on the rims prevents a perfect seal. Place the prepared lids on the jars, add the screw bands, and tighten according to the manufacturer’s directions.
*Set each jar into the rack in the canner as it is filled and sealed. Jars should not touch each other. Replace the canner cover each time you add a jar.
*When all jars have been added, ladle hot water from the extra pot into the canner to cover the jars by 1 inch.
*Cover, heat to a full rolling boil. Begin processing time, following recipe procedures and times exactly. If necessary adjust for altitude. Keep the water boiling gently during the processing, adding additional boiling water if the water level drops. If the water stops boiling when you add more, stop timing, turn up the heat, and wait for a full boil before resuming counting.
*At the end of processing, remove the jars; place them on a rack or on towels in a draft-free area to cool. Leave at least 1 inch of space between jars to allow air to circulate.
*After the jars are completely cooled (12 to 24 hours), press the center of each lid to check the seal. If the dip in the lid holds, the jar is sealed. If the lid bounces up and down, the jar isn’t sealed. Check unsealed jars for flaws. Contents can be refrigerated and used within 2 to 3 days, frozen, or reprocessed within 24 hours. To reprocess, use a clean, sterilized jar and a new lid; process for full length of time specified. Mark the label so you can use any recanned jars first. If the jars have lost liquid but are still sealed, the contents are safe. However, any food not covered by liquid will discolor, so use these jars first.
*Wipe jars and lids. Remove, wash, and dry screw bands; store for future use. Label jars with contents and date; include batch number if you can more than a load a day. If a jar spoils, you can identify others from the same batch. Store jars in a cool (50° to 70° F), dry, dark place. Use within 1 year.
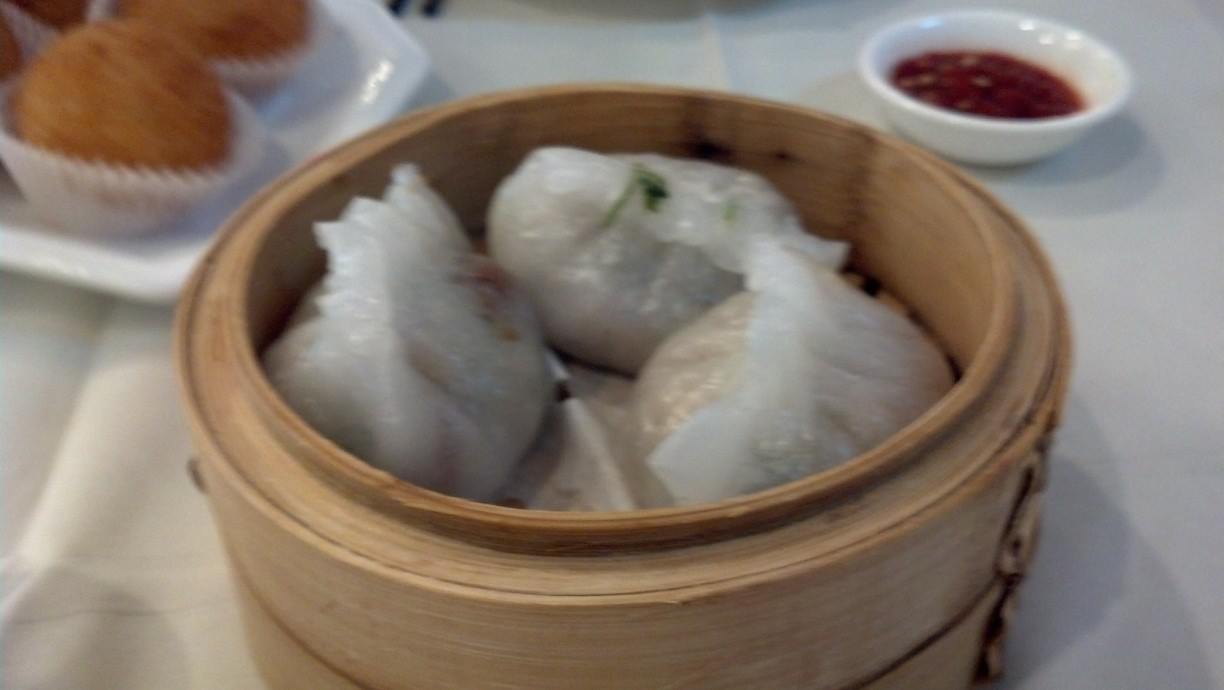
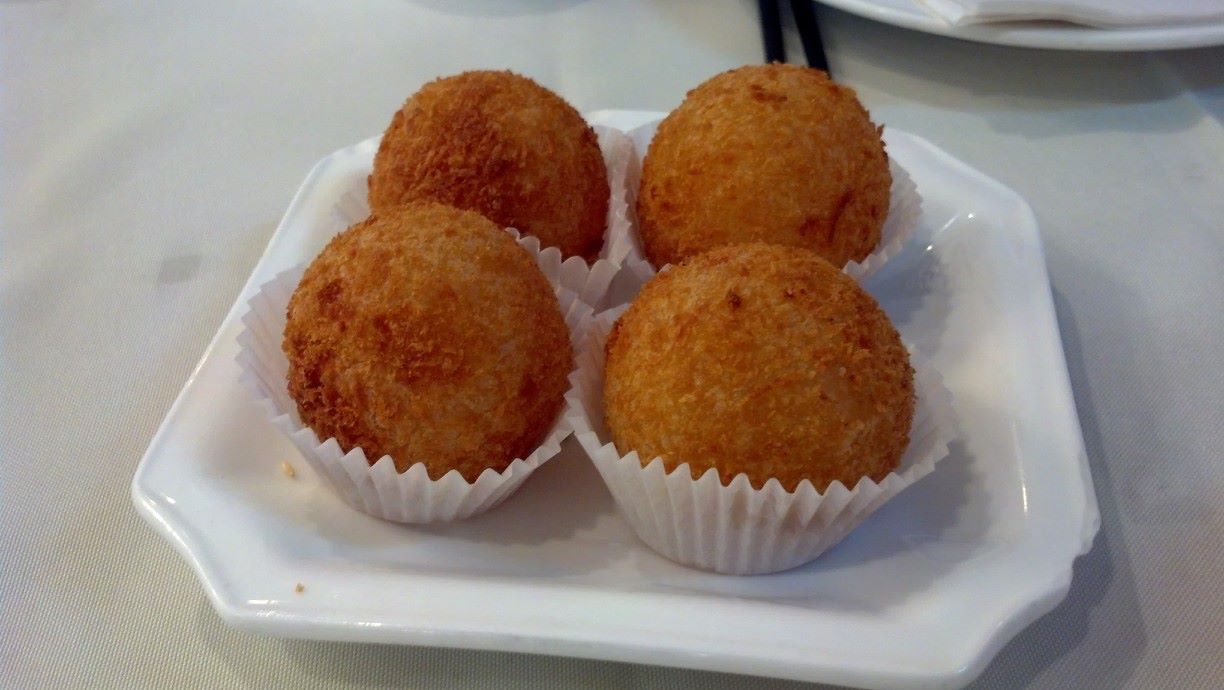
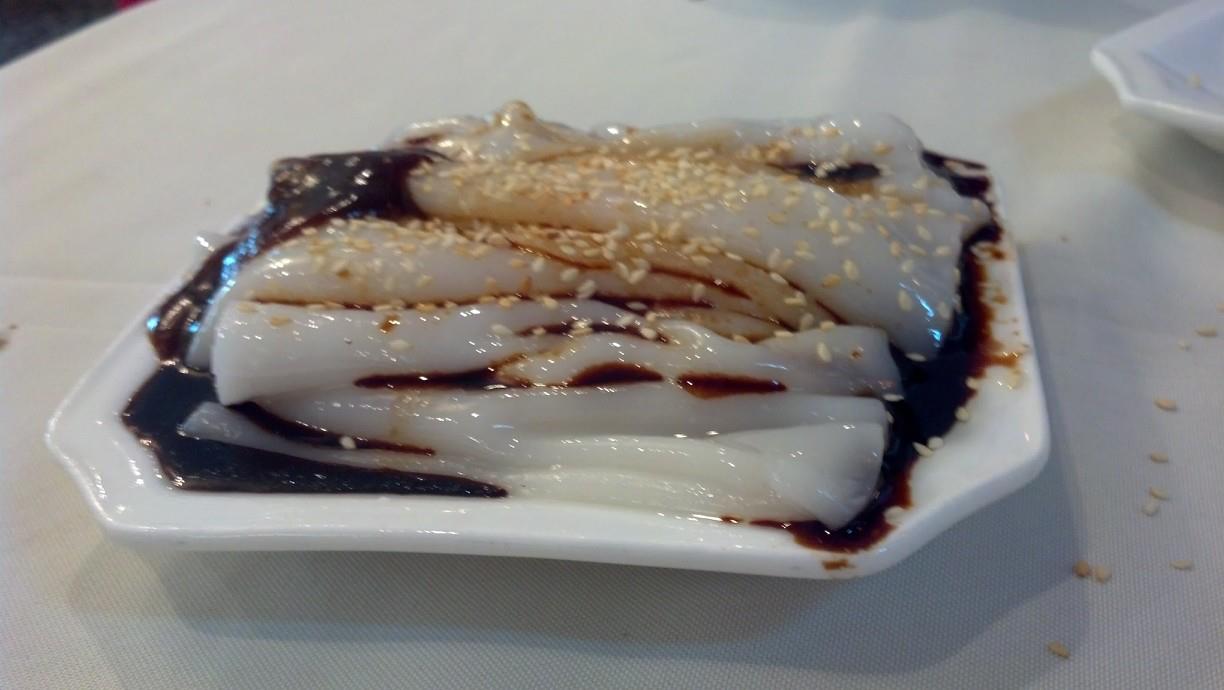
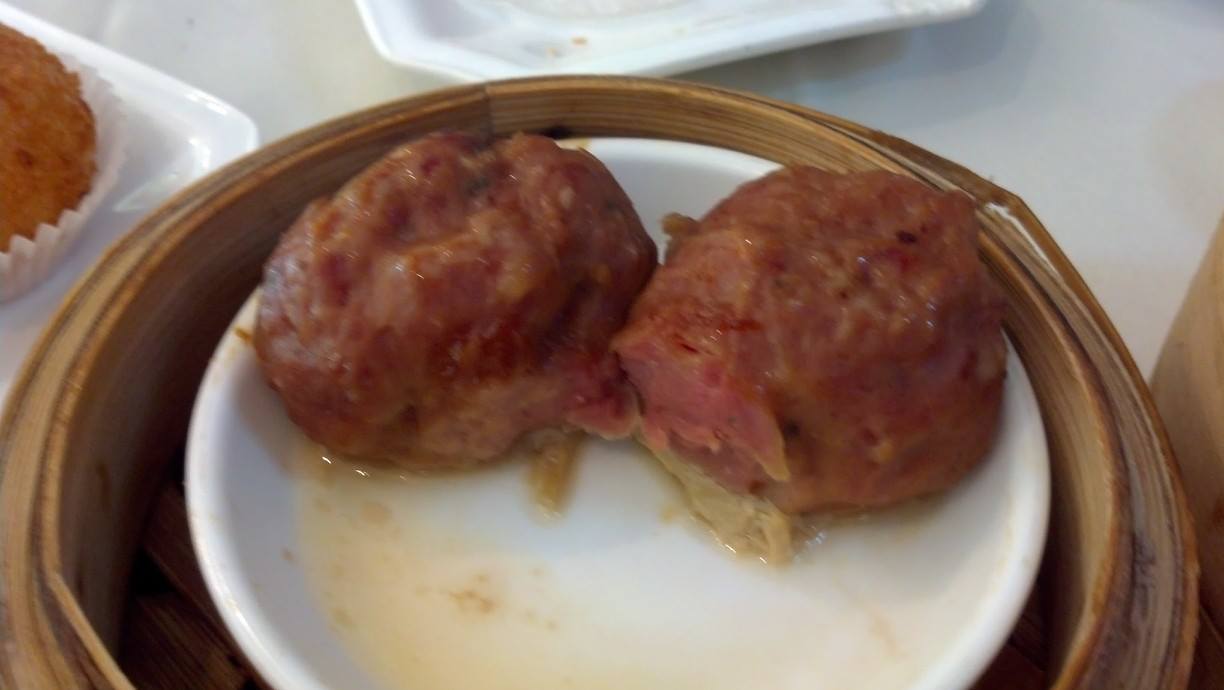


 Last week I met my wonderful Chinese friend, Su, in her neighborhood of Flushing. Su took me to a great dim sum lunch and then showed me around the various markets and restaurant supply stores. I can’t believe that I actually picked up squeeze bottles for 50 cents each. I had such a good time that I’m planning on going back to do more shopping.

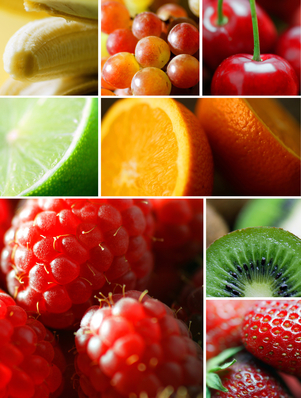 Fruit Essentials
Have you ever come home from the market after purchasing fruit to find that you spent money for nothing? I have plenty of times and it ticks me off every time. Here are some Fruit Essentials that may help you have more fruit shopping success.
Did you know that many plants that are botanically fruits are not sweet? We think of them as vegetables or non-fruits. Avocados, beans, coconuts, corn, cucumbers, eggplants, green peppers, okra, peas, pumpkins, sugar peas, string beans and tomatoes all fall in the fruit category. Some cookbooks make a distinction between fruit, vegetables and fruit vegetables. Fruit vegetables are foods that are botanically fruits, but are most often prepared and served like vegetables. These fruits are considered fruit vegetables: Aubergine, autumn squash, avocado, bitter melon, cantaloupe, chayote, chile, courgette, cucumber, eggplant, gherkin, green bean, green sweet pepper, hot pepper, marrow, muskmelon, okra, olive, pumpkin, red sweet pepper, seedless cucumber, squash, sweet pepper, tomatillo, tomato, watermelon, wax gourd, yellow sweet pepper and zucchini.
Pectin is a substance contained in some fruit which is used for making jams and jellies thicker. High pectin fruits are apples, cranberries, currants, lemons, oranges, plums and quinces. Low pectin fruits are bananas, cherries, grapes, mangos, peaches, pineapples and strawberries.
Low pectin fruits seem to discolor quicker than high pectin fruits ( bananas and eggplants). Lemon juice or vinegar slows the discoloring process. Other fruits and vegetables that discolor quickly are avocados, cauliflower, celery, cherries, figs, Jerusalem artichokes, mushrooms, nectarines, parsnips, peaches, pears, potatoes, rutabaga and yams.
Bruising: When a fruit is bruised the cell walls break down and discoloration begins. The process can be slowed down by refrigeration.
Cleaning: It is important to clean our fruit and vegetables. Rinse fruit in cold running water and scrub as needed before cooking or eating. Soaking fruit in water for more than a few minutes can leach out water soluble vitamins.
Peeling: The fruit skin usually contains a lot of important nutrients, but if you need to peel a thick-skinned fruit cut a small amount of the peel from the top and bottom. Then on a cutting board cut off the peel in strips from top to bottom. A good way to peel thin skinned fruit is to place the fruit in a bowl with boiling water and let stand for about 1 minute. Remove and cool in an ice water bath. You could also spear the fruit with a fork and hold over a gas flame until the skin cracks OR quarter the fruit and peel with a sharp paring knife or potato peeler.
Wax: Oh those beautiful waxed apples that wink at us at the market. They are beautiful because they are waxed. I don’t know about you, but I would rather not eat wax. Wax can be removed from the surface of fruits by washing them with a mild dishwashing soap and then thoroughly rinsing them. This will remove most of the wax, but probably not all of it.
Purchasing Ripe: Purchase these fruits fully ripe: Berries, cherries, citrus, grapes and watermelon. All of the fruits in this list, except berries, can be refrigerated without losing flavor.
Purchasing Not-So-Ripe: Apricots, figs, melons, nectarines, peaches and plums develop more complex flavors after picking. Store these fruits at room temperature until they are as ripe as you would like them.
Refrigeration: You can refrigerate apples,ripe mangos and ripe pears as soon as you get them. Do not refrigerat bananas.
Seasonal Fruit: Winter is the season for citrus. Fall is the season for apples and pears. Late spring is the season for strawberries and pineapples. Summer is perfect for blueberries, melons, peaches and plums.
Washing: Dry fruit with paper towels or kitchen towels and then use a blow dryer on the cool setting to completely dry fruit.
Squeezing: A microwave can be used to get more juice from citrus fruits. Microwave citrus fruits for about 20 seconds before squeezing the fruit for juice.
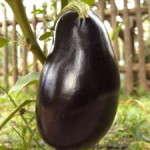
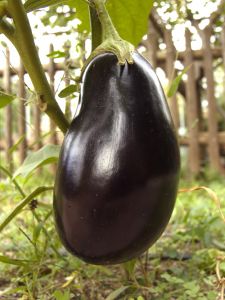 Eggplant Essentials
Eggplant (also known as Aubergine or Melongene) is an egg-shaped vegetable with a typically dark purple, shiny skin, though some are yellow or white. Eggplant was so named because the delicate white varieties that resemble eggs. Eggplant grows on a plant (Solanum Esculentum) in the nightshade family and is actually a fruit and not a vegetable. It is actually technically a berry. Eggplants have not always been popular. They were once known as “mad apples,” because it was thought that they caused insanity or death. They have been used in China since 600 BC. Thomas Jefferson first brought the eggplant to America from France in the eighteenth century. Male eggplants are rounder and smoother at the blossom end. They have fewer seeds which are bitter. Female eggplants are more oval and the blossom end is usually deeply indented. They tend to have more bitter seeds.
Eggplants are at their best from July through September. Select smooth, firm, glossy-skinned eggplants with green caps and stems. Smaller eggplants are sweeter than large ones. The fewer the seeds in an eggplant, the sweeter the eggplant. The more seeds in an eggplant, the older the eggplant.
Store eggplants in perforated plastic bags in the vegetable crisper of the refrigerator for four to five days.
Eggplants should be cooked immediately after peeling or cutting because the exposed flesh discolors rapidly due to oxidation. To prevent this start cooking as soon as you have cut it. If there is an unavoidable delay, promptly coat the surface with lemon juice or submerge with pieces in acidulated water.
Salt the flesh of a large cut-up eggplant to draw out any bitterness. For frying, it is always good to salt the eggplant or otherwise remove excess moisture. Only eggplants with tough, thick skins need to be peeled.
Eggplants should be cooked in only the minimum amount of fat or oil or without any at all because they have inner air pockets. Eggplants can absorb several times their weight in oil, even when breaded. Cooking with too much oil or fat breaks down the eggplant’s texture.
Slicing eggplants is so much easier when using a serrated knife.


