
Corn kernels contain a small drop of water that is stored inside a circle of soft starch. The soft starch is surrounded by the kernel’s hard outer surface. As the kernel heats up, the water begins to expand, and pressure builds against the hard starch. When this hard surface gives way, the popcorn explodes. As it explodes, the soft starch inside the popcorn inflates and bursts, turning the kernel inside out.
“Work With What You Got!”
© Victoria Hart Glavin Tiny New York Kitchen © 2017 All Rights Reserved

Oranges and lemons were first brought to the Americas by Spanish explorers. Today the United States is among the world’s top citrus growers and consumers. To choose the best citrus select fruit that is heavy and not too soft. When selecting oranges don’t worry about the color, as it is not a good indicator of how tasty the orange will be. For lemons and limes the juiciest fruit gives a little when you gently squeeze them. I like to roll lemons and limes around on the counter with the palm of my hand to loosen up the juice before cutting into them.
Oranges, grapefruits, lemons, and limes are the most commonly found citrus fruits. Lemons, limes, and oranges come into season just when we need them the most, when days are short and the weather is cold. Rich in vitamin C and fiber, they add a zesty boost to almost any meal. During the winter months, look for other varieties, such as blood oranges, Key limes, and Meyer lemons, as well as grapefruit-like pomelos and tiny kumquats.
We need vitamin C to stay healthy and citrus fruit is a delicious way to add lots of this vital nutrient to your diet. Start the day with orange juice, add a squeeze of lemon to warm water later in the day, or pack grapefruit sections to enjoy as a snack at work or school.
Citrus stars in everything from sweet and savory dishes to non-food uses. Simmer slices of lemons, limes, and oranges in water to use as a natural air freshener, use lemon juice as a gentle alternative to laundry bleach, or combine lemon juice with olive oil to use as furniture polish.
Much of the citrus flavor is in the zest. Finely grate the peel and add to anything that needs a punch of citrus flavor. To get perfectly grated zest without bitter white pith, use a fine zester.
Make your own flavored salt by processing coarse salt, freshly ground black pepper, and citrus zest in a food processor. Add this mix to soups, stews, meats and pasta dishes.
Use a vegetable peeler to remove large strips of peel and add to hot tea, mulled wine, soups, and stews to add bold flavor.
To segment citrus like a pro cut a thin slice from either end of the fruit to make a base. Pare away the peel and white part of the rind. Cut into the fruit center between one section and the membrane. Cut along the other side, between section and membrane. Repeat.
www.tinynewyorkkitchen.com
“Work With What You Got!”
© Victoria Hart Glavin Tiny New York Kitchen © 2017 All Rights Reserved

Most recipes have been perfected for use at seal level. At higher altitudes, adjustments in the cooking time, temperature, and ingredients could be necessary.
At sea level, water boils at 212 degrees. With each additional 500 feet of altitude, the boiling point drops 1 degree. Even though the boiling point is lower, it takes longer to generate the heat required to cook food. Therefore, at high altitudes, foods boiled in water (such as pasta and beans) will take longer to come to a boil and will require longer cooking times than recipes suggest. The processing times for canning foods and the blanching times for freezing vegetables will vary, too.
At high altitudes, cake recipes may need slight adjustments in the proportions of flour, leavening, liquid, eggs, etc. These adjustments will vary from recipe to recipe, and not set guidelines can be given. Many cake mixes now carry special directions on the label for high-altitude preparation.
High altitudes can also affect the rising of doughs and batters, deep-frying, candy making, and other aspects of food preparation. For complete information and special recipes for your area, call or write to the home agent at your county cooperative extension office or to the home economics department of your local utility company or state university.
“Work With What You Got!”
© Victoria Hart Glavin Tiny New York Kitchen © 2017 All Rights Reserved

The turkey came originally from America and was first domesticated by the Aztecs in Mexico. The Spanish introduced turkeys into Europe and they soon became a popular choice in France, Italy and Britain.
When early settlers from Britain, France and Holland crossed the Atlantic to North America, the vast flocks of turkey that roamed wild provided them with sustenance. They were plentiful and so easy to trap or shoot that the older children of the family were given the responsibility of catching them. The Native Americans meanwhile taught the new settlers the rudiments of farming, and in November 1621, on the first anniversary of their arrival, the Pilgrims entertained the locals to a feast, at the center of which was the turkey. Ever since, this has been the traditional bird served at Thanksgiving.
Turkeys are available fresh, chilled, or frozen all year round. When buying a whole bird, look for a plump well-rounded breast and legs and clear, soft and evenly colored skin. Avoid birds that are bruised, with blemishes or torn skin or any that have been badly or unevenly plucked. Turkeys vary enormously in weight.
When you’re ready to purchase your turkey it’s easy to get confused on what size to get. A good guild to go by is to figure approximately 1 1/4 pounds per person. This makes enough for the meal and provides a decent amount of leftovers.
To store your turkey place it in a large, deep dish and cover it completely with plastic wrap. Store it in the coolest part of the refrigerator; making sure that it does not come in contact with other foods.
Thaw a frozen turkey in the refrigerator for 2 to 4 days. Estimate 24 hours for every 5 pounds, so 2 days for a 10 pounder, 3 days for a 15 pounder, etc.
And then there is always the frozen turkey emergency that goes like this, “Help, help, it’s Wednesday, and my turkey is still frozen!!!” It’s been a long time, but I’ve been in this predicament. What you do is leave the turkey in its wrapper and put it in a large-size container. A lobster pot works well. Fill the container with cold tap water and let it sit for 30 minutes. Dump out the water and refill. Let it sit another 30 minutes. Repeat until the turkey is thawed, then roast immediately or transfer to the refrigerator.
The good news is that you can brine or dry cure your turkey while it defrosts in the refrigerator. What a Godsend that is! Use a lighter brine solution, which is about 1/2 cup kosher salt per gallon of water, plus sugar and spices). If you’re dry curing, use the standard recipe. You’re turkey should stay below 40 degrees while brining. You don’t need to brine or cure a kosher or butterball type supermarket frozen turkey. These come pre-brined. If you want to be able to put your own flavor stamp on your meal, then get a natural or untreated bird and do it yourself. If you plan on brining for 2 days use the weaker solution that I just mentioned. If you plan to brine for 24 hours or less, then bump it up to 1 cup kosher salt per gallon of water. Then add an equal amount of sugar. I don’t always brine, but when I do I’ve been known to throw an assortment of flavorings in the brine. Flavorings that you could add to your brine could be: apples, lemons, oranges, onions, garlic, shallots, peppercorns, bay leaves, cinnamon sticks, cloves, allspice berries, juniper berries, mustard seeds, fennel seeds, coriander seeds, rosemary, sage, thyme, savory, parsley, or oregano. You can also replace half the water with sweet cider, hard cider, vegetable stock, turkey stock, chicken stock, beer, white wine, or red wine. If you want to dry cure then use about 1/2 teaspoon kosher salt for every pound of turkey. Then add spices to your taste.
Stuffing your turkey is a personal preference. I always stuff the bird because I love how it tastes when cooked inside the turkey. It does slow down the cooking process, however. Never stuff the turkey in advance of cooking. The stuffing can be made in advance, but the turkey should not be stuffed until just before it is placed in the oven. Weigh the stuffing and add this to the weight of the bird before calculating the cooking time. Thoroughly rinse the body cavity of the bird under cold running water, and then drain it well. Wipe the turkey, inside and out, with paper towels. Press the stuffing inside the shallow neck cavity. Make sure not to pack it in too tightly. Turn the bird over and pull the neck skin over the stuffing. Now it’s time for a little turkey bondage and truss the bird (tuck the wing tips under the breast and tie the legs together) and then cook for the calculated time. Never shorten the cooking time because although the meat may appear cooked, extra time must be allowed for cooking the stuffing thoroughly.
If you choose not to stuff your turkey then place aromatics in the body cavity of the bird. Cut a large onion in half and stud each half with 4 to 6 cloves. Place this in the body cavity of the bird. Cut an orange and a lemon into quarters and add these, together with 3 or 4 bay leaves, 4 to 6 fresh sage sprigs, and 2 to 3 fresh thyme sprigs. Add 1 cinnamon stick or 1 blade of mace for a festive hint of warm spice.
Turkeys are super easy to roast, but require a little more attention than smaller birds. Check to make sure the oven shelves are in the correct position before heating the oven. Preheat the oven to 350 degrees. Place the prepared bird on a rack in a large-size roasting pan. Smear the turkey breast generously with butter, season with salt & pepper and place in the oven. Baste the turkey from time to time during cooking. When the breast has browned, cover with foil to protect it and continue cooking. Remove the covering foil for the final 20 minutes of cooking. To check if the meat is cooked, insert a skewer into the thickest part of the thigh. If the juices run clear and the meat is white, it is cooked. If the juices are pink and the meat is soft and pink, the turkey is not ready. Return it to the oven and check again after 20 minutes. Cooking times will differ depending on whether your bird was purchased fresh or frozen. Plan on 20 minutes per pound in a 350 degree oven for a defrosted turkey and 10 to 15 minutes per pound for fresh. Remember to add more time if you’re turkey is stuffed. You should have an instant-read thermometer in your kitchen drawer. Insert the thermometer into the breast (all the way to the bone) and if it reads 160 degrees you’re good to go. You may also measure the thigh by inserting the thermometer into the thickest part, but not touching the bone, and it should read 165 degrees.
Remove the turkey from the oven and cover it closely with foil. Leave it to rest for at least 30 minutes. This will even out the temperature and make it easier to carve. I know some chefs who let it rest for 2 hours, but I don’t think that one needs to wait that long. If you wish to make gravy in the roasting pan, transfer the bird to a carving plate.
When you’ve let your bird rest awhile remove the trussing string. Hold the bird steady in position with a carving fork. Cut off the legs, then cut these in half or carve the meat from the bones. Make a horizontal cut across the breast above the wing. Carve neat and even vertical slices off the breast. Repeat on the other side of the bird. Arrange slices on a warmed platter. Add the turkey legs or sliced meat to the platter or set them aside for serving separately. Scoop out the stuffing and serve with the meat.
“Work With What You Got!”
© Victoria Hart Glavin Tiny New York Kitchen © 2016 All Rights Reserved
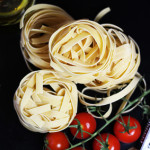
Cooking Pasta
There is no salt in pasta dough, so make sure to put enough salt in the cooking water. Use plenty of water, which should be about 4 quarts per 1 pound of pasta. Because salt actually slows down the rate at which water comes to a boil, add salt after the water is boiling. Use a heaping teaspoon for every quart of water. If you don’t think that you have enough salt in the water, then taste it, and you should be able to detect the salt.
I like to serve pasta from a warmed serving bowl. Place the bowl in the sink and set the colander inside of the bowl. Drain the pasta, letting the water drain into the bowl. Lift up the pasta in the colander, give it a good shake to drain further, and then pour the pasta into the still warm cooking pot. Make sure to NEVER rinse the pasta. This is a big no no. Then add the sauce to the pasta, in the cooking pot, and combine. Pour out the water from the serving bowl. I always reserve a cup or two of the pasta water in case I want to thin out the sauce a bit. Dry the bowl and transfer the pasta to the warm bowl and serve. It’s that easy.
“Work With What You Got!”
© Victoria Hart Glavin Tiny New York Kitchen © 2016 All Rights Reserved

Dried Beans
Purchase dried beans from a source with good turnover. When I’m travel to Tucson I love to stock up on dried beans from Native Seeds, who have a nice selection of beautiful beans (http://shop.nativeseeds.org/collections/beans) The longer the beans are on the shelf, the drier they become, and the longer they will take to cook. If you’ve ever cooked beans that just wouldn’t become tender, they were probably too old. Once you have them home, store them in an airtight container in a cool dark place.
Soaking dried beans reduces the cooking time and helps the beans hold their shape better during cooking. Although soaking isn’t necessary, the shortened cooking time cuts energy use, which is a good enough reason to soak. Spread the beans on a large baking sheet, and sort through them to remove stones or broken beans. Transfer the beans to a bowl and add enough cold water to cover by an inch or two. Let stand for 2 hours; longer will shrivel the beans. Drain before using.
For a quicker soaking method, place the sorted beans in a large saucepan, add cold water to cover, and bring to a full boil. Immediately remove from the heat and cover. Let stand for 1 hour, and then drain before using.
Cooks are divided over when to salt a pot of cooking beans. Some people believe that salting toughens the beans and thus lengthens their cooking time. Others believe that if beans are salted toward the end of cooking, the flavor is dull. So, in the interest of proper seasoning, go ahead and add a reasonable amount of salt at the beginning of cooking (about 1/2 teaspoon per cup of dried beans), as the add cooking time is minimal.
www.tinynewyorkkitchen.com
“Work With What You Got!”
© Victoria Hart Glavin Tiny New York Kitchen © 2016 All Rights Reserved

It’s been quite a week waking up to discover there was no water and that the irrigation guys had drained the well! Welcome to the country! After chasing all the appropriate people the well is back to normal. A wonderful thing is happening this moment. Because of the heavy rains yesterday my guys who come mow the acreage came this morning. It just so happened that I had made way too much pizza. So my guys are sitting on my front porch chowing down on pizza and taking a little break before their next stop. It always makes me so happy to see people enjoying the food that I make. It’s a beautiful thing!
“Work With What You Got!”
© Victoria Hart Glavin Tiny New York Kitchen © 2016 All Rights Reserved

Homemade Fruit & Vegetable Wash
I’ve made the mistake of buying premade produce wash and have spent way too much money to find out that many of them don’t really work that well. It’s easy to make your own and you’ll save plenty of money as well. You’ll just need to invest in a decent spray bottle.
INGREDIENTS
1 Cup Water
1/4 Cup White Vinegar
3 Tablespoons Lemon Juice
Pour into spray bottle and use by spraying produce, wipe thoroughly, and rinse. It’s that easy!
Makes About 1 1/4 Cups
“Work With What You Got!”
© Victoria Hart Glavin Tiny New York Kitchen © 2016 All Rights Reserved

English Stew (1860)
English stew is the name given to the following excellent preparation of cold meat. Cut the meat in slices, pepper, salt, and flour them, and lay them in a dish. Take a few pickles of any kind, or a small quantity of pickled cabbage, and sprinkle over the meat. Then take a tea-cup half full of water; add to it a small quantity of the vinegar belonging to the pickles, a small quantity of catsup, if approved of, and any gravy that may be set for use. Stir all together and pour it over the meat. Set the meat before the fire with a tin behind it, or put it in a Dutch oven, or in the oven of the kitchen range, as may be most convenient, for about half an hour before dinner-time. This is a cheap, simple way of dressing cold meat.
“Work With What You Got!”
© Victoria Hart Glavin Tiny New York Kitchen © 2016 All Rights Reserved

Making The Best Candy
Candy is not difficult to make. Some candy recipes require little or no cooking at all. Other candy recipes need only careful timing and adequate beating. For some types of candy, however, special care is necessary. Follow these basic instructions and you can become a successful and versatile candy maker.
Always read a recipe through from beginning to end BEFORE starting to cook. This is important with all recipes, but especially candy recipes. You never will know if you need special equipment or a special ingredient until you read the recipe.
Always use the best quality, freshest ingredient available.
Measure ingredients accurately, using standard measuring spoons for small amounts, a fluid measuring cup for liquids, and graduated measuring cups for dry ingredients.
Follow recipes carefully. Use only the ingredients specified and add them in the order and by the method given.
To prevent sugaring, carefully follow directions about stirring and about covering the pan.
Use moderate or low heat, according to instructions in the recipe, so the syrup does not reach the boiling point too quickly.
Always use a saucepan large enough to allow space for the candy to bubble up when boiling. A 2 quart pan is large enough in most cases, but sometimes a 3 quart or even a 4 quart pan is preferable. A pan in which candy is made should be a heavy gauge metal, which holds heat evenly and will prevent sticking.
Candy making involves a lot of stirring and beating. Although an electric mixer may be used in some stages of preparation, such as beating egg whites for divinity, for most candy mixtures a spoon is best. A long handled wooden spoon is preferable, since it will never get too hot to handle. God bless wooden spoons!
A candy thermometer that clips onto the side of the pan is almost a necessity for successful candy making, since it is critical that the candy be removed fro the heat at the moment it reaches the proper temperature. It is best to use a clearly marked, easy to read thermometer with a mercury ball that is set low enough to measure the temperature of the boiling syrup, but does not touch the bottom of the pan.
To use a candy thermometer, be sure it is at room temperature before putting it into the hot syrup. Lower the thermometer gradually into the candy mixture AFTER the sugar is dissolved and the syrup has begun to boil.
The cold-water test is an alternative to a candy thermometer. Many cooks still rely upon this test, although it is not as accurate as a candy thermometer (hard ball/soft ball).
Temperature Tests For Candy
Temperature of Syrup Test Description of Syrup When Dropped Into Very Cold Water
234° to 240 ° Soft Ball Forms a soft ball that flattens on removal from water
244° to 248° Firm Ball Forms a firm ball that does not flatten on removal from water
250° to 266° Hard Ball Forms a hard ball that, on removal from water remains hard enough to hold its shape yet pliable
270° to 290° Soft Crack Separates into threads that are hard, but not brittle, when removed from water
300° to 310° Hard Crack Separates into threads that are hard and very brittle
To water-test, use very cold, but NOT ice, water. Use a clean cup, spoon, and fresh water for each test. Remove the pan from the heat and drop a little of the hot mixture into the water. Use your fingers to gather the drops into a ball and feel its consistency. If the candy is not yet ready, immediately return the pan to the heat.
Avoid making candy on damp or rainy days. High humidity is the candy maker’s enemy. If for any reason you cannot postpone a candy making session, cook the candy 1 or 2 degrees higher on the thermometer than indicated in the recipe.
Altitude also affects candy making. Temperatures given in recipes are typically for sea level. At high altitudes the candy must be cooked about 2 degrees higher.
Be patient and always allow sufficient time. Most candy does take time to make, and there is no way to rush the cooking with disaster.
"Work With What You Got!”
© Victoria Hart Glavin Tiny New York Kitchen


