
Substitution Guide
|
Ingredient |
Substitution |
|
Allspice (1 tsp.) |
1/2 tsp. cinnamon + 1/4 tsp. nutmeg + 1/4 tsp. ground clove |
|
Baking Powder (1 tsp.) |
1/4 tsp. baking soda + 1/2 tsp. cream of tartar |
|
Baking Soda (1 tsp.) |
2 tsp double-acting baking powder + replace acidic liquid ingredient in recipe with non-acidic liquid |
|
Balsamic Vinegar |
Equal amount of sherry or cidar vinegar |
|
Bread Crumbs (1 cup) |
3/4 cup cracker crumbs |
|
Brown Sugar (1 cup) |
1 Tbsp. light molasses + enough sugar to fill 1 dry measure cup or 1 cup raw sugar |
|
Butter, salted (1 cup or 2 sticks) |
1 cup or 2 sticks unsalted butter + 1/4 tsp. salt or 1 cup margarine or 7/8 cup lard or vegetable shortening |
|
Buttermilk (1 cup) |
Place 1 Tbsp. white vinegar or lemon juice in a liquid measure. Fill to 1 cup with room temp whole or 2% milk and let stand for 5 minutes or 1 cup milk + 3/4 tsp. cream of tartar or 1 cup plain yogurt |
|
Canola, Sunflower and Vegetable Oils |
Substitute one for one |
|
Chocolate, Bittersweet or Semi-Sweet (1 oz.) |
1/2 oz. Unsweetened chocolate + 1 Tbsp. granulated sugar |
|
Cocoa Powder (3 Tbsp. Dutch-processed) |
1 oz. Unsweetened chocolate + 1/8 tsp. baking soda + reduce fat in recipe by 1 Tbsp. or 3 Tbsp. natural cocoa powder + 1/8 tsp. baking soda |
|
Corn Starch (as a thickener) |
Equal amounts of Minute Tapioca for cornstarch, use slightly less for flour |
|
Cream of Tartar (1/2 tsp.) |
1/2 tsp. white vinegar or lemon juice |
|
Egg (1 whole large egg) |
3-1/2 Tbsp. thawed frozen egg or egg substitute or 2 egg whites |
|
Garlic (1 fresh clove) |
1 tsp. Garlic Salt or 1/8 tsp. Garlic Powder or 1/4 tsp. dried minced garlic |
|
Gingerroot (1 Tbsp. minced) |
1/8 tsp. ground ginger powder or 1 Tbsp. rinsed and chopped candied ginger |
|
Half & Half (1 cup) for cooking or baking |
1-1/2 Tbsp. butter or margarine + enough milk to equal 1 cup |
|
Heavy Cream (1 cup) for cooking or baking |
3/4 cup milk + 1/3 cup butter or margarine |
|
Herbs, Fresh (1 Tbsp.) |
1 tsp. dried herbs |
|
Honey (1 cup) for cooking or baking |
1 1/4 cups granulated sugar + 1/4 cup of liquid appropriate for recipe |
|
Italian Seasoning (1 tsp.) |
1/2 tsp. dried basil + 1/4 tsp. dried oregano + 1/4 tsp. dried thyme |
|
Molasses (1 cup) |
1 cup honey or 1 cup dark corn syrup or 3/4 cup light or dark brown sugar dissolved in 1/4 cup liquid |
|
Mushrooms, fresh (1 cup sliced and cooked) |
1 can (4 oz.) mushrooms, drained |
|
Mustard, Prepared (1 Tbsp.) |
1/2 tsp. dry mustard powder + 2 tsp. white vinegar |
|
Onion (1 small minced) |
1/2 tsp. onion powder |
|
Poultry Seasoning (1 tsp.) |
1/4 tsp. ground thyme + 3/4 tsp. ground sage |
|
Pumpkin Pie Spice (1 tsp.) |
1/2 tsp. ground cinnamon + 1/4 tsp. ground ginger + 1/8 tsp. allspice + 1/8 tsp. nutmeg |
|
Sour Cream (1 cup) |
1 cup plain yogurt or 1 Tbsp. lemon juice and enough evaporated milk to equal 1 cup |
|
Tomato Juice (1 cup) for cooking |
1/2 cup tomato sauce + 1/2 cup water |
|
Tomato Sauce (1 cup) for cooking |
1/2 cup tomato paste + 1/2 cup water |
|
Wine, Red (1 cup) |
1 cup nonalcoholic wine, apple cider, beef broth or water |
|
Wine, White (1 cup) |
1 cup nonalcoholic wine, white grape juice, apple juice, chicken broth or water |
|
Yogurt (1 cup) |
1 cup buttermilk or 1 Tbsp. lemon juice and enough milk to equal 1 cup or 1 cup sour cream |
"Work With What You Got!"
© Victoria Hart Glavin Tiny New York Kitchen


Ruby Red Grapefruit Iced Tea
This Ruby Red Grapefruit Iced Tea is so refreshing. If you want to make ahead then add the ice cubes before serving.
INGREDIENTS
3 Green Tea Bags
3 Cups Boiling Water
2 Cups Ruby Red Grapefruit Juice
1/2 Cup Agave Nectar
1 Cup Mint Leaves
1 Ruby Red Grapefruit (Thinly Sliced)
1 Cup Fresh Sliced Ginger (Thinly Sliced)
Pitted Cherries For Garnish (Optional)
Ice Cubes (To Serve)
Place tea bags and boiling water in a large-size bowl and set aside to infuse for 5 minutes. Remove the tea bags and allow the tea to cool completely. Add the grapefruit juice and agave nectar. Stir to combine. Place the mint, grapefruit slices, ginger and ice cubes in a 42-ounce capacity jar and pour the tea mixture over to serve. Pour into ice tea glasses and garnish with a single cherry. Makes 42 ounces.
© Victoria Hart Glavin
![]()
![]()


Thanksgiving Emergency Strategies
Help, help, I have extra guests coming! My gravy doesn’t look right! What to do? These are some holiday entertaining questions that I have been asked over the years. Whether this is the first time you’ve hosted Thanksgiving dinner or your 20th time there are always things that seem to come up that feel like emergencies. From lumpy gravy to unexpected guests the pressure can just be too great at times. Not to worry, these are some good strategies that have helped me cope and make everything run smoothly.
Dear Victoria: “My turkey is still a bit frozen and my dinner is in a few hours. What should I do?”
Put that bird into a large pot and run tepid water over it for at least an hour. You can butterfly the turkey so that it cooks faster which should take about an hour and a half at 400 degrees. You can then roast it or grill it. In the future you may want to consider purchasing a fresh turkey and not a frozen one.
Dear Victoria:” I called everyone to the table and started carving the turkey to find that parts of it are still raw or undercooked. How embarrassing! What should I do?”
This situation has happened to most of us at one time or another. Don’t skip a beat and just carry on carving off any parts that are cooked, serve those and put the remaining pieces back in the pan, cover with foil, and cook until done. Most likely the breast meat will be done. Your guests can get a bit of turkey along with your delicious sides while waiting for the rest of the turkey to come out of the oven. In the future you may want to consider carving the turkey first and then cooking it.
Dear Victoria: “I always seem to overcook the turkey. I just don’t know how I keep doing this. Please help!”
For the immediate remedy I suggest you have LOTS of gravy on the table to pour over those dried out pieces of turkey. In the future make sure to invest in a meat thermometer. Insert the thermometer into your cooked turkey through the thickest part of the breast until it hits the breastbone. Remove the turkey from the oven when it reads 160 degrees. Let your turkey rest for about 30 minutes before carving.
Dear Victoria: “I have a small kitchen and don’t have much room in my oven to cook everything. How am I going to get everything done?”
Tiny New York Kitchen knows this situation all too well! First of all there are plenty of things that you can get cooked in advance. Check your menu and see what you can prepare before needing to place your turkey in the oven. If you have an outdoor grill, then by all means grill your bird. Hey, you can play it off as the “hip thing to do.” Let your side dishes cook in the oven while your turkey is grilling out there in the fresh November air!
Dear Victoria: “I made stuffing and it is pretty soggy. How can I make it un-soggy?”
This is a super easy one. Scoop it out of the turkey and/or the baking dish and spread it out on a baking sheet. Place it in the oven and bake it at 350 degrees until it is how you want it. Scoop it back into the serving dish and serve. No one will be the wiser.
Dear Victoria: “Before I call my guests to the table the food starts to get cold. How can I avoid this?”
Cover serving dishes with lids or foil to keep them warm. If a dish actually gets really cold, that is supposed to be hot, then just put it back in the oven for a little bit. Don’t be too concerned, however, as most Thanksgiving dishes are perfectly fine at room temperature.
Dear Victoria: “My side dishes aren’t browned on top? They just don’t look that appetizing. What should I do?”
If a dish is fully cooked, but doesn’t have that delicious looking brown surface (Potatoes, Vegetables, Stuffing, etc.) then simply put them under a hot broiler at least 4 inches away from the heating element. You may want to turn them as needed until browned on top. MAKE SURE that you watch them carefully. You really don’t want them to go from pasty to burned up! Always put the food too far from the broiler rather than too close. If you follow these instructions then you will get a nice browned crust on top of your dishes.
Dear Victoria: “My gravy looks way too lumpy. I can’t serve lumpy gravy! How do I fix it?”
Not to worry. You will just need to put some hard work into it with a good whisk. Whisk those lumps out. It may take a bit of time, but it can be done. If you have really stubborn lumps add just a bit of hot liquid to coax them out while you whisk. If you STILL can’t get them out take a medium weave strainer and set it over a bowl. Pour the grave in and stir. Smooth gravy will flow through the strainer and the lumps will stay behind. For the future make sure you whisk the flour or cornstarch constantly while you are adding the broth or turkey juices to keep lumps from forming.
Dear Victoria: “Help, my gravy is just way to thick. It looks like brown jelly. How do I thin it out?”
This one is super easy. Drizzle in a bit of hot broth or hot water while whisking and then heat up your gravy until it’s piping hot.
Dear Victoria: “My gravy is too thin. It looks watery. I’m horrified. Is there a good solution to this hot mess?”
This problem is just a bit trickier. Brown 1 tablespoon for every cup of gravy by stirring it in a dry frying pan over a medium heat until it turns a nice deep golden brown. Have your gravy in a wide pan on the stove over a medium high heat. Whisk the browned flour into your gravy and cook. Make sure to whisk constantly until your gravy thickens. This should do the trick.
Dear Victoria: “The top of my pumpkin pie is all cracked and looks horrible. What happened? How can I serve a cracked pumpkin pie?”
Your pumpkin pie was over baked which is why it is cracked on top. Not a soul needs to know, however, if you dollop on whipped cream and carry it to the table like the prize pie it is! Sometimes cooking is like acting. If you flub a line you just carry on like that is how it is supposed to be.
Dear Victoria: “My sister called and asked if she could bring extra guests. My goodness, what am I going to do? Dinner is in an hour!”
I’ve certainly encountered this situation plenty throughout my dinner party throwing life. I’ve always kept an open door policy because I figure that not everyone has a place to go on the holidays, which can be very sad and lonely. The good news is that most of us make way too much food for Thanksgiving. Having unexpected guests can impact a meal however. First of all, forget any leftovers that you were counting on. Make more mashed potatoes, rice or pasta. These items take 30 minutes or less to make. Slice the turkey thin. Make a quick soup by combining chicken broth, pureed cooked vegetable(s), fresh herbs, salt and pepper. As soon as you get the call immediately put bowls of nuts and snacks out before dinner.
Dear Victoria: “I have quite a large group coming for dinner and I don’t have enough room at the table. What do I do?”
You can set up dinner buffet style or you can set up multiple tables as auxiliary eating areas. Living room coffee tables and game and/or card tables work. You can let everyone sit where they want or you can seat people by age or alphabetically or however you decide to seat people. Thanksgiving is about spending time with friends and family. People will have fun no matter where they are sitting. Relax and enjoy yourself.


Constitution Week – Foods of Our Forefathers Part II
The standard grains included wheat, barley, oats and rye. Finely ground wheat flour, “boulted” or sieved through a fine cloth, was used to make white bread for the rich early in the fifteenth century. Most of the gentry ate what we would call cracked or whole wheat bread. The poor ate bread of coarse-ground wheat flour mixed with oats, ground peas or lentils.
During the ocean crossing to the New World, immigrants subsisted on an even more monotonous diet for weeks. The Mayflower provisions were typical – brown biscuits and hard white crackers, oatmeal, and black-eyed peas, plus bacon, dried salted codfish and smoked herring for animal protein. The only vegetables on the trip were parsnips, turnips, onions and cabbages. Beer was the beverage.
As pilgrims set foot on their new homeland, they hardly knew what to expect. Each brought a stock of basic foods to get them through the first year, as well as a variety of basic utensils and kitchen tools. Also included were the essential accompaniments for whatever they found or could raise when they arrived – a bushel of coarse salt, 2 gallons of vinegar, a gallon of “oyle” and a gallon of aquavite.
Nothing they had been told, however, prepared them for the staggering variety of totally unfamiliar plants that were being used as food by the Indians – corn, sweet potatoes, peppers, pumpkins, squash, sunflower seeds and cranberries were examples. In addition to the strange food, there were strange ways of cooking. In Europe, meat was boiled; the Indians, lacking iron pots, roasted theirs on a spit over a fire. The Indians also had a long, slow cooking process that yielded what we now call Boston baked beans, and they used a fire-heated, rock-lined pit for what we would now call a clam-bake. Where the pilgrims were accustomed to raised wheat bread, the Indians introduced them to corn based spoon bread. Corn also provided hominy, used as a vegetable, and later, of course, as grits. For sweetening, the Indians used maple syrup and honey, as sugar was unknown.
Although many of the food the Pilgrims and other colonists found were totally strange, others had travelled the route before them. The Spanish had brought pigs, which thrived especially in areas where peanuts grew. Peaches and oranges were also native which spread throughout climatically suitable areas in a short time.
Even the white potato was an early migrant to the New World, following a zig-zag route, from its original home in Peru to Spain in 1520, from Spain to Florida forty years later, from Florida to England in 1565, always being treated as a culinary curiosity. By the 1600’s they had become a popular food staple in Ireland, and were carried by Colonists both to New England and Virginia, where they quickly established themselves. There they served as a valuable source of vitamin C, protein and trace minerals, in addition to the starch.
Potatoes, incidentally were significant in another, later migration to America: the climate in Ireland proved so amenable to their culture, and their nutrient content was so high, that many poor Irish farmers grew only potatoes on their small farms. In fact, as fathers subdivided farms for their sons, many found themselves supporting whole families on the potatoes grown on less than an acre of ground, while the family itself lived in a roofed-over ditch. When blight struck in 1845, the sole food source of millions of people literally withered away before their eyes. A half-million of the 8 1/2 million population died of starvation or disease, and 1 1/2 million emigrated to England or America – following the “Irish potatoe.”
Spices were in short supply in America’s earliest days. The English pretty well monopolized the trade with the New World. Within a few years, however, settlers had planted the seeds they had brought or imported, and most had adapted to the climate and were flourishing in orderly rows and patterns in kitchen gardens all along the Atlantic Coast. There were a few – ginger, pepper, cloves, mace, cinnamon, nutmeg, and allspice – that simply couldn’t cope with the weather or soil – and were scarce. Olive oil, lime juice, prunes and saffron were available, but only at high prices.
To Be Continued…
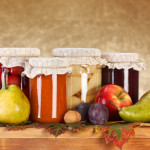
 Canning Basics
It’s that time again! Time to can jams, jellies, fruits, tomato sauces, pickles, vegetables and whatever else you can think up. The good news is that canning is making a comeback as new generations discover the joys of serving and sharing home preserved foods. Here are some basic guidelines to follow for safe and delicious results.
Equipment
Boiling Water Canner
I like to use a Boiling Water Canner and not a pressure canner. A boiling water canner (or water bath) is used for fruits, jams, jellies, pickled vegetables, pickles, relishes and tomatoes. It is a large pot that has a lid and a rack designed to hold canning jars. Any large cooking pot can be used if it has a rack, a tight fitting lid and enough depth for briskly boiling water to cover the jars by 1 inch. A pressure canner must be used for vegetables and other low acid foods. It is a large heavy pot that has a rack and a tight fitting lid with a vent, a dial or weighted pressure gauge and a safety fuse. It sometimes has a gasket. Pressure canners allow foods to be heated to 240° F and held at the temperature as long as necessary. When using a pressure canner, always refer to the manufacturer’s instructions before beginning.
Jars
Canning jars come in many sizes, from 4 ounces to 1 quart; those with wide mouths are perfect for pickles. Use the size and style called for in each recipe.
Use only standard canning jars. These are tempered to withstand the heat inside a canner, and their mouths are specially threaded to seal with canning lids. Inspect all jars before using them, discard any that are cracked or have chipped rims.
Lids
Use screw bands and flat metal lids that have a built-in sealing compound. Prepare them according to the manufacturer’s directions. The flat lids are designed for one-time use only. Screw bands can be reused if they are not bent or rusty.
Other Essentials
Special kits can be purchased that include all the canning essentials in one box. Kits typically contain the following: A jar lifter for removing hot jars from the boiling water; a magnetic lid want for retrieving sterilized lids from the hot water; a nonmetallic spatula which often has measuring increments for judging headspace (You certainly could use a ruler instead); and a funnel for directing hot liquids into jars. You may also want to have a food scale, food mill or sieve and a colander. Make sure to wash any utensils that will directly touch the food with soap and warm water before beginning.
General Canning Steps
For a boiling water canner, pack food into the canning jars by the raw pack (cold pack) or hot pack method. In raw packing, uncooked food is packed into the canning jar and covered with boiling water, juice or syrup. In hot packing, food is partially cooked, packed into jars and covered with cooking liquid. The following applies to both methods.
*Wash empty canning jars in hot, soapy water. Make sure to rinse thoroughly. Place the jars in the boiling water canner. Cover the jars with hot water and then bring to a simmer over a medium heat. For food processed under 10 minutes, boil the jars 10 minutes and keep warm in simmering water until needed. Set screw bands aside; place the lids in a separate saucepan. Cover with water; bring to a simmer over medium heat (do not boil).
*If you are using a separate pot for sterilizing the jars, fill the boiling water canner half full; bring to boiling. Heat additional water in another large pot (to top off water in the canner); keep it hot but not boiling.
*Prepare only as much food as needed to fill the maximum number of jars your canner will hold at one time. Keep your work area clean.
*Remove sterilized jars from the hot water; place the hot jars on cloth towels to prevent them from slipping during packing.
*Pack food into jars using a wide mouth funnel, allowing for adequate headspace. Ladle boiling liquid over the food, leaving adequate headspace.
*Check the headspace. The space between the top of the food and the container rim is the headspace, leaving the correct amount is essential. Headspace allows a vacuum to form and the jar to seal. Use a ruler to make sure that you have the amount specified in each recipe.
*Release trapped air bubbles by gently working a sterilized nonmetal utensil (such as one provided in a canning kit) down the jar’s sides. Add liquid, if needed, to maintain necessary headspace.
*Wipe jar rims with a clean, damp cloth, food on the rims prevents a perfect seal. Place the prepared lids on the jars, add the screw bands, and tighten according to the manufacturer’s directions.
*Set each jar into the rack in the canner as it is filled and sealed. Jars should not touch each other. Replace the canner cover each time you add a jar.
*When all jars have been added, ladle hot water from the extra pot into the canner to cover the jars by 1 inch.
*Cover, heat to a full rolling boil. Begin processing time, following recipe procedures and times exactly. If necessary adjust for altitude. Keep the water boiling gently during the processing, adding additional boiling water if the water level drops. If the water stops boiling when you add more, stop timing, turn up the heat, and wait for a full boil before resuming counting.
*At the end of processing, remove the jars; place them on a rack or on towels in a draft-free area to cool. Leave at least 1 inch of space between jars to allow air to circulate.
*After the jars are completely cooled (12 to 24 hours), press the center of each lid to check the seal. If the dip in the lid holds, the jar is sealed. If the lid bounces up and down, the jar isn’t sealed. Check unsealed jars for flaws. Contents can be refrigerated and used within 2 to 3 days, frozen, or reprocessed within 24 hours. To reprocess, use a clean, sterilized jar and a new lid; process for full length of time specified. Mark the label so you can use any recanned jars first. If the jars have lost liquid but are still sealed, the contents are safe. However, any food not covered by liquid will discolor, so use these jars first.
*Wipe jars and lids. Remove, wash, and dry screw bands; store for future use. Label jars with contents and date; include batch number if you can more than a load a day. If a jar spoils, you can identify others from the same batch. Store jars in a cool (50° to 70° F), dry, dark place. Use within 1 year.

Easy Non-Salad Radish Ideas
I love radishes and am always drawn to the pretty color of a pile of radishes. Most of us just slice them into a green salad and the left-over radishes die a fateful death in the fridge. Here are some non-salad ideas that will expand your radish repertoire.
Radish Sauté – It doesn’t really occur to many people that you can cook radishes (as with cucumbers). It’s so simple to sauté radishes in olive oil or butter. They are delicious and make you appreciate radishes in a while new way.
Kimchi – Sprinkle the radishes with a bit of kosher salt and a little chili paste. Toss together and then pack them into a glass jar. Place in the back of the fridge for two weeks. Excellent on top of a burger.
Butter & Sea Salt – A fine butter and a pinch of sea salt on top of a radish slice make the perfect summer bite.
Radish “Sauerkraut” – Slice 1 pound of radishes and toss with 1 tablespoon of kosher salt. Pack tightly into a glass jar. Weigh down with a wrapped can and place on a shelf for two weeks. Makes a great addition to a sandwich.
Shaved & Lightly Poached In A Tasty Liquid – Slivers of radish dropped in a simmering stock and/or wine for 10 seconds are a great compliment to fresh fish. They let go of their bite, but retain some of their unique crunch we all know and love.
Braised – Sauté a little onion and garlic. Add in some radish quarters and a healthy splash of red wine. Cover and simmer for 20 minutes. Finish with a squeeze of lemon or dash of vinegar. Excellent draped over a grilled steak or pork chop.
Pickled – Slice some 1/4 inch coins and throw them into a jar. Pour brine over them (1 teaspoon kosher salt, 1/2 teaspoon sugar, 1/2 cup water and 1 1/2 cups cider vinegar). You may want to throw in a few dried chilis if you want a bit of spice. Let sit in your fridge for a week.
Soup – Simmered for 30 minutes in a soup. The radishes will take on a sweet and velvety character.
Grated – Grate the radishes along with some freshly grated ginger and use as a condiment with any oily fish such as trout or mackerel.
Roasted – Quarter and toss with a little olive oil. Season with kosher salt and freshly ground pepper. Roast in an oven at 425º F for 20 minutes. They should be a little brown and will become sweet. Toss them with some toasted nuts. They are a great side dish at any potluck picnic.

 Healthy & Whole Foods
Many Americans have been struggling with weight issues for years. People may lose a few pounds by trying various diets, but only to gain a few extra pounds when resuming old eating patterns. As we get older we find that losing weight becomes much more difficult with our metabolisms slowing substantially. Being overweight brings on serious health risks such as diabetes, cancer and heart disease. It is important for us to make a real connection between what we eat and our overall health. Here are some eating tips that typically make a difference in weight loss and, of course, incorporating exercise into your daily routine helps significantly.
Breakfast
Eat a healthy breakfast every day. A healthy breakfast is one that consists of
Protein, fruit and whole grains. Avoid processed foods. Eating breakfast helps
prevent overeating later in the day. Try eating an egg sandwich with a piece of fruit or whole grain cereal with low fat or skim milk and a banana.
Water
Drink more water. Most of us don’t drink enough water. Substitute water for sodas, juices, alcoholic drinks and even diet sodas. Substitute water for those high calorie drinks and you will begin to see the pounds melt away. I like to drink sparkling water when I crave a soda.
Fish
Fish is great for giving you those good omega-3 fatty acids that we all need and
is lower in calories. Stay away from eating processed meats like hot dogs and sausages. Eat fish two to three times per week and eat red meat once a week at most.
Whole Grains
Whole grains are chock full of vitamins, minerals and high in fiber. Eat whole wheat bread, whole wheat pasta and brown rice. Stay away from refined grains such as white bread and white pasta.
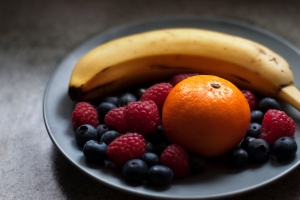
Fruits & Vegetables
We need our fruits and vegetables. They are antioxidant rich foods that help in weight loss. Fresh produce contains water so we feel full and satisfied longer. Berries are great antioxidants.
Dairy
Including low-fat dairy food into our diets is important. These foods are rich in calcium and vitamin D. Many of us are deficient in obtaining these bone building vitamins.
“Diet” Foods
Just because the label says “diet” or “low-fat” or “fat-free” doesn’t mean that they are healthy for us or will promote weight loss. These foods are typically loaded with sugar and are highly processed which means empty calories. It would be better to eat a hand-full of nuts than to turn to these impostors.
Home Cooking
As you know I am big on cooking at home. I rarely use processed foods and would rather cook my own meals. It takes time, money and energy, but in the end it’s worth it. When we eat out in restaurants we truly don’t know how our food is cooked. Chefs tend to put butter on “everything” and that’s why the meals taste good. Also, we tend to eat much larger portions when we go out for dinner. For certain stay away from fast food restaurants.
Portion Sizes
I am a visual person. It sounds ridiculous but the serving size for fruits and vegetables should be fist size. Look at your fist and get a visual of what a fruit/veggie serving size should be. A serving size of meat should be the size of a deck of cards and a serving size of fish should be the size of a checkbook. Eat smaller meals!
Slow Down
Eat slower. We should spend 30 minutes eating a meal. Eat at the table sitting down.
Food Labels
Read those food labels for calories and other nutrients. Scan the food labels for how many grams of sugar an item has. Just because a food item my say it is low in fat it just may have a high amount of sugar.
Snacking
Snacking twice a day on healthy snacks helps from overeating later in the day. Healthy snacks are items such as fruit, carrots or a handful of nuts (not sugar coated candy type nuts). Don’t forget that water!
Gum
Believe it or not chewing gum can help keep that weight off. I like to nibble so when I get the urge to nibble I will pop a couple pieces of gum in my mouth.
Sleep
Sleep at least 7 hours per night.
Exercise
Join a gym and go at least 3 times a week. If you can’t make it to a gym then walk. Go for a walk after lunch or after dinner for 45 minutes to an hour. Incorporate lifting some free weights into your routine.
Foods To Avoid
Butter
Ice Cream
Chips
Crackers
Instant Oatmeal
Fish Sticks
Sugary Cereal
White Pasta
Cereal Bars
Candy Bars
Fried Chicken
Regular Pretzels
Potato Chips
White Bread
White Potatoes
Prepared Salad Dressings
White Rice
Cookies
Foods To Eat
Olive Oil
Greek Yogurt
Nuts
Seeds
Steel Cut Oats
Broiled Salmon
High Fiber Cereal
Whole Wheat Pasta
Blueberries
Piece of Dark Chocolate
Grilled/Roasted Chicken
Whole Wheat Pretzels
Unbuttered Popcorn
Whole Wheat Bread
Sweet Potatoes
Oil & Vinegar Salad Dressing
Brown Rice
Figs

 Packing A Picnic & Serving Food Outdoors
Packing A Picnic
*Pack lots of extra drinks in a cooler. When it’s hot outside picnickers get thirsty.
*Pack sweet treats. Bring fresh fruit such as berries and melon or cookies instead of ice cream.
*Keep prepared foods in the refrigerator until it is time to pack them up.
*Bring a soccer ball, football, baseball & mitts or a Frisbee. If you live close to the park either walk, rollerblade or ride your bikes.
*Pack sunscreen! Even when it is overcast or if you’re lying in the shade make sure to wear sunscreen.
Serving Food Outdoors
*When taking foods on a picnic make sure to keep perishables in the cooler with either ice or freezer packs until serving time. Make sure that the food is cold BEFORE it goes into the cooler.
*Pack just the right amount that you and your picnickers are going to eat. You don’t want to bring leftovers back home.
*If you are driving to your picnic don’t put your cooler and picnic basket in the hot trunk. Instead transport your picnic in the air-conditioned car.
*At you picnic site, keep the cooler and picnic basket in the shade. Open the cooler as little as possible.
*Never leave foods at room temperature for more than 2 hours. If the temperature outside is over 90°F, perishable foods should be left out no longer than 1 hour.
*If you buy a lot of take-out foods, such as fried chicken or barbecued beef, make sure to eat the food within 2 hours of pickup. Otherwise, buy the food in advance, refrigerate and reheat just before serving.
*Keep desserts made with whipped cream, cream cheese or dairy products refrigerated until you are ready to serve. Store any leftovers in a refrigerator or cooler.
*When preparing food outdoors, away from home, make sure to bring a jug of water, soap and paper towels for hand washing.


