
Zucchini is wonderfully versatile, healthy, and contains only 25 calories per small zucchini. Low in sodium, cholesterol free and is an excellent source of vitamin C and manganese. Leave the thin skin on for all preparations. It’s a good source of dietary fiber. Store unwashed zucchini in a plastic bag, in the vegetable compartment of the refrigerator, for no more than three days, for optimal freshness.
“Work With What You Got!”
©Tiny New York Kitchen © 2018 All Rights Reserved

Here At Tiny New York Kitchen We’re All About Watermelon. It’s So Easy To Choose A Good Watermelon. Look For A Firm, Symmetrical Watermelon That Is Free From Bruises, Cuts Or Dents. Lift It Up. The Watermelon Should Be Heavy For Its Size. Watermelon Is 92% Water, Most Of The Weight Is Water. Turn It Over. The Underside Should Have A Creamy Yellow Spot From Where It Sat On The Ground And Ripened In The Sun. Go Get Yourself A Watermelon Or Two And Enjoy The Refreshing Summer Fruit Until It’s Gone.

Drizzling olive oil over savory fruits like tomatoes is second nature, but put it on sweet fruit and people start to think you’re crazy. Consider this: Olive and watermelons are both fruits, and just as vegetable-driven salads need fat to balance salt and acid, fruit salads crave the mouth-coating richness of oil to complement their sweetness and acidity. Olive oil is ideal since it brings a sharp aromatic flavor of its own that carries other savory ingredients, like nutty sharp cheeses and spicy sauce. Look for lighter, grassy oils to avoid overwhelming your fruits, but even a bold, peppery one can play nice with whatever you care to throw at it.
“Work With What You Got!”
©Tiny New York Kitchen © 2018 All Rights Reserved
The best way to be a good cook is not to worry about being a perfect cook. Give up on perfection, or at least any ideas you may have that perfection is a fixed thing against which you must measure everything you do. Nothing we cook will look will look exactly the same as a picture in a magazine or taste the way our friend’s dish did. Even a familiar recipe will not offer the same result from one day to the next time we make it.
We at Tiny New York Kitchen like to experiment with flavors. Often we reach into our well-stocked pantry and use the essential flavor builders to take a dish to the next level.
Essential Flavor Builders To Keep On Hand:
Vinegars: Vinegar’s complex tang is the secret ingredient in many recipes. We shake a bit of sherry vinegar into bean soup, and add rice vinegar to coleslaw dressings. If you had to choose just one vinegar, we would recommend the mild rice vinegar, but we also keep balsamic, sherry, malt, and cider vinegars on hand.
Anchovies: A filet of anchovy blended into a marinade or dressing adds savory flavor without being too overtly fishy.
Chili Paste: We keep chili paste or bottled Sriracha for drizzling over rice and adding to meat marinades.
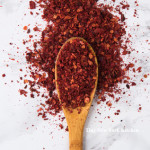
Red Pepper Flakes: Many dishes get better with a little kick from red pepper flakes.
Soy Sauce: Soy sauce is a way to add umami flavor and a little salt to dressing and soups.
“Work With What You Got!”
©Tiny New York Kitchen © 2018 All Rights Reserved

Place room temperature eggs in a single layer in a saucepan and add enough cold water to cover by 1 inch. Add 1 tablespoon vinegar and 1/2 teaspoon salt to the water to help prevent the shells from cracking and the whites from running should the shells crack. Bring the water to a boil over a high heat. Once the water boils, turn off the heat, cover the pot, and let it stand for 10 minutes. Remove the eggs with a slotted spoon and gently place them in an ice bath.
Peel and use hard-boiled eggs or store the unpeeled eggs in a covered container in the refrigerator for up to 5 days.
“Work With What You Got!”
©Tiny New York Kitchen © 2018 All Rights Reserved

Sometimes, the best way to cook fresh produce is the simplest way of all.
For roasting vegetables, put them on a baking sheet, sprinkle with olive oil and a bit of kosher salt, and cook in a hot oven until tender, turn once or twice.
For steaming vegetables, put a small amount of water in a saucepan and heat over a medium-high heat until tender, as little as 2 minutes or up to 10, depending on the vegetable.
“Work With What You Got!”
©Tiny New York Kitchen © 2018 All Rights Reserved

Grilling season is upon us and many want to grill fish, but have questions on the best way to do it. Here are some easy tips to help you get the most out of your fish grilling experience.
Ask Your Fishmonger. Fishmongers are knowledgeable and can recommend the best fish for dinner. They will clean your fish for you as well.
Take It Easy. Leave the fish head and tail on for easier handling, and try grilling a small 1 to 1 1/2 pound fish if you’re a first-timer.
Work With A Clean Grill. Scrub the grates clean with a wire brush to reduce sticking, and rub the exterior of the fish with oil before placing it on the grill.
Get Cooking And Don’t Be A Flipper. Grill over a medium-high heat for about 8 minutes total cooking time per inch of thickness. Most fish will cook best if turned only once, so wait at least 3 minutes for the fish to form a crust on the outside before flipping. Don’t risk the fish falling apart by trying to flip multiple times.
“Work With What You Got!”
©Tiny New York Kitchen © 2018 All Rights Reserved

It’s that magical time of year when Mother Nature reinvents herself. I love watching everything come to life after a long winter. Spring is also the time when people take a look at their homes and decide to tackle long delayed projects. Wouldn’t it be nice to have the inside of your home bloom along with the outside? Most of us feel overwhelmed when we look at a large project that we just can’t get started. Here are some ways to declutter and spruce up the inside of your home.
Clean & Declutter: Just take one room at a time. Get rid of all the extra “stuff” that has accumulated and give each room a good cleaning.
Paint: It is amazing what a new paint job in a pretty updated color can do for a room. Are any of your rooms looking a bit tired? Wake them up with a new color.
Window Treatments: If you don’t have a privacy issue and have a nice view, take everything off the windows and let the sun shine in. The view will be Mother Nature’s artwork in the room. If you do need window treatments, keep them simple. Side panels on a pretty rod, roman shades, or plantation shutters are fun options.
Kitchens & Baths: New faucets, light fixtures, handles, and pulls on the cabinets and new towels in the bathroom will add sparkle without breaking the bank.
Lamps: New lampshades and bulbs are quick fixes that can brighten things up.
Foyer: Do your guests feel immediately welcome when they enter your home? Open your front door and what do you see? Perhaps a rug, mirror, small bench or chair. Flowers can create a warm, cheerful welcome.
Rugs: For a quick update to a living or family room add a new area rug that will define the conversation area.
Pillows: It is amazing what a couple of pretty new throw pillows can do to add sparkle to a room. This is an easy and inexpensive update.
“Work With What You Got!”
©Tiny New York Kitchen © 2018 All Rights Reserved

Pulling a tender, juicy roast chicken with crisp, golden brown skin out of the oven is so rewarding. For a simple side, roast a pan of in-season produce like spring onions, ramps, new potatoes or carrots during the last 20 minutes of cooking.
INGREDIENTS
1 Whole Chicken (4 Pound)
1 Teaspoon Sea Salt
1/2 Teaspoon Freshly Ground Pepper
Preheat oven to 425 degrees.
Remove neck and giblets from chicken. Trim off any excess fat from neck and tail end of chicken. Rinse bird with cool running water. Pat dry with paper towels, and season all over with salt and pepper.
Place chicken, breast side up, on a rack in a small-size roasting pan or a 9×13 inch-baking dish. Tuck wings back and behind bird to hold them in place. Roast, basting once or twice with pan juices, until skin is deep golden brown and juices run clear, about 1 1/2 hours.
An instant-read thermometer inserted in the thickest part of the thigh should read 165 degrees. Let chicken rest for 15 minutes and then carve.
To add fragrant flavor, stuff the cavity with a halved lemon or orange and a handful of fresh herbs like rosemary, thyme, and oregano.
Serve with an easy salad of greens topped with cherry tomatoes, mozzarella, and a drizzle of olive oil.
Serves 4
Prep Time: 20 Minutes
Cook Time: 90 Minutes
Total Time: 110 Minutes
“Work With What You Got!”
©Tiny New York Kitchen © 2018 All Rights Reserved

Chefs love cast iron’s durability and its ability to evenly retain heat. What’s old is new again. Cast iron comes in all sizes from pans that hold a single fried egg to 20-inch giants that weigh 25 pounds and take up two burners. You can pick up a cast iron pan for $25 to $300. I like 10-inch skillets for everyday cooking, which are between four to six pounds and can comfortably accommodate a pack of chicken thighs. Remember that a bigger pan is a heavier pan, which limits how easily you can maneuver it as you cook.
Make sure to season your cast iron pan. Use a paper towel to rub your pan all over with a very light coat of neutral oil like grapeseed or vegetable oil and then place in a 500-degree oven for an hour. You want your pan to have a matte dark finish. Remove from the oven and let cool. Rub another very light coat of oil all over before storing. The very best thing that you can do to maintain that new seasoning is to get cooking. Each time you cook a steak or chicken thighs, the fat adds another coat to the pan’s surface, which will create a glassy finish over time. Re-season when your pan starts to look dry and dull or if you can’t remember the last time you cooked in it. Always rub you pan down with a thin coat of neutral oil before storing.
Just because you can cook it in cast iron doesn’t mean that you should! There are some foods that you definitely should not cook in your cast iron. Fish is not something that I would cook in cast iron unless I want to infuse next day’s pancakes with the essence of fish. Tomato sauce’s high acidity reacts with cast iron, which creates an unpleasant metallic flavor. I’d skip cooking scrambled eggs in cast iron unless I want to be on dish duty for an hour or two after breakfast.
Wash your pan! Yes, you do need to wash your pan. Each time you cook with cast iron a few burnt and crusty food bits inevitably seem to stick to the pan. If you don’t scrub it clean between uses, those bits will fossilize under subsequent layers of seasoning, which create an irregular surface that will never become truly nonstick (the opposite of what you want). Wash your pan with hot water and a drop of dish soap while it’s still warm. Take care not to let the pan soak in water. Wipe down the pan and then set it over a low flame for a few minutes to fully dry. Rub all over with a very light coat of neutral oil before storing (just like you would after seasoning it). These steps are crucial for keeping your pan in fighting form against Public Enemy Number One – RUST! If you ever do have spot rust just use and old toothbrush dipped in distilled vinegar to scrub it off, let it dry, and then rub in a drop of oil. If you make a regular habit of cleaning your cast iron you’ll have a faithful companion for life.
“Work With What You Got!”
©Tiny New York Kitchen © 2018 All Rights Reserved


