
Tips & Tricks
While many foods are naturally gluten-free, gluten can be especially difficult to avoid in baked goods. Gluten is a complex protein found in wheat (and other grains) that functions like glue in baked goods and pastas. Gluten’s elastic structure helps baked goods rise and become light and fluffy by trapping gas produced by yeast. It’s the key ingredient that makes breads, pizza crusts, and quick breads tender and chewy. But gluten-free enthusiasts and savvy bakers are reaching new heights by getting creative in the kitchen.
Measure By Weight
In most recipes, a blend of gluten-free ingredients is necessary to create baked goods with a conventional shape and texture. For this reason, most health food stores and many grocers sell blended, all-purpose gluten-free flour mixes that simplify gluten-free baking. There are some notable differences when baking with gluten-free substitutes, including a few that break the conventional rules of baking. Gluten-free flours are, in general, milled finer than wheat-based flours. The fine grind helps gluten-free flours blend better with other ingredients and prevents your baked goods from becoming gritty. On the other hand, the fine flour is more difficult to evenly pack into measuring cups and dense gluten-free flours have different weight to volume ratios than conventional wheat flours. In short, you can’t always substitute a cup of gluten-free flour for a cup of wheat flour, and you’re better off using a kitchen scale to measure gluten-free flour for accurate measurements. The labels on most gluten-free flours feature a cup-to-grams conversion to ensure accuracy.
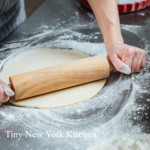
Consistency & Shape
Even with the right flour mix and measurements, a gluten-free batter or dough won’t usually handle exactly like a conventional dough. For example, gluten-free pie crust tends to be more crumbly and is more apt to split when you try to fold it. To keep the dough in one piece, roll it between two sheets of wax or parchment paper, which also makes it easier to transfer the dough to a pie plate. Be sure to use and egg wash on pie dough, instead of a milk wash, as a milk wash will more easily soak into the dough instead of resting on its surface. With gluten free breads, be sure to use a pan with sides, because the dough typically won’t stand easily on its own.
Moisture Matters
The strong and sticky bonds formed by gluten play many roles in baking, including moisture retention. While gluten-free flours typically include gums and starches to hold moisture, the resulting dough still tends to dry out faster. To avoid a tough texture or crummy edge on cakes and cookies, consider adding things like egg yolks, yogurt, and fruits (where appropriate) to increase moisture and add flavor. After baking, you can freeze gluten-free baked goods (tightly wrapped in freezer-safe bags) to prevent them from drying out.
Times & Temps
Traditional doneness indicators, such as a clean, dry toothpick in a cake or the hollow sounds when thumping a loaf of bread, are not always accurate for gluten-free baked goods. In fact, some gluten-free baked goods might feel soft to the touch and look wet inside even though they’re completely cooked – requiring a cool-down time to firm up. Follow the time and temperature recommendations in gluten-free recipes closely, because the traditional visual cues aren’t the same as wheat-based goods. Oftentimes, gluten-free recipes feature lower oven temperatures and extended baking times to drive out excess moisture.
Try It
If you’re new to gluten-free baking, don’t be intimidated, but do follow reliable recipes closely – as gluten-free recipes don’t always take well to adjustments, swaps, and add-ins. There are some good gluten-free cookbooks out to help with finding good recipes. I suggest, Gluten-Free Baking Classics, by Annalise Roberts for beginners, who know they need (or just want) to switch over to gluten-free or alternative flours when baking, but aren’t totally sure how to make the conversion. Gluten-Free Baking With the Culinary Institute of America: 150 Flavorful Recipes From The World’s Premier Culinary Collage, by Richard J Coppedge Jr.is geared toward professional bakers or those with an interest in the food-science side of things.
“Work With What You Got!”
©Tiny New York Kitchen © 2018 All Rights Reserved

We love autumn, but we’re giving it one last-ditch effort to savor the remaining glimmers of summer. You may frost this cake or leave it plain.
Sometimes I Just Get In An Uncontrollable Baking Mood. Baking Brownies Is One Of My Favorite Things To Do.
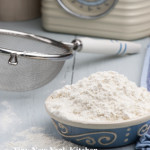
Have you ever wondered what the difference between cake flour, bread flour, and pastry flour is? Is it ok to substitute all-purpose flour that call for a specific flour type? These are questions that I get asked often.
Choosing the correct flour is about controlling the amount of gluten in your dough. Gluten is a protein structure that makes dough both firm and elastic. Bread flour comes from “hard” flour, which has a higher protein content (produces more gluten) making it perfect for bread, pizza dough, and any recipe that needs a little more elasticity and cohesion.
Pastry flour is made with “soft” flour, which has a much less protein content and produces less gluten. Dough made with pastry flour is tender, flaky and doesn’t hold together firmly. That’s a good thing because no one wants a rubbery piecrust! Cake flour has even less protein content than pastry flour, but not by much. It has just enough protein to give the cake a little structure, but not enough to make it tough.
All-purpose flour is a blend of “hard” and “soft” flours, which falls in the middle of the gluten spectrum, and works well in most baked goods. Your cakes might not be quite as tender, but in most cases they’ll still come out beautifully. It’s all a matter of degree. Cookies, piecrusts, muffins, quick breads, and scones all do well with all-purpose flour.
Gluten development is also the reason why recipes instruct you not to over mix your dough. Once you add water or any other low-fat liquid to flour, gluten bands start forming and the more you knead or stir the dough, the more these elastic bands start connecting. If you are using all-purpose flour in a cake or piecrust, make sure to stop mixing just when everything comes together.
“Work With What You Got!”
©Tiny New York Kitchen © 2018 All Rights Reserved
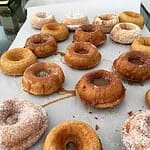
This Snowy Saturday Morning I’m Making Old-Fashioned Baked Donuts. YUM!
“Work With What You Got!”
©Tiny New York Kitchen © 2018 All Rights Reserved
I like to bake all year long, but baking season is officially here!
Whether you’re baking summer pies or getting ready for holiday baking it’s important to have some key information about pie dough.
Blind Baking
Blind baking is prebaking a crust before you add an unbaked or especially wet filling. To ensure that your crust turns out crisp while blind baking, you can either dock it or use pie weights.
Docking
Docking is pricking the dough all over with the tines of a fork. The tiny holes allow steam to escape, so that the crust doesn’t puff up. After rolling out your dough and pressing it into the pan, gently prick it, leaving an inch or two between each mark. Be sure to check your crust several times throughout its bake time. If you notice it puffing up in any way, simply prick the puffy spots a few times and keep baking.
Pie Weights
Pie weights are tiny ceramic or metal balls or a thin metal chain that prevent the bottom of your crust from forming air pockets and bubbling up while baking. While docking is less fussy than using pie weights, I prefer pie weights because of the additional support they give the crust. Line your unbaked crust with parchment paper or aluminum foil before adding the weights to keep them from baking into the dough. I prefer parchment paper because its permeable structure allows the crust to breathe and brown more evenly. If you don’t own pie weights, dried beans work just as well.
Blind Bake Ahead
You can blind bake a crust up to three days ahead of time. Allow the crust to cool completely in the pan, wrap with plastic wrap, and store at room temperature until you are ready to fill and serve.
Happy Pie Baking!
“Work With What You Got!”
© Victoria Hart Glavin Tiny New York Kitchen © 2017 All Rights Reserved

Even though summer is not technically over I’m in the fall baking mood. Yesterday was a rainy day here in New England. I made Gooey Rocky Road Brownies and I had to stop myself from eating the entire batch.

From Concord to Emperor, there are so many delicious grape varieties available.
Whether tossed in a salad, baked into a dessert, or straight off the vine, these bite-size globes are packed with flavor.
Bursting with fiber, vitamin C, and loads of antioxidants, this fruit packs a nutritional punch as big as flavor. Grapes make an ideal portable snack in less than 100 calories per cup.
Look for firm grapes that are brightly colored and securely attached to their stems. Avoid bundles with wrinkled, dull skin or packages that have a lot of fruit floating at the bottom of the bag. When all else fails, try one.
Although there are thousands of varieties of grapes, the most popular are Thompson and Emperor seedless. Thompson grapes are sweet and crisp with vibrant green skin, amazing for snacking. Emperor red grapes have a sweet and tart flavor and are super juicy, making them great for baking.
Emperor or Flame: With their sweet flavor and long shelf life, these large seedless grapes are one of the most popular varieties.
Thompson Green: In America, 90% of these classic green grapes are produced in California. They are used for snacking, making wine, and raisins.
Concord: Created in Concord, Massachusetts, these grapes are known for their thick, blush skin and sweet candy-like flavor.
Freeze Them: Pick grapes off the vine and place them in a resealable plastic bag. Freeze overnight for a healthy, frosty treat.
Bake Them: To make raisins at home, cook grapes for 30 seconds in boiling water and place in a bowl of ice water. Preheat the oven to 170 degrees and place grapes on a parchment paper lined baking sheet. Bake until they have dried out completely. Toss grapes halfway through to prevent sticking.
Blend Them: Blend grapes with a bit of water and pour through a fine mesh strainer for a fresh glass of grape juice.
“Work With What You Got!”
© Victoria Hart Glavin Tiny New York Kitchen © 2017 All Rights Reserved
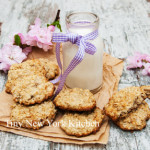
When making cookies make sure not to overcream the butter and sugar. Unlike cake batter baked in a pan, cookie dough is baked free-form. When the dough is heated and the chemical leaveners expand the air bubbles, the bubbles burst without a pan to force the dough upward, producing flat cookies. For cookies, cream the butter and sugar for only 1 to 2 minutes, just until the mixture is smooth but has not lightened in color.
Another insurance policy against flat cookies, chill butter-based cookie dough before baking. Butter has a low melting point, and starts to soften as soon as it is exposed to oven heat. Refrigerate the chilled dough for at least 30 minutes and up to 2 days before shaping and baking. This only works with dough that uses baking powder for leavening. Don’t do this with dough that includes baking soda as the leavener, which loses its rising power soon after it is mixed with wet ingredients.
Professionals use spring-loaded ice cream scoops to portion cookie dough, making cookies the same size that will bake at the same rate. A tablespoon-size scoop is the right capacity for most recipes.
For even baking and easy cleanup, bake your cookies on heavy-duty, rimmed aluminum baking sheets (half sheet pans) lined with parchment paper. To help the paper adhere, butter the baking sheet first. You can also line baking sheets with silicone baking mats instead of parchment paper.
If you’re using silicone mats, you may want to do a test run. Some cookie bottoms won’t crisp as well on the mat as they do on parchment lined baking sheets. Of course, this can be an advantage if you prefer soft, cakelike cookies.
There is no need to transfer cookies to a wire rack to cool. In fact, more harm can be done by transferring warm, delicate, pliable cookies to a rack than by letting them stand on the baking sheet. If you need to remove the cookies to use the baking sheet again, just let them cool on the sheet until they are firm enough to move.
To discourage overbrowned cookie bottoms (which can happen when an oven heats unevenly), insulate the baking sheet by placing it inside a second baking sheet of the same size. The think layer of air between the baking sheets will protect the top sheet from getting too hot.
Don’t store different types of cookies together or they will exchange flavors and textures. Tin or stainless steel covered containers work best for storage, but plastic containers can also be used as long as they are airtight and fragrance free.
To revive crisp cookies that have softened, bake them for 5 to 10 minutes in a 300 degree oven. Let them cool completely before storing.
To help soft cookies keep their texture, store them in an airtight container with a ceramic brown sugar softener, or with a piece of apple on a piece of aluminum foil, or soft bread. Make sure to remove the apple after 24 hours.
“Work With What You Got!”
© Victoria Hart Glavin Tiny New York Kitchen © 2017 All Rights Reserved


