Details
Prep Time: 50 minutes
Cook Time: 45 minutes
Ready In: minutes
Yields or Serves: Makes 2 Loaves
Rating:
[Total: 3 Average: 5/5]
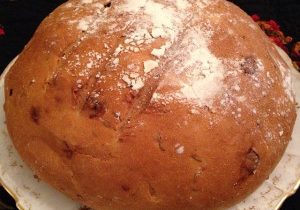
Day of the Dead Bread (Pan de Muerto) is a traditional sweet bread, with its distinctive shape, and is commonly made as an offering during November 1 to 2. Aside from eating this deeply loved bread, Pan de Muerto often serves as an alter decoration to both honor and celebrate those who have died.
- Starter:
- 1/2 Cup Whole Milk (Lukewarm)
- 1 Tablespoons Instant Yeast
- 1 Teaspoon Sugar
- 1/2 Cup Unbleached Flour
- Dough:
- 2 Tablespoons Orange Blossom Water, Rose Water, Or Water
- 2 Teaspoons Orange Zest
- 1 1/2 Teaspoons Anise Seeds
- 3 1/2 Cups Unbleached Flour
- 1 Teaspoon Kosher Salt
- 1/2 Cup Sugar
- 4 Large Eggs (Room Temperature)
- 16 Tablespoons Butter (Cut In 1/2 Inch Cubes/Room Temperature)
- Topping:
- 6 Tablespoons Butter (Melted)
- 1/3 Cup Sugar (For Dusting)
- Make the starter: In large-size bowl combine lukewarm milk, yeast, sugar and flour. Stir with whisk. Cover with plastic wrap and set aside 25 minutes until mixture begins to bubble.
- Make the dough: Add remaining ingredients (minus the butter) to the starter. Gently beat until combined.
- Beat at medium speed 10 minutes, using dough hook, until dough pulls away from sides and make slapping sound.
- On low speed, beat in 3 tablespoons butter at a time, incorporating each addition before adding the next. Once butter had been incorporated, increase speed to medium and beat another 10 minutes, until dough slaps against bowl. Dough will be smooth, yet still a bit sticky. Resist the urge to add more flour.
- Shape dough into a ball and place in lightly greased bowl. Cover and let rise 1 1/2 to 2 hours until almost doubled.
- Turn dough out onto lightly greased surface and gently fold it over on itself. Place dough back into bowl, cover, and place in refrigerator 4 hours (or overnight).
- Shape bread: Remove chilled dough from refrigerator and let rest in a warm spot 30 to 45 minutes to come to room temperature.
- Line large-size baking sheet with parchment paper.
- Portion off 1/4 of dough. Divide that quarter into two pieces. Set aside.
- Divide remaining 3/4 of dough into two pieces. Shape each piece into ball. Press down gently to make flatter rounds (about 6 inches in diameter). Place rounds on prepared baking sheet.
- Divide each of the smaller pieces of dough into thirds, to make a total of 6 pieces. Shape two of the pieces into balls and roll the other four into ropes about 6 to 7 inches long. Pinch the ropes at intervals to make them look like bones.
- Place two of the “bones” over one of the large dough rounds, crossing them in the middle. Place one of the small dough balls in the center and press down firmly to anchor it as securely as possible.
- Shape the rest of the dough the same way you shaped the first loaf, making a second loaf.
- Cover loaves and allow them to rise in a warm spot 1 to 1 1/2 hours until doubled.
- While loaves are rising, preheat oven to 350 degrees.
- Bake Bread: Place loaves in oven 20 minutes until lightly browned on top. Open oven and loosely cover both loaves with foil. Bake for another 20 to 25 minutes, until loaves are fully baked and dark golden brown on the bottom and top, and internal temperature is 190 degrees.
- Remove loaves from oven and let cool 20 minutes on the baking sheet.
- Top bread: Brush loaves with melted butter. Repeat a second time, brushing a section of the loaf with melted butter and immediately covering that section with a generous amount of sugar, so the sugar sticks before the butter cools and dries. Continuing buttering and sugaring loaves section by section. Transfer loaves to rack to cool completely before slicing.
- Store loaves, well wrapped, at room temperature for several days.
- Makes 2 Loaves
- Prep Time: 50 Minutes Cook Time: 45 Minutes Total Time: 95 Minutes
- “Work With What You Got!”
- ©Tiny New York Kitchen © 2021 All Rights Reserved


